
Are miter saws reverse threaded? If you’ve ever found yourself scratching your head while trying to loosen or tighten a miter saw blade, you’re not alone. The term “reverse threaded” might sound a bit confusing, but fear not, I’m here to shed some light on the subject. So buckle up, grab your tool belt, and let’s dive right in!
Now, you might be wondering what exactly does “reverse threaded” mean when it comes to miter saws? Well, in simple terms, it refers to the direction in which you need to turn the bolt or screw to loosen or tighten it. It’s like a secret handshake between your tool and you, and knowing the secret can make your woodworking adventures a whole lot easier.
But here’s the thing, not all miter saws are reverse threaded. It really depends on the make and model. So, if you’re unsure about the threading on your miter saw, don’t worry. In the next sections, I’ll break it down for you, sharing some handy tips and tricks to keep you from getting stuck in a twist (literally!). So, let’s get ready to unravel the mystery of miter saw threading!
And there you have it, my young woodworking enthusiast! An introduction to the intriguing world of miter saw threading. So stick around, grab a cup of cocoa, and let’s explore this topic further. Whether you’re a beginner or a seasoned pro, understanding threading can make a world of difference in your woodworking journey. So, let’s sharpen those blades and get ready for an adventure you won’t forget!
Are Miter Saws Reverse Threaded? Understanding the Mechanics
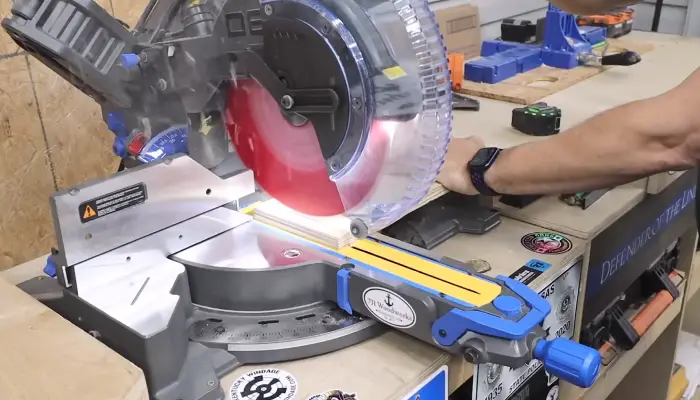
Miter saws are a staple tool in the woodworking industry, known for their precision and versatility. One common question that arises is whether miter saws have reverse threading. In this article, we will delve into the mechanics of miter saws and explain whether they indeed have reverse threaded components. By understanding these details, you’ll be better equipped to use and maintain your miter saw effectively. So let’s dive in and unravel this mystery about miter saws and reverse threading.
The Anatomy of a Miter Saw
Before we can determine if miter saws are reverse threaded, it’s essential to understand the basic anatomy of this power tool. A miter saw consists of several key components. The blade is the most prominent part, responsible for making precise cuts. The arbor is the shaft that the blade attaches to and rotates on. The arbor assembly includes washers and a nut that secure the blade in place. The handle is where you control the saw and adjust the angle and bevel settings. Finally, the fence acts as a guide for material placement and stability.
With this understanding, we can now explore the question of whether miter saws are reverse threaded. The reverse threading phenomenon typically pertains to the arbor nut that holds the saw blade in place. Reverse threading means that the nut turns counterclockwise to loosen and clockwise to tighten, which is the opposite of the conventional clockwise tightening motion.
However, not all miter saws have reverse threaded arbor nuts. In fact, most miter saws have a standard right-hand threaded arbor nut, following the conventional clockwise tightening motion. But there are certain models and brands that do utilize reverse threading for their arbor nuts. This design choice can add an extra layer of safety and prevent the blade from accidentally loosening during operation. Therefore, it’s important to consult your miter saw’s user manual or do thorough research to determine if your specific model has reverse threaded components.
Pros and Cons of Reverse Threaded Arbor Nuts
Now that we know some miter saws do have reverse threaded arbor nuts, let’s weigh the pros and cons of this design choice.
Pros of Reverse Threaded Arbor Nuts
1. Enhanced safety: Reverse threading provides an additional layer of security by reducing the chances of the blade becoming loose during operation, minimizing the risk of accidents.
2. Easy blade changes: With reverse threaded arbor nuts, removing and replacing the blade becomes more convenient since you only need to turn the nut counterclockwise to loosen it.
3. Less chance of over-tightening: Reverse threading ensures that the nut won’t accidentally tighten further during the cutting process, preventing potential damage to the blade or motor.
Cons of Reverse Threaded Arbor Nuts
1. Unfamiliarity: If you’re accustomed to using standard right-hand threaded arbor nuts, adapting to reverse threading might initially cause confusion or challenges.
2. Limited options: Since not all miter saws have reverse threaded arbor nuts, finding replacement parts or accessories specific to these models might be more challenging or require ordering directly from the manufacturer.
3. Learning curve: If you switch between different miter saws with varying arbor nut designs, you’ll need to adjust your muscle memory and remember which direction to turn the nut for each type.
Tips for Working with Reverse Threaded Arbor Nuts
If you own a miter saw with reverse threaded arbor nuts, here are some tips to keep in mind for smooth operation and maintenance:
1. Read the manual:
Familiarize yourself with the manufacturer’s instructions and recommendations for using and maintaining your specific miter saw model. The manual will clarify whether your saw’s arbor nut is reverse threaded and provide details on how to work with it correctly.
2. Directional reminders:
Place a small sticker or label on your miter saw’s handle or arbor nut to remind yourself of the appropriate direction for loosening or tightening. This visual cue can help avoid any confusion, especially if you frequently switch between different saws.
3. Quality checks:
Regularly inspect the arbor nut, washers, and blade for wear and tear. This includes looking out for any signs of loosening during use. Keeping everything in good condition ensures optimal performance and safety.
4. Use the right tools:
When working with a reverse threaded arbor nut, ensure you have the appropriate tools on hand. This may include wrenches or socket sets designed specifically for counterclockwise tightening. Using the correct tools minimizes the risk of damaging the nut or creating unnecessary stress on the blade assembly.
5. Regular maintenance:
Follow a routine maintenance schedule to keep your miter saw in top shape. This includes cleaning the blade, lubricating moving parts, and inspecting the arbor nut for any signs of wear or damage. Taking care of your saw will prolong its lifespan and ensure accurate cuts.
Understanding Miter Saw Safety
Safety is of utmost importance when using any power tool, including miter saws. In this section, we will discuss essential safety practices and precautions to adhere to while operating a miter saw. By following these guidelines, you can minimize the risk of accidents and make woodworking a safe and enjoyable experience.
Protective Gear and Clothing
When operating a miter saw, it’s essential to wear the appropriate protective gear to safeguard yourself against potential hazards. Here are some key items to consider:
1. Safety glasses:
Protect your eyes from flying debris by wearing safety glasses that are impact-resistant. Ensure they fit snugly and provide full coverage for your eyes.
2. Ear protection:
Miter saws can be incredibly loud, potentially causing long-term hearing damage. Invest in quality earmuffs or earplugs to reduce noise exposure and protect your hearing.
3. Dust mask:
Woodworking generates dust particles that can be harmful if inhaled. Wear a dust mask or respirator to protect your respiratory system from airborne particles and maintain good air quality in your workspace.
4. Proper clothing:
Avoid loose clothing or jewelry that could get caught in the saw’s moving parts. Put on comfortable attire that allows freedom of movement and won’t hinder your ability to operate the saw safely.
Workspace Preparation
Creating a safe working environment is crucial when using a miter saw. Here are some workspace preparation tips:
1. Clear the area:
Remove any obstacles or clutter from the vicinity of the miter saw to ensure a safe working space. This includes moving tools, materials, and debris away from the cutting area.
2. Secure the material:
Properly secure the workpiece to the miter saw’s fence or table using clamps or other appropriate methods. This prevents the material from shifting or becoming unstable during the cutting process.
3. Well-lit workspace:
Ensure your workspace is well-lit so that you can clearly see the cutting area and any potential hazards. Good lighting helps in making accurate and safe cuts.
Safe Operating Practices
Alongside protective gear and proper workspace setup, it’s essential to follow safe operating practices when using a miter saw. Here are some key pointers:
1. Read the manual:
Familiarize yourself with the manufacturer’s instructions and safety guidelines outlined in the miter saw’s user manual. Each saw may have specific operational requirements and safety precautions that you need to be aware of.
2. Mindful position:
Stand in a stable position with a firm footing, ensuring that your body is well-balanced and comfortable. Maintain a safe distance from the blade, keeping your hands and fingers away from the cutting area.
3. Use the appropriate blade:
Ensure you have the correct blade for the material you are cutting. Using the wrong blade can lead to accidents, kickback, or damaged workpieces.
4. Maintain control:
Maintain a firm grip on the saw’s handle and guide the material through the cut at a consistent speed. Avoid forcing or rushing the cut, as this can compromise accuracy and safety.
5. Wait for the blade to stop:
Once you’ve completed a cut, wait for the blade to come to a complete stop before raising it or removing the workpiece. This prevents any accidental contact with the blade, reducing the risk of injury.
Choosing the Right Miter Saw for Your Needs
With the multitude of options available in the market, selecting the right miter saw can be overwhelming. In this section, we’ll provide valuable insights and considerations to help you choose the perfect miter saw for your needs.
Types of Miter Saws
Miter saws come in various types, each catering to specific cutting requirements. Understanding the different types will assist you in making an informed decision. The common types of miter saws include:
1. Basic miter saw:
This type of miter saw provides essential cutting capabilities, allowing you to make straight crosscuts, miter cuts, and bevel cuts. Basic miter saws are ideal for DIY enthusiasts and hobbyists working on small to medium-sized projects.
2. Compound miter saw:
Compound miter saws offer additional functionality by allowing you to make bevel cuts along with miter cuts. This versatility is useful for projects involving crown molding, picture frames, and other angled cuts.
3. Sliding compound miter saw:
Sliding compound miter saws provide the utmost flexibility with their sliding feature, allowing you to cut wider stock. This is particularly beneficial when working with larger boards, such as for deck construction or furniture building.
4. Dual bevel sliding compound miter saw:
Dual bevel sliding compound miter saws take versatility a step further by offering dual bevel capabilities. This means you can make bevel cuts in both directions without flipping the workpiece, which is advantageous for complex projects that require intricate and precise cuts.
Key Considerations
To ensure you choose the right miter saw, take the following factors into consideration:
1. Cutting capacity:
Evaluate the cutting capacity of the miter saw, including the maximum crosscut, maximum thickness, and maximum bevel and miter angles. Consider the types of projects you typically work on and ensure the saw’s capacity meets your requirements.
2. Motor power:
The motor power determines the cutting efficiency and performance of the miter saw. Higher horsepower motors are more suitable for heavy-duty tasks, while lower horsepower motors may be sufficient for occasional or lighter projects.
3. Blade size:
Miter saws come with various blade sizes, typically ranging from 8 to 12 inches. Consider the size of the materials you frequently work with and choose a blade size that accommodates your needs.
4. Ease of use and safety features:
Look for miter saws with user-friendly features such as easy-to-read scales, positive stops for common angles, and efficient dust collection systems. Additionally, check for safety features like blade guards, electric brakes, and secure locking mechanisms.
5. Budget:
Determine your budget range and compare miter saws within that range. Consider the features, durability, and reputation of the brand to make the best decision within your financial constraints.
Maintaining Your Miter Saw for Optimal Performance
Proper maintenance of your miter saw is crucial to ensure longevity and optimal performance. In this section, we’ll explore some essential maintenance tips that will help keep your miter saw in top shape for years to come.
Regular Cleaning and Lubrication
Dust and resin can accumulate on the moving parts of your miter saw, potentially affecting its performance. It’s important to clean and lubricate the saw regularly to prevent build-up and ensure smooth operation. Here’s how:
1. Cleaning the blade and table:
After each use, remove any sawdust, debris, or resin from the blade and the table surface. Use a stiff brush or a special blade cleaning solution and a clean cloth. This will prevent the accumulation of dust and residues that could impair the blade’s cutting ability.
2. Lubricating moving parts:
Apply lubricant to the pivot points and moving parts of your miter saw. This includes the pivot arm, bevel adjustment, and sliding mechanism (if applicable). Follow the manufacturer’s recommendations regarding the type of lubricant to use and the frequency of application.
Checking and Replacing Blades
The blade is a vital component of your miter saw, and its condition directly affects the quality of your cuts. Here are some tips for checking and replacing blades:
1. Regular blade inspection:
Inspect the blade periodically for signs of wear, damage, or dullness. Look for any chipped teeth, warping, or excessive rust. A dull or damaged blade can result in poor cuts and increase the risk of kickback.
2. Sharpening or replacing:
If your blade is dull or damaged, you have two options: sharpening or replacement. Sharpening is possible if the blade is still in good condition overall. However, if it’s significantly worn or damaged, replacing the blade is the best course of action.
3. Choosing the right blade:
Select the appropriate blade for the material you will be cutting. Different blades are designed for specific materials like wood, metal, or plastic. Using the correct blade ensures clean, accurate cuts and prolongs the lifespan of both the blade and the saw.
Regular Calibration
Calibration is an essential maintenance step to maintain accurate and consistent cuts. Over time, the alignment of your miter saw’s components may shift due to regular use or transportation. Follow these steps to calibrate your miter saw:
1. Check the blade angle:
Use a combination square or a specialized angle gauge to verify the accuracy of the bevel and miter angles. Adjust the saw as necessary to ensure precise cutting angles.
2. Measure the fence alignment:
Place a reliable straight edge against the fence and check if it is parallel to the blade. If it isn’t, make the necessary adjustments according to your miter saw’s user manual.
3. Test the cutting accuracy:
Cut a test piece at various angles and lengths to verify the accuracy and squareness of your miter saw. Make adjustments as needed to achieve desired results.
By following these maintenance practices, you can ensure that your miter saw remains in optimal working condition. Regular inspection, cleaning, and calibration will not only extend the lifespan of your tool but also contribute to safer and more precise woodworking projects.
Key Takeaways: Are Miter Saws Reverse Threaded?
- Miter saws are not reverse threaded
- Reverse threading is commonly used for left-hand threaded screws
- Miter saws typically use regular, right-hand threaded screws
- It’s important to turn the blade nut in the correct direction for tightening or loosening
- Always consult the manufacturer’s manual for specific instructions
Frequently Asked Questions
Wondering about the threading on miter saws? Below, we have answered some of the most common questions regarding whether miter saws are reverse threaded or not.
Question 1: How does the threading on a miter saw work?
When it comes to the threading on a miter saw, it is important to understand that most miter saws have a standard right-hand thread. This means that turning the blade nut clockwise (to the right) will tighten it, and counterclockwise (to the left) will loosen it. The threading allows you to securely attach and remove the blade from the saw. However, it’s worth noting that the specific threading can vary between different brands and models of miter saws, so always refer to the manufacturer’s instructions for your particular saw.
Remember, always take proper safety precautions, such as disconnecting the power source and wearing protective gear, when working with a miter saw and its blade.
Question 2: Are all miter saws reverse threaded?
No, not all miter saws are reverse threaded. The majority of miter saws have standard right-hand threading. Reverse threading is relatively rare in miter saws and is more commonly found in other tools, such as angle grinders. However, it’s always best to consult the user manual or contact the manufacturer directly to confirm the threading on your specific miter saw model.
Knowing the correct threading direction is crucial for safely tightening and loosening the blade on your miter saw.
Question 3: How do I determine if my miter saw has reverse threading?
If you’re unsure whether your miter saw has reverse threading, the best resource is the user manual provided by the manufacturer. The manual will typically include detailed information about the threading direction and provide instructions on how to change or replace the blade.
If you no longer have the user manual, you can try contacting the manufacturer’s customer support or checking their website for downloadable manuals. Additionally, you may also find helpful information and user reviews on online forums and DIY communities where individuals share their experiences with specific miter saw models.
Question 4: Can I switch the threading on my miter saw?
In most cases, the threading on a miter saw is not adjustable or interchangeable. Manufacturers design and build their miter saws with specific threading directions based on the intended use and safety considerations. Attempting to switch the threading may damage the saw or compromise its functionality.
If you require a miter saw with reverse threading, it’s best to explore models that are specifically designed with this feature or consider alternative tools that have the threading you need for your particular project.
Question 5: What are the safety precautions to follow when working with a miter saw?
Working with a miter saw requires careful attention to safety. Always wear appropriate safety gear, such as safety glasses, ear protection, and a dust mask to protect against potential hazards. Before starting any work, inspect the saw and make sure all components are in good working condition, including the blade guard and the blade itself.
When using the miter saw, maintain a firm grip on the tool and position yourself in a stable stance. Always follow proper cutting techniques and avoid placing your hands near the blade while it is operating. Additionally, ensure that the material you are cutting is properly secured to prevent any unexpected movement or kickback.

STOP using MITER SAWS to CUT STUDS!
Summary:
So, are miter saws reverse threaded? The short answer is no. Reverse threading is not a feature of miter saws. It’s important to remember that different tools have different threading systems, and miter saws typically have a standard right-hand threading.
It’s always a good idea to double-check the manual or consult with a professional if you have any doubts about the threading of your miter saw. By understanding the threading on your tools, you can ensure safe and efficient operation throughout your woodworking projects.