
Are you excited about installing a tool box on your Can-Am Defender? Well, you’ve come to the right place! In this guide, we’ll provide you with step-by-step instructions to help you smoothly navigate through the installation process.
But wait, what’s a tool box, you ask? Well, it’s a handy storage compartment that fits perfectly onto your Can-Am Defender, providing you with ample space to store all your essential tools and gear.
Now, let’s dive into the details. Whether you’re a seasoned DIY enthusiast or a beginner, these installation instructions will make the process easy peasy. So, let’s get started and transform your Can-Am Defender into a well-organized machine!
1. Gather the necessary tools: wrench, drill, and measuring tape.
2. Measure the dimensions of your tool box and choose a suitable location on your Can Am Defender.
3. Use the drill to create holes in the designated spots for mounting.
4. Attach the mounting brackets to the Can Am Defender using the wrench.
5. Place the tool box onto the mounting brackets and secure it with the provided hardware.
6. Double-check the tightness of all fasteners and ensure the tool box is securely attached.
article
Can-Am Defender Tool Box Installation Instructions
1. Preparing for Installation
Before beginning the installation process for your Can-Am Defender tool box, it is important to gather all the necessary tools and materials. These typically include a socket wrench set, a drill with drill bits, a level, a tape measure, and the hardware provided with the tool box. Ensure that you have a suitable location in mind for installing the tool box, taking dimensions into consideration. It is also advisable to have an extra set of hands to assist with the installation.
Start by cleaning the mounting area to ensure proper adhesion. If there are any existing accessories or obstacles in the mounting area, you may need to remove them temporarily to complete the installation. Once the area is prepped, read through the installation instructions provided with your specific tool box model. Familiarize yourself with the steps and any specific requirements or precautions mentioned.
It is always a good idea to wear protective gloves and eyewear during the installation process to prevent any injuries. Additionally, make sure to work in a well-ventilated area, as some products used during installation may emit fumes.
2. Mounting the Tool Box
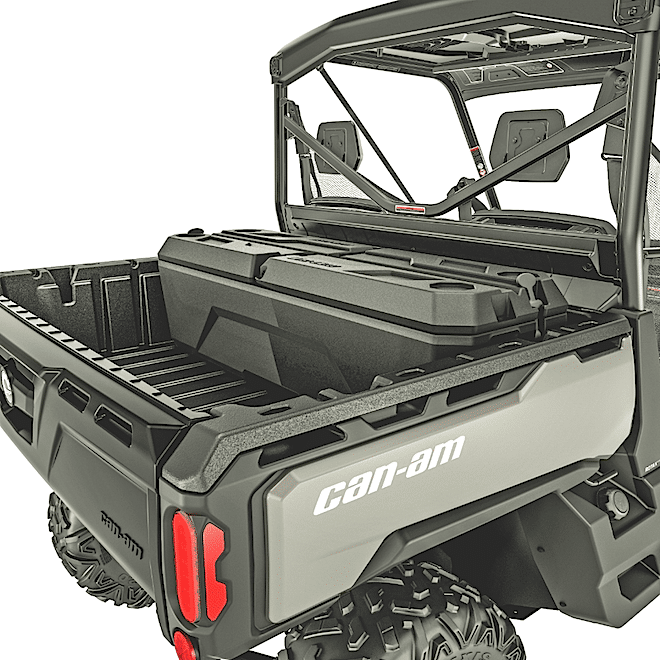
Begin the installation process by positioning the tool box in the desired location on your Can-Am Defender. Ensure that it is aligned with the mounting holes or brackets provided. Use a level to ensure that the tool box is oriented correctly and adjust if necessary.
Once you are satisfied with the positioning, mark the location of the mounting holes on your vehicle’s bed or frame. Use a tape measure to ensure proper spacing and alignment. If necessary, use a drill with a suitable drill bit to create pilot holes for the mounting hardware.
After the pilot holes are drilled, attach the mounting brackets or hardware to the tool box. Then, with the help of your assistant, align the tool box with the marked holes and secure it in place using the provided hardware. Use a socket wrench to tighten the bolts or screws, ensuring that the tool box is securely attached.
3. Securing the Tool Box
Once the tool box is mounted, check that it is firmly in place. If there is any movement or wobbling, reevaluate the installation and tighten the mounting hardware as necessary.
Inspect the tool box for any sharp edges or protruding hardware that may pose a hazard. Use a file or sandpaper to smooth any rough edges and ensure the safety of yourself and others who may come into contact with the tool box.
Finally, test the functionality of the tool box. Open and close the lid to ensure smooth operation. Check that the hinges are properly aligned and that the locking mechanism, if applicable, functions correctly. You are now ready to utilize your new Can-Am Defender tool box for all your storage needs!
4. Maintenance and Additional Tips
Regularly inspect your tool box for any signs of damage or wear. Check the mounting hardware and brackets for tightness and make any necessary adjustments. Cleaning the tool box periodically will help maintain its appearance and prevent corrosion. Use a mild detergent and water solution to clean the exterior, and ensure that it is completely dry before closing the lid.
Consider securing the contents of your tool box using additional fasteners or dividers to prevent shifting or damage during transportation. Utilize any small compartments or trays provided to maximize organization and accessibility.
If you encounter any issues during installation or have questions about your specific tool box model, refer to the manufacturer’s instructions or contact their customer support for assistance. Following the recommended guidelines and properly maintaining your Can-Am Defender tool box will ensure its longevity and functionality for years to come.
Top Accessories for Your Can-Am Defender Tool Box
After successfully installing your Can-Am Defender tool box, you may be looking to enhance its functionality and convenience further. Here are three recommended accessories that complement your tool box:
Accessory 1: Tool Box Liner
A tool box liner is a practical addition that helps protect your tools and equipment from scratches, dents, and rust. It also provides an extra layer of cushioning, preventing the contents from shifting during transportation. Look for a liner that is easy to install and clean, ideally made from durable and water-resistant materials.
Accessory 2: Divider Inserts
Divider inserts are an excellent accessory to keep your tool box organized. They allow you to create custom compartments within the tool box, providing designated spaces for different tools or equipment. This makes it easier to locate specific items and prevents them from getting mixed up or damaged during transit. Choose divider inserts that are adjustable and compatible with your tool box’s dimensions.
Accessory 3: Tie-Down Straps
When transporting your Can-Am Defender, it is important to secure the tool box and its contents to prevent shifting or damage. Tie-down straps are a convenient solution for keeping everything in place. Look for durable straps with strong buckles that can withstand heavy loads and provide reliable stability. Ensure that the straps are secured tightly to keep the tool box secure throughout the journey.
Tips for Maintaining Your Can-Am Defender Tool Box
To ensure the longevity and optimal performance of your Can-Am Defender tool box, consider the following maintenance tips:
Tip 1: Regular Cleaning
Clean your tool box regularly to remove dirt, debris, and any potential contaminants. Use a mild detergent and water solution to wipe down the interior and exterior surfaces. Avoid harsh chemicals or abrasive cleaning tools that may damage the finish or material of the tool box.
Tip 2: Lubrication
Apply lubricant to any moving parts, such as hinges or locking mechanisms, to prevent rust and ensure smooth operation. Be sure to choose a lubricant that is safe for the specific materials of your tool box and follow the manufacturer’s recommendations.
Tip 3: Inspect for Damage
Regularly inspect your tool box for any signs of damage, such as dents, cracks, or loose hardware. Repair or replace any damaged components promptly to prevent further deterioration or potential safety hazards.
Tip 4: Secure Your Contents
Use additional fasteners, dividers, or foam inserts to secure the contents of your tool box, especially during transport. This prevents tools and equipment from shifting, reducing the risk of damage or injury.
Tip 5: Storage Considerations
When not in use, store your tool box in a dry and secure location. Exposure to moisture or extreme temperatures can degrade the materials and compromise the integrity of the tool box.
Tip 6: Follow Manufacturer’s Guidelines
Always refer to the manufacturer’s guidelines and recommendations for your specific tool box model. They provide valuable information and instructions tailored to your tool box’s design and materials.
Wrap-Up:
Installing a tool box on your Can-Am Defender enhances its storage capacity and allows you to keep your tools and equipment organized. By carefully following the installation instructions, ensuring secure mounting, and maintaining your tool box, you can enjoy its benefits for a long time. Additionally, accessorizing your tool box with liner, divider inserts, and tie-down straps further enhances its functionality and convenience. Regular cleaning, lubrication, and inspections will keep your tool box in excellent condition. By following these tips, you can maximize the lifespan and performance of your Can-Am Defender tool box.
Key Takeaways: Can-Am Defender Tool Box Installation Instructions
- Installing a tool box on your Can-Am Defender is a simple process.
- Start by gathering the necessary tools and materials.
- Find a suitable location on your vehicle to mount the tool box.
- Follow the manufacturer’s instructions for securing the box to your vehicle.
- Make sure to test the box for stability and secure any loose components.
Frequently Asked Questions
Looking to install a tool box on your Can Am Defender? Here are some common questions and answers to help you with the installation process.
1. How do I choose the right size of tool box for my Can Am Defender?
When selecting a tool box for your Can Am Defender, consider the available space and your storage needs. Measure the area on your vehicle where you plan to install the tool box and choose a size that fits comfortably. Take into account any specific tools or equipment you’ll be storing and ensure that the tool box you choose has enough space to accommodate them.
It’s also essential to consider the weight capacity of the tool box and ensure it can handle the load you intend to carry. Opt for a sturdy and durable material like aluminum or steel that can withstand rugged off-road conditions.
2. What tools do I need for installing a tool box on my Can Am Defender?
Before you begin the installation process, gather the necessary tools. You’ll typically need a set of wrenches or sockets, a drill with the appropriate drill bits, a tape measure, and a marker for measuring and marking the mounting holes. Additionally, have some cleaning supplies such as a rag and degreaser on hand to prepare the installation surface.
It’s always a good idea to refer to the specific installation instructions provided with your tool box, as some models may require additional tools or steps that are unique to their design.
3. How do I mount the tool box on my Can Am Defender?
To mount the tool box on your Can Am Defender, start by selecting a suitable mounting location. Ensure that the surface is clean and free of any debris or dirt. Position the tool box in the desired location, and use a tape measure and marker to mark the mounting hole locations on both the tool box and the vehicle.
Next, drill the mounting holes following the size and spacing specified in the installation instructions. Attach any required mounting brackets or hardware provided by the manufacturer. Finally, secure the tool box to the vehicle using the appropriate fasteners and tighten them securely. Double-check that the tool box is securely mounted before using it to store your tools or equipment.
4. Are there any precautions to take during the installation process?
During the installation process, it’s important to take a few precautions to ensure a safe and successful installation. First, make sure you read and understand the installation instructions provided by the manufacturer. These instructions will provide specific guidance and safety precautions unique to your tool box model.
Additionally, when drilling mounting holes, be cautious of any wires, cables, or components that may be located behind the installation surface. Use caution and avoid damaging any vehicle components or wiring during the installation process. If you are unsure of what may be behind the surface, consult a professional or refer to the vehicle’s wiring diagram for guidance.
5. How can I maintain and care for my Can Am Defender tool box?
To keep your Can Am Defender tool box in good condition, regular maintenance is key. Clean the tool box regularly with mild soap and water to remove dirt and debris. Avoid using abrasive cleaners that may scratch or damage the surface of the tool box.
Inspect the mounting hardware periodically and tighten it if necessary to prevent any loosening over time. If you notice any signs of rust or corrosion on the tool box, address it promptly by using appropriate rust removal methods and applying a protective coating to prevent further damage.

Summary
Installing a tool box on your Can-Am Defender is a straightforward process that can be done at home. Start by gathering the necessary tools and materials, like a drill and screws. Then, locate the mounting points on your vehicle and position the tool box accordingly. Secure it in place using the provided hardware. Be sure to double-check the fit and make any necessary adjustments. Once everything is secure, you can start using your new tool box to store and transport your gear on your Can-Am Defender adventure!
Remember to follow the instructions carefully and take your time to complete each step accurately. With a little patience and effort, you’ll have your tool box installed and ready to go in no time. Enjoy your Can-Am Defender with its new addition and have fun exploring the great outdoors!