
Thinking of giving your plywood wall a stylish upgrade? You might be wondering, “Can I tile onto a plywood wall?” Well, you’ve come to the right place! In this article, we’ll dive into the world of tiling and explore whether tiling onto a plywood wall is a feasible option. So, let’s grab our hard hats and discover the ins and outs of this exciting DIY adventure!
When it comes to tiling, it’s essential to lay a solid foundation. Plywood walls can present some unique challenges, but fear not! We’ll guide you through the process step by step, ensuring you have all the knowledge and tools to take on this project like a pro. So, whether you’re looking to transform your bathroom, kitchen, or any other room in your home, let’s find out if tiling onto a plywood wall is a possibility!
Now, before we get our hands dirty, it’s important to understand the potential risks and benefits of tiling onto plywood. We’ll explore the structural considerations, the type of adhesive and tiles to use, and any additional precautions you may need to take. So, fasten your safety goggles, and let’s embark on this tiling adventure together!
If you’re wondering about tiling onto a plywood wall, the answer is yes, you can! However, there are a few important steps to follow. Firstly, make sure the plywood is clean and free from any debris. Next, apply a cement backer board to provide a stable surface for the tiles. Use a waterproofing membrane and adhesive specifically designed for tiling onto plywood. Finally, carefully install the tiles using the recommended spacing and grout. Enjoy your beautiful tiled plywood wall!
Can I Tile Onto Plywood Wall?
When it comes to tiling a wall, the type of surface you’re working with is crucial. While plywood may not be the most traditional choice for a tiling substrate, it is possible to tile onto a plywood wall with the right preparation and installation techniques. In this article, we will explore the considerations and steps involved in successfully tiling onto a plywood wall, so you can achieve a beautiful and durable tiled surface.
Preparing the Plywood Wall for Tiling
Before you begin tiling onto a plywood wall, it’s important to properly prepare the surface. The following steps will ensure the plywood is ready to support the weight and stress of the tiles:
1. Assess the Condition of the Plywood
Inspect the plywood for any signs of damage, such as rot or warping. Replace any damaged sections to ensure a solid and stable surface for tiling.
Table: Comparison of Plywood Grades
| Grade | Description |
|---|---|
| BC | A strong and durable grade with one smooth side and one rough side. |
| CDX | A basic grade with a rough surface on both sides. Suitable for construction purposes. |
2. Reinforce the Plywood
To enhance the strength and stability of the plywood, consider adding a layer of cement backer board or a liquid waterproofing membrane. These materials will provide additional support and prevent moisture damage.
BENEFITS OF REINFORCING THE PLYWOOD:
- Improved tile adhesion
- Reduced risk of moisture penetration
- Enhanced overall stability
3. Apply a Primer
Before tiling, apply a suitable primer to the plywood. This will promote better adhesion and ensure a long-lasting bond between the tiles and the substrate.
TIPS FOR PRIMING PLYWOOD:
- Choose a primer specifically designed for plywood surfaces.
- Follow the manufacturer’s instructions for application and drying times.
- Apply the primer evenly and allow it to dry completely before proceeding with tiling.
4. Use the Correct Tile Adhesive
Choosing the right tile adhesive is crucial when tiling onto a plywood wall. Opt for a flexible, polymer-modified adhesive that is appropriate for the size and type of tiles you are using. This will ensure proper adhesion and prevent tile cracking or detachment.
TIPS FOR SELECTING TILE ADHESIVE:
- Check the manufacturer’s recommendations for the specific type of tiles and plywood you are using.
- Consider using a flexible adhesive to accommodate any movement in the plywood.
- Apply the adhesive evenly using a notched trowel, following the instructions on the adhesive packaging.
Installation and Maintenance of Tiled Plywood Walls
Once the plywood wall is properly prepared, it’s time to install the tiles. Follow these guidelines to ensure a successful installation and maintain the longevity of your tiled plywood wall:
1. Plan your Tile Layout
Start by laying out your tiles on the plywood wall to determine the best positioning and ensure a balanced and visually appealing design. Consider the size and shape of the tiles, as well as any pattern or color variation.
TIPS FOR TILE LAYOUT:
- Use tile spacers to maintain consistent spacing between each tile.
- Consider dry-fitting the tiles before applying adhesive to ensure they fit properly within the space.
- Take into account any outlets or fixtures that may require special tile cuts.
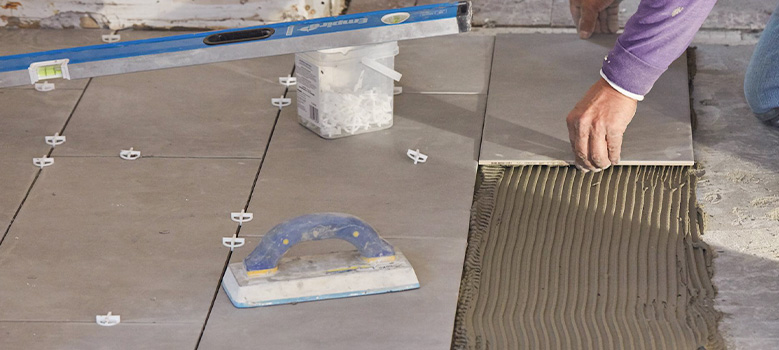
2. Apply the Tile Adhesive and Install the Tiles
Using the appropriate tile adhesive, apply a layer to the plywood wall using a notched trowel. Start in a corner and work your way across the wall, pressing each tile firmly into place. Make sure to maintain the desired tile spacing and alignment as you go.
TIPS FOR TILE INSTALLATION:
- Work in small sections to ensure the adhesive doesn’t dry out before you can install the tiles.
- Check the levelness of the tiles regularly to ensure a flat and even installation.
- Wipe away any excess adhesive immediately to prevent it from drying on the surface of the tiles.
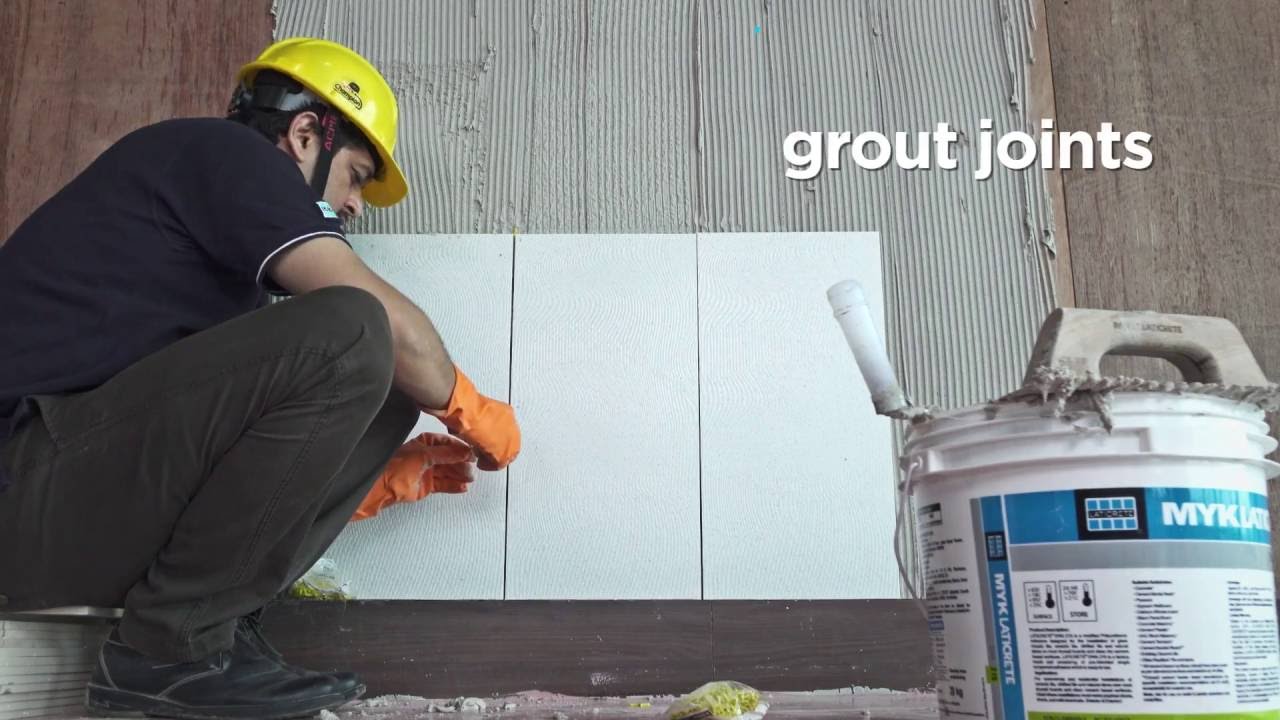
3. Allow the Tiles to Set and Grout the Joints
Once the tiles are installed, allow them to set according to the adhesive manufacturer’s instructions. Then, mix grout according to the manufacturer’s guidelines and use a grout float to fill the joints between the tiles. Remove any excess grout with a damp sponge, being careful not to dislodge the tiles.
TIPS FOR GROUTING:
- Seal the grout after it has fully cured to protect it from stains and moisture.
- Maintain the grout lines regularly by cleaning and resealing them as needed.
Maintaining Tiled Plywood Walls
To keep your tiled plywood walls looking their best, follow these maintenance tips:
1. Regular Cleaning
Use a mild, non-abrasive cleaner and a soft cloth or sponge to clean the tiles regularly. Avoid harsh chemicals or abrasive scrub brushes that could damage the tile surface or grout.
TIPS FOR TILE CLEANING:
- Wipe up any spills or stains immediately to prevent them from penetrating the grout.
- Avoid using excessive water or moisture on the tiled wall, as this can potentially penetrate the plywood substrate.
2. Repairing Damaged Tiles or Grout
If any tiles or grout become damaged or cracked, it’s important to repair them promptly to maintain the integrity of the tiled plywood wall. Remove the damaged tile or grout and replace it with new materials, following the original installation techniques.
TIPS FOR TILE AND GROUT REPAIR:
- Keep extra tiles and grout on hand for easy replacement when needed.
- Ensure the replacement tile matches the existing tiles in terms of size, color, and texture.
- Allow ample time for the repair materials to dry and set before using the tiled wall.
In conclusion, tiling onto a plywood wall is possible with the right preparation, installation, and maintenance techniques. By following the steps outlined in this article, you can achieve a beautiful and lasting tiled surface on your plywood wall. Remember to assess the condition of the plywood, reinforce it if necessary, apply a suitable primer, use the correct tile adhesive, and properly install and maintain the tiles. With these guidelines, you can confidently transform your plywood wall into a stunning tiled masterpiece.
Key Takeaways: Can I tile onto a plywood wall?
- Tiling onto a plywood wall is possible but requires proper preparation.
- The plywood wall should be clean, dry, and free of any bumps or imperfections.
- Applying a cement backer board or waterproof membrane can provide a stable surface for tiling.
- Using a high-quality adhesive and grout suitable for tile installation on plywood is essential.
- Properly sealing the grout after installation can help protect the plywood wall from moisture.
Frequently Asked Questions
If you’re looking to tile onto a plywood wall, you may have a few questions about the process. Here are some commonly asked questions to help guide you.
1. Is it possible to tile directly onto a plywood wall?
Yes, you can tile directly onto a plywood wall, but there are a few important considerations. First, make sure the plywood is sturdy and in good condition to ensure a solid foundation for the tiles. It’s recommended to use a high-quality exterior-grade plywood that is at least ⅜” thick. Additionally, the plywood should be properly sealed to prevent moisture from seeping in. Apply a waterproofing membrane or primer to create a moisture-resistant barrier before tiling.
Finally, ensure the surface is level and smooth before starting to tile. If necessary, use self-leveling compound to even out any imperfections. By following these steps, you can successfully tile onto a plywood wall.
2. Can I use any type of tile on a plywood wall?
While you have some flexibility in choosing the type of tile, it’s important to consider the weight of the tiles. Porcelain and ceramic tiles are usually the best options for tiling onto plywood walls because they are relatively lightweight. However, larger and heavier tiles, such as stone or marble, may require additional support to avoid stress on the plywood. It’s advisable to consult with a professional or the manufacturer’s guidelines to determine the appropriate tile options for your specific plywood wall.
Remember to also consider the style and design you want to achieve. Different types of tiles offer various colors, textures, and patterns that can enhance the overall aesthetic of your space.
3. Do I need to prepare the plywood before tiling?
Yes, proper preparation is crucial for tiling onto a plywood wall. Start by ensuring the plywood is clean, free from dust, dirt, and any loose particles. Next, fill any gaps, holes, or cracks in the plywood with a suitable filler or putty, and then sand it down to create a smooth surface.
After this, it’s important to seal the plywood to prevent moisture damage. Apply a waterproofing membrane or primer that is compatible with the adhesive and tiles you will be using. This step creates a moisture-resistant barrier and helps the tiles adhere securely to the plywood. Following these preparation steps will help ensure the longevity and durability of your tiled plywood wall.
4. Can I install tile directly on bare plywood?
It is not recommended to install tile directly on bare plywood. Plywood is susceptible to expanding and contracting due to changes in temperature and moisture levels, which can cause the tiles to crack or become loose. To avoid this, it’s important to properly prepare the plywood by sealing it with a waterproofing membrane or primer. This creates a stable and moisture-resistant surface for the tiles to adhere to.
Additionally, applying a layer of thinset mortar before laying the tiles provides extra support and helps ensure a strong bond. By taking these precautions, you can minimize the risk of tile damage and achieve a long-lasting tiled plywood wall.
5. Can I tile onto a plywood wall in a wet area, like a bathroom?
Yes, you can tile onto a plywood wall in a wet area like a bathroom, but it requires additional precautions to prevent water damage. In wet areas, it’s important to use a specialized waterproofing system to protect the plywood and the structure behind it from moisture penetration. This typically involves applying a waterproofing membrane over the plywood surface and ensuring proper sealing at joints, corners, and transitions.
It’s advisable to consult with a professional or follow the manufacturer’s guidelines for the specific waterproofing system you choose. By taking these measures, you can confidently tile your plywood wall in wet areas and enjoy a beautiful and water-resistant finish in your bathroom or other moisture-prone spaces.
Summary
So, can you tile onto a plywood wall? The answer is yes, but with caution. Plywood walls need proper preparation, such as adding a cement backer board and using the right adhesive. Make sure to follow the manufacturer’s instructions and consult a professional if needed.
Remember, water-resistant materials like cement board are important to prevent water damage and ensure the tiles stay in place. With the right steps and materials, you can achieve a beautiful tiled wall on plywood. Good luck with your tiling project!