Have you ever wondered if you can cut crown molding with a circular saw? Well, you’re in the right place! Whether you’re a DIY enthusiast or just curious about home improvement, I’ve got you covered. In this article, we’ll explore the exciting world of crown molding and discover if a trusty circular saw can tackle this challenging task.
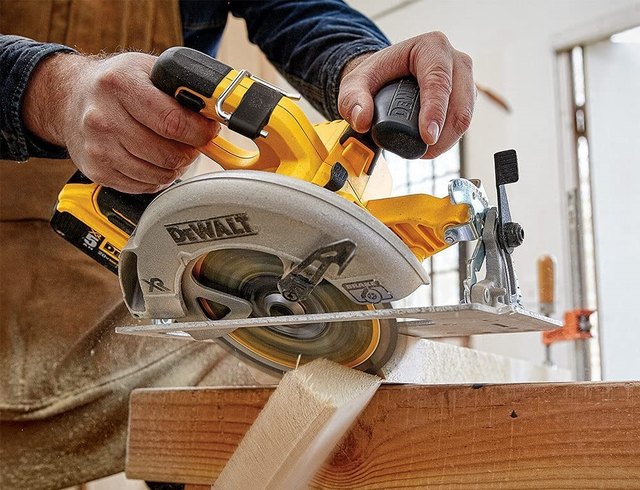
Now, let’s dive right in and address the burning question: can you really cut crown molding with a circular saw? Many folks believe that specialized miter saws are the only option, but I’m here to tell you that a circular saw can do the job just fine. In fact, using a circular saw for crown molding can be a cost-effective and efficient alternative. So, grab your safety goggles and let’s learn how to make clean and precise cuts with a trusty circular saw.
Before we get our hands dirty, it’s essential to understand the techniques, tools, and safety measures involved in cutting crown molding with a circular saw. Together, we’ll explore the step-by-step process, from measuring and marking to making the actual cuts. With a little practice and patience, you’ll be able to achieve professional-looking results in no time. So, get ready to unleash your inner carpenter and take your crown molding projects to the next level!
Yes, you can cut crown molding with a circular saw! This powerful tool makes the job easier and more efficient. Here’s how:
- Measure and mark the molding.
- Set the saw at the correct angle.
- Secure the molding in a sturdy position.
- Start cutting with a slow, steady motion.
- Sand and finish the cut edges.
With the right technique and precautions, your circular saw can produce clean, precise cuts for your crown molding project.

Can You Cut Crown Molding with a Circular Saw?
Crown molding is a beautiful addition to any room, adding an elegant touch to the ceiling and creating a seamless transition between the walls and ceiling. However, cutting crown molding can be a tricky task, especially when it comes to precision and accuracy. Many people wonder if it is possible to cut crown molding with a circular saw, a versatile tool commonly found in most workshops. In this article, we will explore the feasibility of using a circular saw for cutting crown molding and provide you with all the information you need to make an informed decision.
1. Understanding Crown Molding
Before we dive into the practicalities of cutting crown molding with a circular saw, it’s important to understand the nature of crown molding itself. Crown molding is typically made from wood or composite materials, and it is used to decorate the intersection between the walls and the ceiling. It adds an element of elegance and sophistication to any space, enhancing the overall aesthetic appeal. Crown molding comes in various profiles and sizes, and cutting it correctly requires careful measurements and precise angles.
When it comes to cutting crown molding, there are a few challenges to consider. Firstly, crown molding is often installed at an angle, which means the cuts need to be made at specific bevel and miter angles to ensure a proper fit. Secondly, crown molding is typically installed in long, continuous pieces, which means that accurate measurements and clean, seamless cuts are crucial for a professional-looking installation. With these challenges in mind, let’s explore whether a circular saw can be used effectively for cutting crown molding.
2. Can You Use a Circular Saw to Cut Crown Molding?
The answer to this question is: yes, you can use a circular saw to cut crown molding. However, it requires a bit of skill, practice, and the right set of tools. Traditionally, carpenters utilize miter saws or coping saws for cutting crown molding, as these tools are specifically designed to make angled and intricate cuts. However, not everyone has access to these specialized tools, and using a circular saw can be a viable alternative.
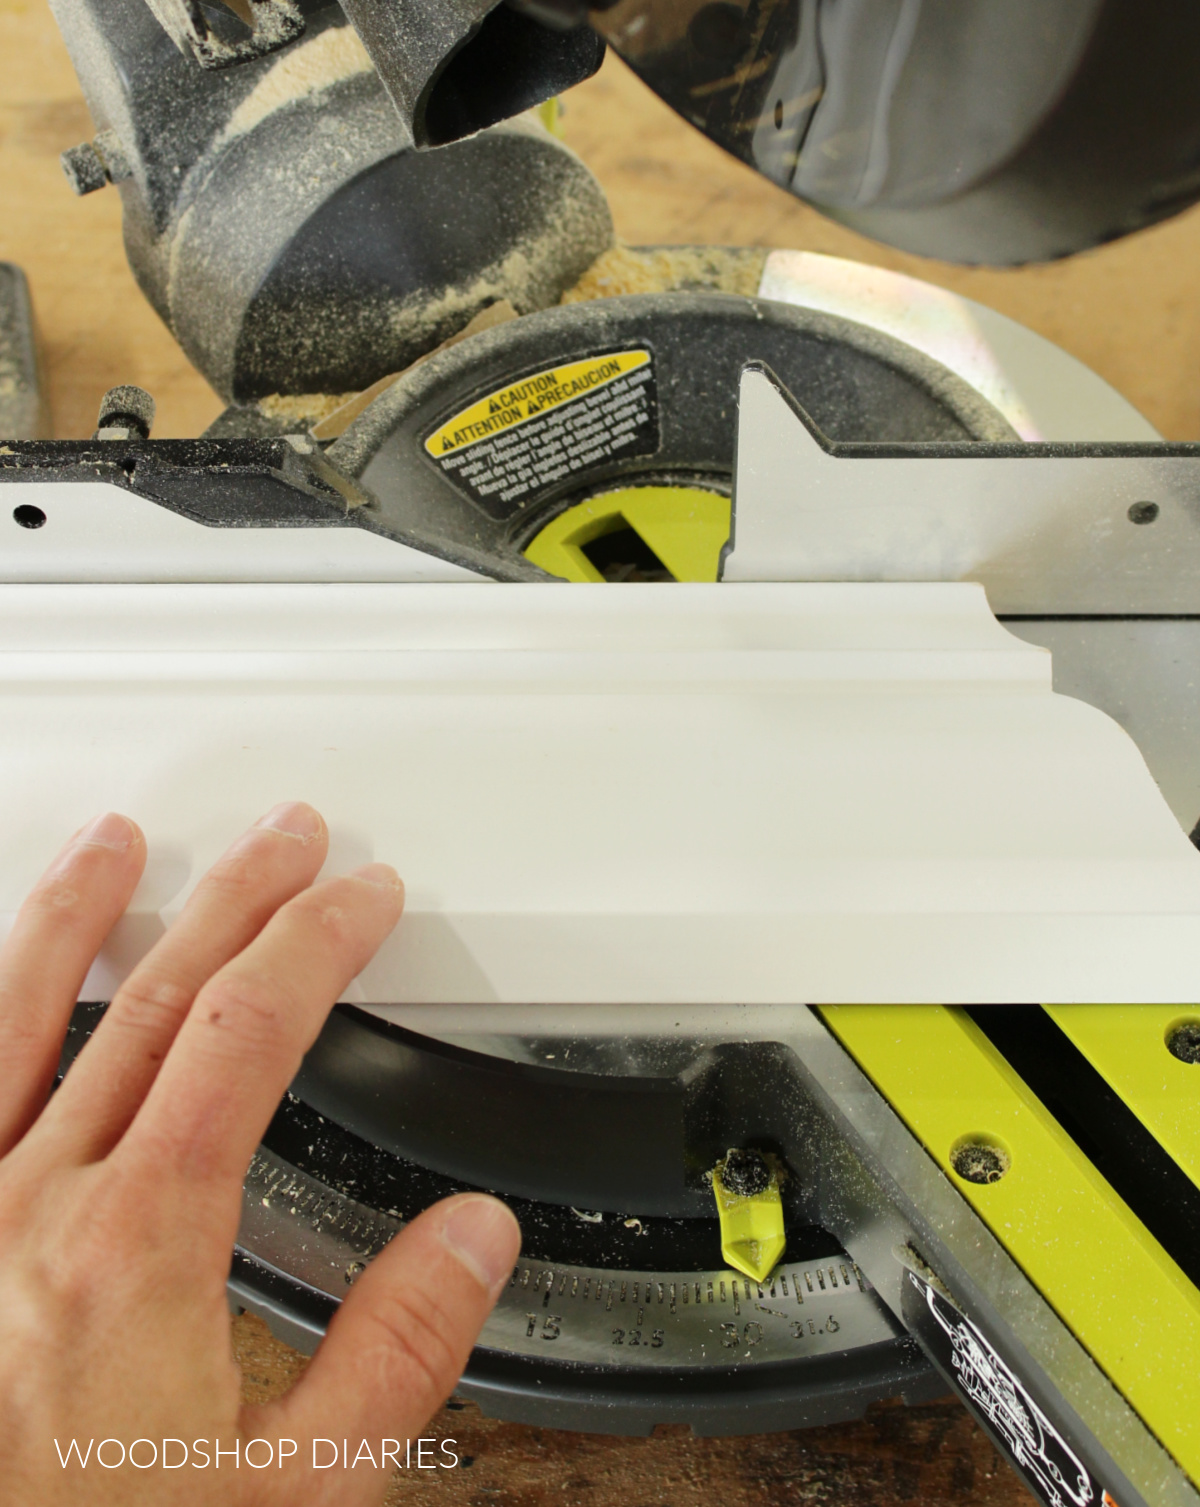
To cut crown molding with a circular saw, you will need a few additional tools and accessories. A compound miter saw is highly recommended, as it allows you to make bevel and miter cuts simultaneously, replicating the angled cuts required for crown molding accurately. Additionally, a crown molding jig is essential for holding the crown molding securely in place while you make your cuts. This jig acts as a guide and ensures that the crown molding remains stable throughout the cutting process.
3. Steps for Cutting Crown Molding with a Circular Saw
Now that you understand the challenges and have the necessary tools, let’s walk through the steps for cutting crown molding with a circular saw.
Step 1: Measure and mark the crown molding: Use a tape measure to determine the length of the crown molding you need. Make sure to measure twice to ensure accuracy. Mark the measured length on the crown molding using a pencil.
Step 2: Set up the compound miter saw and crown molding jig: Adjust the bevel and miter angles on your compound miter saw to match the angles required for your crown molding. Secure the crown molding jig onto your work surface, ensuring that it is properly aligned.
Step 3: Position the crown molding on the jig: Place the crown molding onto the jig, aligning it with the appropriate angle settings on the jig and the compound miter saw.
Step 4: Make the first cut: Carefully line up the marked line on the crown molding with the appropriate guide on the jig. With a firm grip on the circular saw, slowly lower the blade onto the crown molding and make the cut, ensuring that the blade remains aligned with the marked line.
Step 5: Repeat for additional cuts: Once you have made the first cut, reposition the crown molding on the jig to make the next cut. Repeat the process for each cut required.
Step 6: Test the fit: After making all the necessary cuts, test the fit of the crown molding on the wall or ceiling to ensure it fits flush and accurately. Make any adjustments if necessary.
By following these steps and taking your time to make precise cuts, you can achieve excellent results when cutting crown molding with a circular saw. Remember to prioritize safety by wearing protective gear, such as safety goggles and gloves, and practice on scrap pieces of crown molding before working on your actual project.
Additional Considerations for Cutting Crown Molding with a Circular Saw
1. Benefits of Using a Circular Saw for Cutting Crown Molding
There are several benefits to using a circular saw for cutting crown molding. Firstly, circular saws are readily available and commonly found in most workshops, making them accessible to the average DIYer. Secondly, circular saws are versatile tools that can be used for a wide range of cutting tasks beyond just crown molding, making them a cost-effective investment. Lastly, with the right setup, technique, and practice, a circular saw can produce clean and accurate cuts, allowing you to achieve professional-looking results.
2. Tips for Cutting Crown Molding with a Circular Saw
To ensure successful crown molding cuts with a circular saw, here are some helpful tips to keep in mind:
– Use a fine-toothed blade: A fine-toothed blade will minimize splintering and leave a cleaner cut on the crown molding.
– Take your time: Cutting crown molding requires precision, so don’t rush the process. Take your time to make accurate measurements and ensure proper alignment before making your cuts.
– Secure the crown molding firmly: Use clamps or a crown molding jig to hold the crown molding securely in place during the cutting process. This will prevent any movement and ensure clean, precise cuts.
– Practice on scrap pieces: Before working on your actual crown molding, practice making cuts on scrap pieces to familiarize yourself with the process and perfect your technique.
– Measure twice, cut once: Double-check your measurements before making any cuts to avoid any costly mistakes.
In conclusion, while cutting crown molding with a circular saw requires careful planning, the right tools, and some practice, it is indeed possible to achieve accurate and clean cuts. By following the steps outlined in this article and considering the additional tips provided, you can confidently use a circular saw for your crown molding projects and achieve professional-level results. Remember, practice makes perfect, so don’t be discouraged if it takes a few attempts to master the technique. Happy cutting!
Can You Cut Crown Molding with a Circular Saw?
- Yes, you can cut crown molding with a circular saw.
- It’s important to use a fine-toothed blade for the cleanest cuts.
- Make sure the crown molding is securely clamped before cutting.
- Take your time and maintain a steady hand to achieve accurate cuts.
- Always wear safety goggles and follow proper safety precautions when using power tools.
Frequently Asked Questions
Here are some commonly asked questions about cutting crown molding with a circular saw and their answers:
1. What type of saw blade should I use to cut crown molding?
When cutting crown molding with a circular saw, it’s best to use a fine-toothed blade with a high tooth count. This type of blade provides cleaner cuts and reduces the risk of splintering or damaging the material. A blade with at least 60 teeth is recommended. Make sure the blade is sharp to ensure smooth and precise cuts.
Additionally, using a blade specifically designed for cutting crown molding, such as a crosscut or combination blade, can further enhance the quality of your cuts. These blades are specifically designed to handle the delicate nature of crown molding and provide optimal results.
2. Can I use a circular saw to make both straight and angled cuts on crown molding?
Yes, a circular saw can be used to make both straight and angled cuts on crown molding. For straight cuts, a miter saw or a circular saw equipped with a guide or a straight-edge jig can be used to ensure clean and precise cuts.
When it comes to angled cuts, a miter saw or a circular saw with an adjustable base or a bevel function is ideal. These tools allow you to tilt the blade to the desired angle and make accurate bevel cuts on the crown molding. Just make sure to properly measure and mark the angles before making the cuts to ensure a perfect fit.
3. Do I need to secure the crown molding before cutting it with a circular saw?
Yes, it is important to properly secure the crown molding before cutting it with a circular saw. Unsecured molding can move or vibrate during the cutting process, leading to imprecise cuts and potential safety hazards.
To secure the crown molding, you can use clamps or hold-downs to firmly hold it in place. It’s also a good idea to use a support stand or sawhorses to support longer sections of the molding and prevent it from flexing or bending. This will ensure stability and improve the accuracy of your cuts.
4. How can I prevent splintering when cutting crown molding with a circular saw?
To minimize splintering when cutting crown molding with a circular saw, there are a few key steps you can take. First, ensure that you are using a sharp blade with a high tooth count. A dull or low-quality blade can cause more splintering.
Second, make sure to set the depth of the circular saw blade just deep enough to cut through the crown molding without going too far. This will reduce the chances of tearing or splintering the material.
Lastly, applying masking tape or painter’s tape along the cut line can help prevent splintering. The tape helps provide support and stability to the wood fibers, resulting in cleaner cuts with reduced splintering.
5. What safety precautions should I take when cutting crown molding with a circular saw?
When working with a circular saw to cut crown molding, it is crucial to prioritize safety. Here are a few key safety precautions to follow:
– Always wear appropriate personal protective equipment (PPE), such as safety goggles and ear protection, to protect your eyes and ears from potential hazards.
– Secure the crown molding and ensure it is stable before starting the cutting process.
– Keep your hands clear of the blade and use a push stick or a guide when necessary to maintain a safe distance from the blade.
– Make sure the circular saw is unplugged or switched off when making adjustments or changing blades.
– Avoid distractions and maintain a clean and organized work area to minimize the risk of accidents.
– Follow all manufacturer’s instructions and guidelines for your specific circular saw model.
By following these safety measures, you can reduce the risk of injuries and work with peace of mind when cutting crown molding with a circular saw.
Summary
You can cut crown molding with a circular saw! Just make sure to use the right blade for clean cuts. Remember to measure and mark accurately before cutting. Take your time and go slowly to avoid mistakes. Use a miter saw to make angled cuts for corners and joints. With practice and patience, you can achieve professional-looking results.
Cutting crown molding with a circular saw can save you time and money. It’s important to wear safety goggles and follow safety guidelines. Always maintain a firm grip on the saw and keep your fingers away from the blade. If you’re unsure, it’s best to seek help from an adult or a professional.