Do you ever wonder if you can plane the edge of a board? Well, you’ve come to the right place! In this article, we’ll explore the fascinating world of woodworking and delve into the possibilities of planing board edges. So, grab your thinking cap and let’s dive into the marvelous world of woodworking techniques!
Now, you might be asking yourself, “Why would I want to plane the edge of a board?” Well, there are several reasons why this technique can be incredibly useful. From achieving a smoother and more polished finish to ensuring a better fit during joinery, planing the edge of a board can make a world of difference in your woodworking projects. So, let’s roll up our sleeves and discover the ins and outs of this intriguing technique!
But wait, there’s more! Before we jump into the actual process of planing the edge of a board, it’s important to understand the tools and techniques involved. From hand planes to power tools, there are various methods you can use to achieve the desired results. So, get ready to expand your woodworking repertoire and unlock the secrets of planing board edges! Let’s embark on this woodworking adventure together!
- Secure the board firmly in place.
- Set the planer to the desired depth of cut.
- Hold the planer at a slight angle, with the blade facing the edge of the board.
- Apply light, even pressure as you move the planer along the edge.
- Repeat the process until the desired result is achieved.
By following these steps, you can easily plane the edge of a board to perfection.

Can You Plane the Edge of a Board?
In woodworking, planing is a common technique used to smooth and shape wood surfaces. While most people are familiar with planing the faces of boards, there is often confusion about whether it is possible to plane the edges of a board. In this article, we will explore the answer to this question and delve into the process of planing edges, including the tools required and techniques to achieve the best results. So, if you’ve ever wondered if you can plane the edge of a board, let’s find out together!
Why Would You Need to Plane the Edge of a Board?
Before we dive into the details of planing the edge of a board, it’s essential to understand why you might need to do so. There are several situations where planing the edge can be beneficial:
- Straightening: Sometimes, the edges of boards can be uneven or warped, leading to difficulties in joining them together. By planing the edges, you can create straight and smooth surfaces that will fit together seamlessly.
- Sizing: When working on a project that requires boards of specific dimensions, planing the edges allows you to adjust the width or thickness of the board to achieve the desired measurements.
- Finishing Touch: Planing the edges of a board can provide a polished and professional look to your woodworking projects. This is especially important if the edges will be visible, for example, in furniture construction.
The Tools You’ll Need
To successfully plane the edges of a board, you’ll need a few essential tools:
- Hand Plane: A hand plane is the primary tool used for planing. There are various types of hand planes available, such as bench planes, block planes, and shoulder planes. Choose a plane that is suitable for the size and type of work you will be doing.
- Workbench: A sturdy workbench is essential for securing the board and providing a stable surface to plane on.
- Clamps: Clamps are necessary to secure the board firmly to the workbench, preventing it from moving during the planing process.
- Sharpening Tools: Keeping your hand plane blades sharp is crucial for achieving clean and precise cuts. Invest in sharpening stones or other sharpening tools to maintain the cutting edge of your plane blades.
Techniques for Planing the Edge of a Board
Now that you have the necessary tools, it’s time to learn some techniques for planing the edge of a board:
- Preparation: Begin by marking the area of the board you wish to plane. Using a pencil, draw a straight line along the length of the edge, indicating the desired width or removing any uneven portions.
- Secure the Board: Place the board on the workbench, aligning the marked edge with the edge of the bench. Use clamps to hold the board firmly in place, ensuring it does not move during planing.
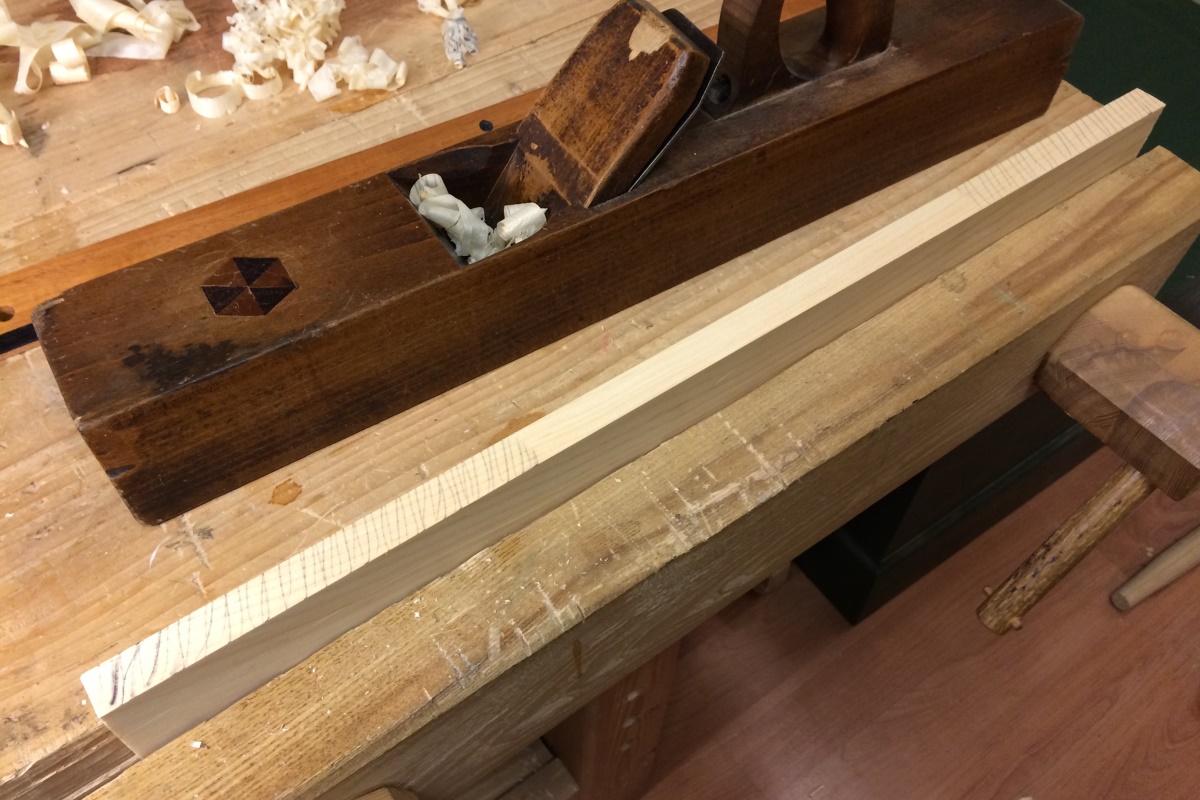
- Start Planing: Hold the hand plane with both hands and position it at a slight angle to the edge of the board. Apply firm but controlled pressure as you push the plane along the length of the edge, moving in the direction of the grain. Maintain a steady and even rhythm to achieve consistent results.
- Check for Smoothness: After a few passes with the hand plane, check the surface of the edge for smoothness. If there are any uneven areas or high spots, continue planing until the edge is flat, straight, and smooth.
Tips for a Successful Edge Planing Experience
To ensure the best results when planing the edge of a board, keep the following tips in mind:
- Use a Straight Reference: If you want to achieve a perfectly straight edge, consider using a straight reference such as a straightedge or a jointed board to guide your hand plane along the edge.
- Take Light Shavings: Instead of trying to remove a significant amount of material in one pass, take light and shallow shavings. This allows for greater control and reduces the risk of tear-out or splintering.
- Frequent Blade Maintenance: Regularly check and sharpen the blades of your hand plane to ensure they are sharp and in optimal condition. Blunt blades can lead to poor planing results.
- Work in Sections: If you are planing the edge of a long board, consider dividing the task into manageable sections. This allows you to focus on smaller areas, ensuring greater precision and control.
Common Mistakes to Avoid
Planing the edge of a board may seem straightforward, but there are a few common mistakes that can hinder your progress:
1. Lack of Proper Support:
One of the primary reasons for achieving inconsistent results is not adequately supporting the board during planing. Ensure that the board is securely clamped to the workbench, as any movement can result in an uneven edge.
2. Neglecting Sharpening:
Using a dull or blunt blade will make it difficult to achieve a smooth and even edge. Keep your hand plane blades sharp and regularly sharpen them to ensure optimal performance.
3. Uneven Pressure:
Applying uneven pressure while planing can result in an uneven edge. Maintain consistent pressure and maintain a steady rhythm as you move the hand plane along the board.
Conclusion
So, can you plane the edge of a board? The answer is a resounding yes! With the right tools, techniques, and a little practice, you can create straight, smooth, and professional-looking edges on your boards. Remember to prepare the board, secure it firmly, and use proper planing techniques to achieve the best results. By avoiding common mistakes and following helpful tips, you’ll be well on your way to mastering the art of planing edges in your woodworking projects.
Can You Plane the Edge of a Board?
- Yes, you can plane the edge of a board to make it smooth and straight.
- Using a hand plane or a power planer, you can remove material from the edge of the board.
- Planing the edge helps to ensure a tight fit when joining boards together.
- Make sure to secure the board properly before planing to prevent accidents.
- Take your time and use smooth, consistent strokes for the best results.
Frequently Asked Questions
Welcome to our FAQ section where we address common questions about working with boards and planing edges. Read on to find answers to your queries.
1. How can I plane the edge of a board?
To plane the edge of a board, you will need a hand plane. Start by securing the board firmly to a workbench or other stable surface. Hold the hand plane with both hands, positioning the cutting edge flush against the edge of the board. Apply even pressure and push the plane across the board in long, smooth strokes. Repeat until the desired edge is achieved, taking care to maintain a consistent angle and depth.
Remember to frequently check your progress to ensure you’re achieving the desired shape and smoothness. If necessary, make adjustments to the plane or your technique. Always wear appropriate safety gear, such as safety goggles and hearing protection, when working with hand tools.
2. Can a power planer be used to plane the edge of a board?
While power planers are typically used for planing larger surfaces, they can also be used to plane the edge of a board. However, it requires some caution and skill to achieve good results. First, secure the board to a workbench or other stable surface. Then, hold the power planer with both hands and allow the blade to make contact with the edge of the board. Move the planer along the length of the edge in smooth, steady passes.
Keep in mind that power planers remove material quickly, so it’s important to be mindful of the depth and angle you’re working with. Practice on scrap boards first to get a feel for the tool and technique, and always prioritize safety by wearing protective gear.
3. Are there any limitations to planing the edge of a board?
While it’s generally possible to plane the edge of a board, there are a few limitations to keep in mind. Firstly, consider the width of the board. If it’s too narrow, it may be difficult to secure it properly for planing, increasing the risk of accidents. Additionally, if the board has an irregular or uneven surface, planing the edge may be challenging or result in an uneven edge.
If the board is warped or has significant imperfections, it may be better to consider other techniques, such as using a jointer or a router, to achieve a straight and smooth edge. It’s also important to choose the right type of plane for the job. Factors such as the type of wood and the desired finish can impact the choice of plane.
4. What are the benefits of planing the edge of a board?
Planing the edge of a board offers several benefits. One of the main advantages is that it allows you to create a straight and smooth edge, which is essential when joining boards together for projects such as cabinetry or furniture making. A properly planed edge ensures a tight and secure fit, resulting in stronger joints.
Additionally, planing the edge can remove imperfections, such as roughness, splinters, or unevenness, resulting in an improved overall appearance of the board. It can also make it easier to work with the board, as a smooth edge facilitates accurate measurements and reduces the risk of injury when handling the material.
5. What are some tips for achieving the best results when planing the edge of a board?
To achieve the best results when planing the edge of a board, consider the following tips:
– Ensure your board is securely clamped or held in place to minimize vibrations and movement.
– Take shallow passes with the plane to gradually remove material and avoid tear-out.
– Use a sharp and properly adjusted plane for efficient and clean cuts.
– Pay attention to the grain direction and adjust your planing technique accordingly.
– Regularly check your progress to ensure you’re achieving the desired shape and smoothness.
– Sand the edge after planing for an even smoother and more polished finish, if desired.
By following these tips, you’ll be able to achieve professional-looking results when planing the edge of a board.
How to Plane Narrow Board Edges Square | Paul Sellers
Summary
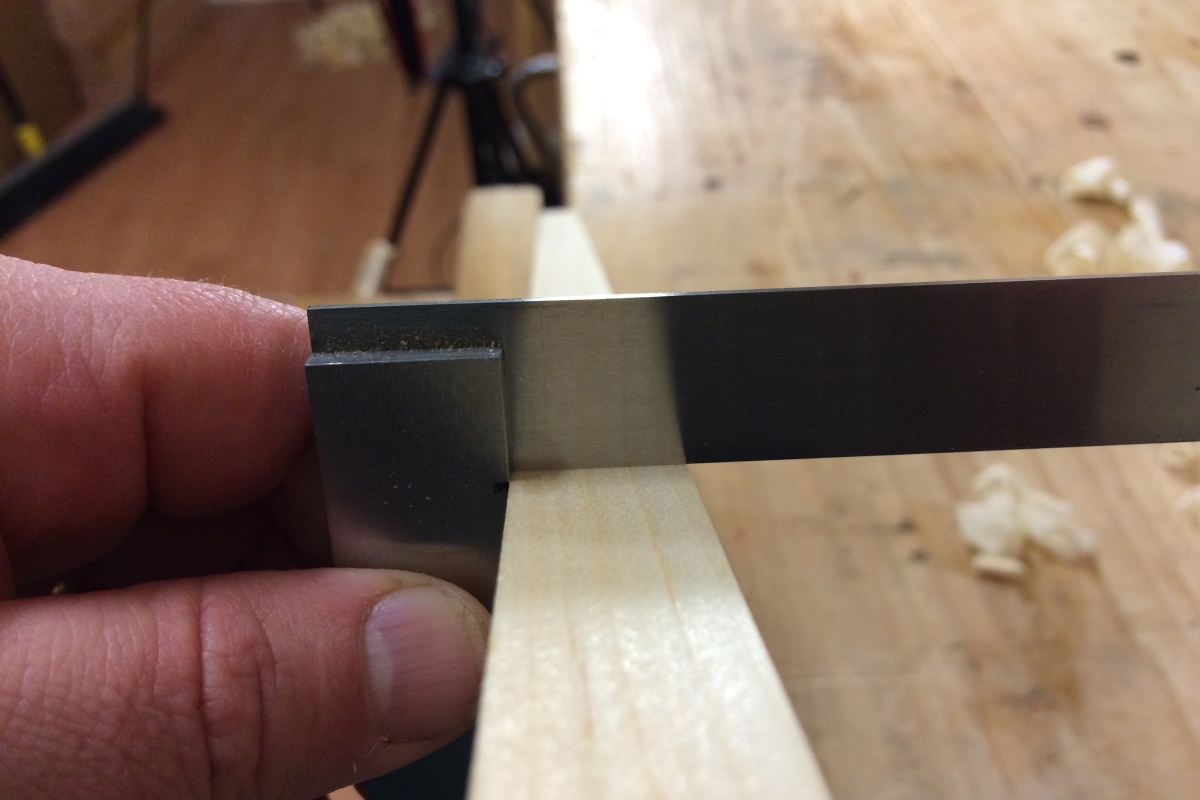
Planes are tools that help smooth out surfaces and edges of wooden boards. When working on the edge of a board, it’s important to have a sturdy workbench and clamp the board securely. To get a straight edge, mark a line and focus on shaving off the high spots while regularly checking for straightness. It’s also helpful to use a square to ensure that the edge is perpendicular to the surface. Remember to take your time and be patient for the best results.
Conclusion
In summary, planing the edge of a board requires careful attention to detail and the right tools. By following the steps of securing the board, marking a line, and shaving off the high spots, you can achieve a straight edge. Keep practicing and remember to stay safe while working with tools.