Are you wondering if you can use an orbital sander for finishing? Well, you’ve come to the right place! Whether you’re a DIY enthusiast or a woodworking professional, understanding the tools at your disposal is crucial. In this article, we’ll dive into the world of orbital sanders and uncover whether they’re suitable for finishing work.
When it comes to giving your project that smooth and polished look, finishing plays a vital role. It’s the final touch that brings out the beauty of the wood and gives it a professional appearance. But can you achieve this with an orbital sander? That’s a question we’ll answer in this article. So, hang tight and let’s explore this topic together!
Using the right tool for the job can make a world of difference. So, whether you’re planning to refinish a piece of furniture or sand down a wooden surface, understanding if an orbital sander is suitable for finishing is essential. Let’s uncover the truth behind this popular woodworking tool and discover if it’s the right choice for your finishing needs.
Looking to achieve a flawless finish? While an orbital sander is great for initial sanding, it may not be the best choice for finishing. Orbital sanders can leave swirl marks and are better suited for rough sanding. For a smooth, professional finish, consider using a random orbit sander or a finishing sander. These tools are specifically designed for final sanding and will give you the best results.

Can You Use an Orbital Sander for Finishing: Exploring the Possibilities
Orbital sanders are versatile tools that have gained popularity among woodworkers and DIY enthusiasts for their ability to smooth surfaces efficiently. But can you use an orbital sander for finishing? In this article, we will delve into the world of orbital sanders and discover their potential in the finishing process. Whether you are a professional woodworker or a hobbyist, this guide will provide you with essential insights to help you achieve the perfect finish.
The Benefits of Using an Orbital Sander for Finishing
Using an orbital sander for finishing offers several advantages that make it a viable option for both professionals and beginners.
1. Quick and Efficient
Orbital sanders utilize a circular sanding motion combined with random orbital movements, resulting in fast and efficient sanding. The motion of the sander helps to prevent swirl marks, ensuring a smooth and even finish. This makes them an excellent choice for large projects or surfaces that require extensive sanding.
2. Versatile Sanding Patterns
Orbital sanders come with interchangeable sanding pads, allowing you to choose from various grits and patterns. This versatility enables you to achieve different finishes depending on the desired effect. Whether it’s a fine, satin-smooth finish or a slightly rougher texture for a distressed look, an orbital sander can handle it all.
3. Dust Collection Capabilities
Many modern orbital sanders come with built-in dust collection systems or the option to attach a vacuum for efficient dust control. This not only keeps your workspace clean but also improves visibility and prevents particles from settling on the surface, ensuring a flawless finish.
4. Ease of Use
Orbital sanders are generally easy to handle and operate, making them suitable for beginners and experienced woodworkers alike. The ergonomic design, lightweight construction, and user-friendly controls make sanding more comfortable and less fatiguing, even during long sessions.
Choosing the Right Orbital Sander for Finishing
Not all orbital sanders are created equal, and selecting the right one for finishing depends on various factors. Below are some key considerations to keep in mind when choosing an orbital sander for finishing projects.
1. Variable Speed Control
Look for an orbital sander with variable speed control, as different finishes may require different sanding speeds. Being able to adjust the speed allows for greater control and precision, ensuring you achieve the desired outcome.
2. Size and Power
Consider the size and power of the orbital sander, as this affects its ability to tackle different types of projects. Larger sanders with higher power may be more suitable for heavy-duty sanding, while smaller ones are ideal for intricate and delicate work.
3. Dust Collection System
A reliable dust collection system is essential for a clean and healthy working environment. Look for sanders with effective dust collection mechanisms to minimize airborne particles and reduce cleanup time.
4. Ergonomics
Comfort and ease of use should not be overlooked. Opt for a sander that feels comfortable in your hand, has a well-designed grip, and features intuitive controls. This will enhance your overall sanding experience and reduce the risk of hand strain or fatigue.
Proper Techniques for Finishing with an Orbital Sander
To achieve flawless finishes with an orbital sander, it is crucial to follow proper techniques. Here are some tips to help you get the best results.
1. Start with the Right Grit
Begin sanding with a coarse grit sandpaper and gradually work your way up to finer grits. This helps remove imperfections and ensures a smoother surface. Remember to clean the surface thoroughly between grit changes to prevent cross-contamination.
2. Use Proper Pressure
Apply even and consistent pressure when sanding to avoid uneven surfaces or dips. Let the sander’s weight do most of the work, and avoid pressing too hard, as it can lead to over-sanding or damage the surface.
3. Maintain Movement
Keep the sander moving at all times to prevent swirl marks or uneven sanding. Avoid lingering in one spot for too long, as this can cause indentation or sanding through the material.
4. Sand in the Direction of the Grain
Always sand in the direction of the wood grain to achieve the best results. Sanding against the grain can create scratches and ruin the natural beauty of the wood.
5. Finish with Fine Grits
As you approach the final stages of finishing, switch to finer grit sandpapers for a smooth and polished surface. This will help remove any remaining imperfections and leave you with a professional-looking finish.
Common Mistakes to Avoid
When using an orbital sander for finishing, it’s essential to be aware of common mistakes to avoid compromising the final outcome. Here are some pitfalls to watch out for:
1. Using the Wrong Grit
Using an incorrect grit sandpaper can result in an uneven or rough finish. Make sure to choose the appropriate grit based on the surface and the desired outcome.
2. Applying Too Much Pressure
Excessive pressure can cause the sander to dig into the surface, leaving unsightly marks. Let the weight of the sander and gentle pressure be sufficient to remove material.
3. Neglecting Dust Control
Ignoring dust control measures can lead to a messy work area and poor visibility, making it difficult to assess the progress of your sanding. Always use dust collection systems or protective masks to keep the workspace clean and safe.
4. Neglecting to Sand between Coats
If you’re applying multiple coats of finish, it’s essential to sand between each coat. This helps create a smooth surface and improves adhesion for subsequent coats.
5. Rushing the Finishing Process
Finishing requires patience and attention to detail. Rushing through the sanding process or applying too many layers of finish without proper sanding can result in a subpar outcome. Take your time and follow the necessary steps for the best results.
Can You Use an Orbital Sander for Finishing Metal or Painted Surfaces?
While orbital sanders are predominantly used for wood surfaces, they can also be employed for finishing metal or painted surfaces. However, there are a few considerations to keep in mind.
1. Metal Surfaces
When using an orbital sander for finishing metal, it’s crucial to use aluminum oxide sandpaper, which is better suited for metal surfaces. Start with a coarse grit to remove any imperfections, and gradually move to finer grits for a smooth finish.
2. Painted Surfaces
For painted surfaces, it’s important to use sandpaper with a grit suitable for removing paint without damaging the underlying surface. Always exercise caution and proceed with a lighter touch to avoid stripping off too much paint or creating uneven textures.
Wrapping Up
In conclusion, an orbital sander can indeed be used for finishing, offering quick and efficient sanding, versatile sanding patterns, dust collection capabilities, and ease of use. When selecting an orbital sander for finishing projects, consider factors like variable speed control, size and power, dust collection system, and ergonomics. To achieve the best results, follow proper techniques such as starting with the right grit, using proper pressure, maintaining movement, sanding in the direction of the grain, and finishing with fine grits. Avoid common mistakes like using the wrong grit, applying too much pressure, neglecting dust control, skipping sanding between coats, and rushing the finishing process. Lastly, while orbital sanders can be used for finishing metal and painted surfaces, it is important to use the appropriate sandpaper and exercise caution to avoid damaging the material. With the right sander and proper techniques, you’ll be able to achieve professional-looking finishes that will enhance the beauty of your projects.
Key Takeaways: Can You Use an Orbital Sander for Finishing?
- An orbital sander can be used for finishing tasks like sanding wood, metal, or painted surfaces.
- It’s important to choose the right grit sandpaper for the desired finish – finer grits for a smooth finish and coarser grits for removing material.
- Using an orbital sander requires proper technique, such as moving in a circular or back-and-forth motion, to avoid sanding marks.
- For delicate surfaces, it’s recommended to start with a lighter touch and gradually increase pressure as needed.
- Regular maintenance, such as cleaning the sander and changing sandpaper frequently, helps ensure optimal performance.
Frequently Asked Questions
In this section, we will answer some common questions related to using an orbital sander for finishing. Whether you are a woodworking enthusiast or a DIY lover, these FAQs will help you understand the capabilities of an orbital sander for achieving a smooth and polished finish on different surfaces.
Q: What types of finishes can be achieved with an orbital sander?
An orbital sander is versatile and can help achieve various finishes, including smooth, satin, and semi-glossy finishes. It is especially effective in preparing surfaces for painting or staining. By using different grit sandpapers and applying the right technique, you can achieve the desired finish for your project.
However, it’s important to note that an orbital sander may not be suitable for achieving extremely high gloss finishes, as it may leave swirl marks or fine scratches. In such cases, other sanding and polishing techniques may be more suitable.
Q: Can I use an orbital sander for refinishing furniture?
Yes, you can definitely use an orbital sander for refinishing furniture. Whether you want to remove old paint, stain or varnish, or simply smooth out the surface, an orbital sander can be a valuable tool in your refinishing arsenal. It helps to efficiently strip away the old finish and prepare the surface for a fresh coat of paint or a new finish.
When refinishing furniture with an orbital sander, it’s important to choose the right grit sandpaper for the job. Start with a coarser grit to remove the existing finish, and gradually move to finer grits for a smoother result. Take your time, work in small sections, and be cautious not to over-sand or damage the wood.
Q: Can an orbital sander be used for finishing a wooden countertop?
Yes, an orbital sander can be used for finishing a wooden countertop. It is an excellent tool for smoothing out the surface and achieving a polished finish on wood. The key is to select the right sandpaper grit and follow proper sanding techniques.
Start with a lower grit sandpaper to remove any imperfections or rough areas on the countertop. Gradually move to higher grits to achieve a smoother and more refined surface. Remember to sand in the direction of the wood grain to avoid leaving visible scratches. Once the desired smoothness is achieved, you can finish the countertop with a suitable sealant or varnish to protect it from moisture and stains.
Q: Is it possible to use an orbital sander for finishing metal surfaces?
While an orbital sander is primarily designed for woodworking, it can also be used for finishing metal surfaces. However, it’s important to use the right type of sandpaper and exercise caution to avoid damaging the metal.
For metal finishing, it’s recommended to use sandpaper specifically designed for metalworking, such as aluminum oxide or silicon carbide sandpaper. Start with a lower grit to remove any rust, paint, or imperfections, and gradually move to higher grits for a smoother finish. Always use the orbital sander at a low speed and apply gentle pressure to avoid overheating or gouging the metal surface.
Q: Can I use an orbital sander for finishing delicate surfaces or small intricate areas?
An orbital sander may not be the ideal tool for finishing delicate surfaces or small intricate areas. Its circular sanding motion may be too aggressive and may accidentally remove more material than intended. In such cases, it’s best to opt for hand sanding or use smaller, more delicate sanding tools.
If you need to sand small intricate areas, consider using a detail sander or sanding blocks designed for such tasks. These tools provide better control and precision, allowing you to achieve the desired finish without risking damage to the delicate surface or intricate details.
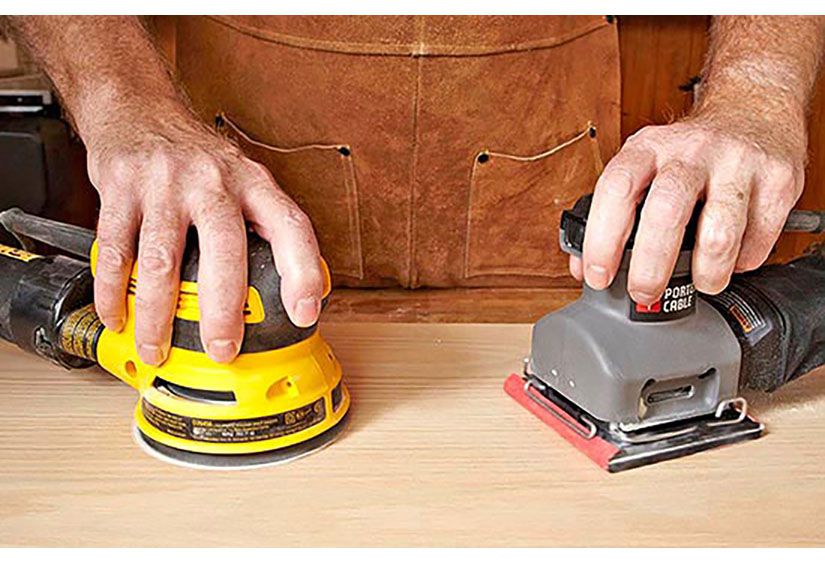
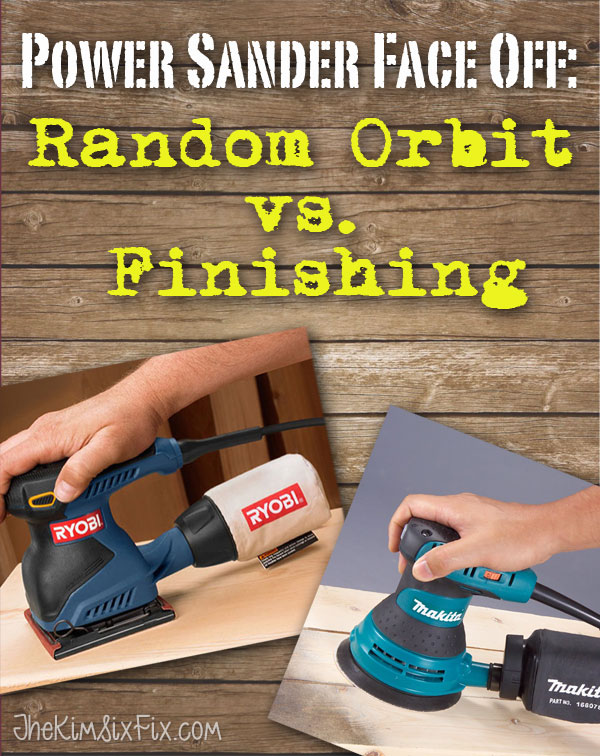
Random Orbital Sander vs. Finish Sander
Summary
An orbital sander can be used for finishing projects as it provides a smooth and even surface. However, it’s important to choose the right grit sandpaper and use proper technique to avoid damaging the wood. Orbital sanders are great for sanding large areas quickly but may not be suitable for intricate or delicate work. It’s also important to note that orbital sanders are best used for rough or medium finishing, and may not achieve the same level of smoothness as hand sanding or other tools.
In conclusion, an orbital sander can be a helpful tool for finishing, but it’s crucial to use it correctly and consider the specific needs of your project. Remember to start with a lower grit and gradually move to higher ones for optimal results.