
Can you use an orbital sander on drywall mud? If you’ve ever tackled a home improvement project involving drywall, you might have wondered about the best tools to achieve a smooth finish. Well, you’re in the right place! In this article, we’ll explore whether or not an orbital sander is suitable for sanding drywall mud.
When it comes to drywall mud, it’s essential to find the most effective way to achieve a polished and even surface. So, can an orbital sander do the job? We’ll dive into that question and provide you with all the information you need.
If you’re a DIY enthusiast or a budding handyman, you’ve probably heard about orbital sanders. But can these versatile power tools be used on drywall mud? Stick around as we uncover the answers and guide you through the world of orbital sanding and drywall finishing.
If you’re wondering whether you can use an orbital sander on drywall mud, the answer is yes! Using an orbital sander can be a great way to smooth out any rough patches or imperfections in your drywall mud. Just make sure to start with a lower grit sandpaper and gradually work your way up to a finer grit for optimal results. Remember to wear protective gear and thoroughly clean up any dust afterward.

Can You Use an Orbital Sander on Drywall Mud?
Drywall mud, also known as joint compound, is a crucial material used in the process of finishing drywall installations. Once the drywall panels are installed and seams are taped, a layer of drywall mud is applied to smooth out the surface and create a seamless finish. To achieve a polished and professional look, many DIY enthusiasts wonder if they can use an orbital sander on drywall mud. In this article, we will explore the feasibility of using an orbital sander for this purpose, along with tips and considerations to keep in mind.
Using an Orbital Sander on Drywall Mud: What You Need to Know
1. Sanding Drywall Mud with an Orbital Sander: The Basics
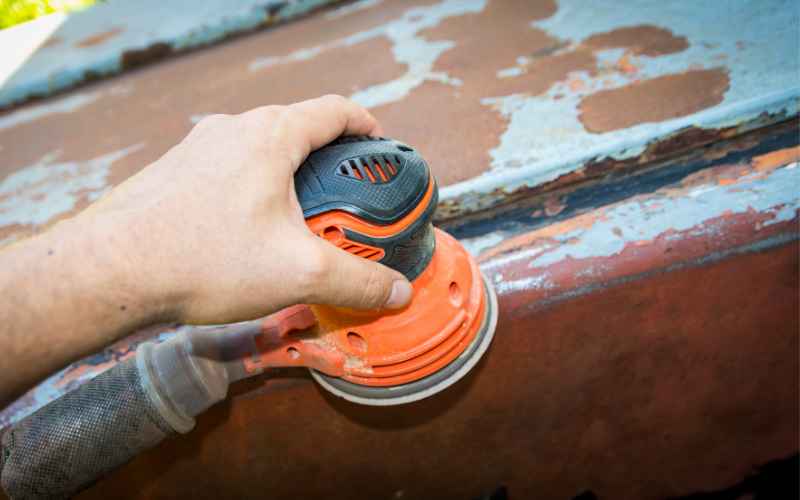
Orbital sanders are versatile tools commonly used for a wide range of sanding tasks. They feature a circular sanding pad that moves in a random orbital motion, minimizing swirl marks and maximizing efficiency. While orbital sanders are popular for refinishing furniture and woodworking projects, they can be used on drywall mud as well. However, there are a few important things to consider before you start sanding your drywall mud with an orbital sander.
Firstly, it is crucial to ensure that the drywall mud is completely dry before sanding. Wet or moist mud can clog the sanding pad and lead to uneven sanding. Allow ample time for the drywall mud to dry according to the manufacturer’s instructions.
Secondly, it is important to choose the appropriate sandpaper grit for the job. For initial sanding of the drywall mud, a coarse grit sandpaper such as 80 or 100 will help to remove excess material and smooth out any high spots. As you progress, you can switch to finer grits such as 120 or 150 to achieve a smoother finish.
Lastly, it is recommended to wear protective gear such as safety goggles and a dust mask while sanding drywall mud. The sanding process can generate a significant amount of dust, which can be harmful if inhaled.
2. Benefits of Using an Orbital Sander on Drywall Mud
Using an orbital sander for sanding drywall mud offers several benefits. Firstly, it can speed up the sanding process significantly. The random orbital motion of the sander allows for quick and efficient material removal, saving time and effort. Additionally, orbital sanders are known for producing a smooth and even finish. This is especially crucial when working with drywall mud, as achieving a seamless surface is essential for a professional-looking result.
Another advantage of using an orbital sander for drywall mud is its ability to minimize swirl marks. Unlike traditional sanders, which can leave circular marks on the surface, orbital sanders move in a random pattern, reducing the risk of visible sanding marks. This makes it easier to achieve a flawless surface that is ready for painting or wallpapering.
3. Tips for Using an Orbital Sander on Drywall Mud
To ensure the best results when using an orbital sander on drywall mud, consider the following tips:
– Start with a clean sanding pad: Regularly clean the sanding pad or replace it when it becomes clogged with drywall dust. A clean pad will ensure optimal performance and prevent uneven sanding.
– Work in a well-ventilated area: Sanding drywall mud generates a significant amount of dust. It is important to work in a well-ventilated area or use dust extraction equipment to minimize the inhalation of dust particles.
– Check for imperfections: Before finishing the sanding process, carefully inspect the surface for any imperfections or high spots. Sand them down until the surface is smooth and even.
Using an orbital sander on drywall mud can be an effective technique for achieving a smooth and flawless finish. However, it is important to follow proper safety precautions and select the appropriate sandpaper grit for the job. With the right approach and attention to detail, using an orbital sander can transform your drywall installation into a professional-looking masterpiece.
Maintaining Your Orbital Sander for Optimal Performance
In order to ensure the best performance and longevity of your orbital sander, it is important to properly maintain and care for the tool. Here are some key tips to keep in mind:
1. Regularly Clean the Sanding Pad
After each sanding session, it is important to clean the sanding pad to remove any built-up dust or debris. A clogged sanding pad can lead to less effective sanding and may even cause damage to the tool. Use a stiff brush or a cleaning tool specifically designed for sanding pads to remove the debris. Additionally, periodically inspect the sanding pad for any signs of wear or damage, and replace it if necessary.
2. Check and Replace Sandpaper as Needed
The sandpaper on an orbital sander can wear out over time, leading to less effective sanding. Check the sandpaper regularly for signs of wear and tear, such as fraying edges or a dull appearance. If the sandpaper is no longer providing the desired results, replace it with a fresh sheet. Using dull or worn-out sandpaper can not only compromise the finish of your project but also cause unnecessary strain on the motor of the sander.
3. Lubricate Moving Parts
To keep the orbital sander running smoothly, it is important to lubricate the moving parts regularly. Check the manufacturer’s instructions for the specific lubrication requirements of your sander. Typically, a few drops of lubricating oil on the bearings and other moving parts will help to prevent excess friction and keep the tool operating smoothly.
4. Store Properly
When not in use, it is essential to store your orbital sander in a clean and dry location. Avoid storing it in a dusty or humid environment, as this can lead to damage and affect the performance of the tool. Additionally, consider using a storage case or bag to protect the sander from impact and prevent dust from settling on it.
By following these maintenance tips, you can ensure that your orbital sander remains in optimal condition and delivers consistent performance for all your sanding projects.
Choosing the Right Sandpaper Grit for your Orbital Sander
When it comes to achieving the desired result in your sanding projects, selecting the right sandpaper grit is crucial. Different grits offer varying levels of abrasiveness, which determines the amount of material removed during sanding. Here are some factors to consider when choosing the appropriate sandpaper grit for your orbital sander:
1. Initial Sanding and Material Removal
If you are starting with a rough surface that requires significant material removal, it is best to begin with a coarse grit sandpaper. Coarse grits, such as 80 or 100, are more abrasive and can effectively remove excess material, level uneven surfaces, and smooth out rough spots. These grits are commonly used for initial sanding of drywall mud to create a smooth and even surface.
2. Intermediate Sanding and Smoothing
After the initial sanding, you will need to transition to finer grits to achieve a smoother finish. Medium grits, such as 120 or 150, are ideal for this stage of the sanding process. They help to further refine the surface, remove any remaining imperfections, and prepare it for final finishing or painting.
3. Fine Sanding and Surface Preparation
For the final sanding and surface preparation, it is recommended to use a fine grit sandpaper. Grits in the range of 180 to 220 are commonly used for this purpose. Fine grits help to achieve a smooth and polished finish, removing any last traces of imperfections and creating a surface that is ready for painting, staining, or applying a protective finish.
Remember, it is important to progress gradually from coarse to fine grits, allowing each grit to fully smooth out the surface before moving on to the next. Rushing through the sanding process or skipping grits can lead to an uneven surface and compromise the final result.
In conclusion, choosing the right sandpaper grit is essential for achieving the desired finish in your sanding projects. Consider the initial condition of the surface, the level of material removal required, and the final result you wish to achieve when selecting the appropriate grit for your orbital sander.
Troubleshooting Common Issues When Using an Orbital Sander on Drywall Mud
Using an orbital sander on drywall mud can be an effective way to achieve a smooth and even finish. However, like any other DIY project, issues may arise during the process. Here are some common problems that you may encounter when sanding drywall mud with an orbital sander, along with their potential solutions:
1. Clogging of the Sanding Pad
One of the most common issues when sanding drywall mud is the clogging of the sanding pad. If your sanding pad becomes clogged with drywall dust, it can lead to uneven sanding and may even damage the pad. To prevent clogging, ensure that the drywall mud is completely dry before sanding. Additionally, clean the sanding pad regularly during the sanding process using a stiff brush or a specialized cleaning tool.
2. Uneven Sanding
Uneven sanding can occur if the orbital sander is not held flat against the surface or if excessive pressure is applied. To achieve an even result, ensure that the sander is held parallel to the surface and is moved in a consistent motion. Avoid applying too much pressure, as this can cause the sandpaper to dig into the drywall mud, resulting in an uneven finish.
3. Swirl Marks
While orbital sanders are known for their ability to minimize swirl marks, they can still occur if the sandpaper grit is too coarse or if excessive pressure is applied. To avoid swirl marks, use a finer grit sandpaper and apply gentle, even pressure when sanding. Take your time and let the sander do the work, allowing the random orbital motion to prevent the formation of visible sanding marks.
4. Excessive Dust
Sanding drywall mud can generate a significant amount of dust, which can be harmful if inhaled and can also create a messy work environment. To minimize dust, work in a well-ventilated area or use dust extraction equipment. Wearing a dust mask and safety goggles is also recommended to protect yourself from inhaling the dust particles.
In cases where the troubleshooting tips provided do not resolve the issue, it may be necessary to consult a professional or seek advice from experienced DIY enthusiasts. Remember, patience and attention to detail are key when using an orbital sander on drywall mud. With the right approach and problem-solving skills, you can overcome any obstacles and achieve a smooth and professional-looking finish.
Key Takeaways: Can You Use an Orbital Sander on Drywall Mud?
- An orbital sander is not recommended for sanding drywall mud.
- Drywall mud is soft and can easily be damaged by the aggressive motion of an orbital sander.
- Using a hand sanding block or a drywall sander is a better option for smoothing out drywall mud.
- Always start with a coarse grit sandpaper and gradually move to finer grits for a smooth finish.
- Remember to wear a mask and protective goggles when sanding to avoid inhaling dust particles.
Frequently Asked Questions
Are you wondering whether you can use an orbital sander on drywall mud? Here are some common questions and answers to help you understand how to handle this task.
1. Can an orbital sander be used to sand drywall mud?
Yes, an orbital sander can be used to sand drywall mud. However, it’s important to use the right attachments and follow proper techniques to achieve the best results. Before starting, make sure the mud is completely dry. Using a fine-grit sanding pad or sandpaper, gently sand the drywall mud using smooth and even strokes. Be careful not to apply excessive pressure, as this may damage the underlying drywall or create uneven surfaces. Remember to wear protective gear, such as a dust mask and safety goggles, to protect yourself from dust particles.
After sanding, inspect the surface for any imperfections and repeat the process if necessary. Keep in mind that orbital sanders are best suited for large and flat surfaces, so if you need to sand corners or tight spaces, you may need to use a different tool, such as a sanding block or a manual sanding sponge.
2. What type of sandpaper is best for sanding drywall mud with an orbital sander?
When sanding drywall mud with an orbital sander, it’s recommended to use a fine-grit sandpaper, such as 120 or 150 grit. Fine-grit sandpaper allows for smooth and controlled sanding, minimizing the risk of damaging the drywall or creating visible scratches. Coarser sandpaper may remove too much material and leave behind marks that are difficult to blend and repair.
Additionally, it’s essential to choose sandpaper specifically designed for drywall sanding. Drywall sandpaper typically has a special coating that resists clogging, allowing for more efficient sanding. Always follow the manufacturer’s recommendations and refer to the grit guidelines on the packaging to ensure you select the appropriate sandpaper for your project.
3. Do I need to prepare the drywall mud before sanding it with an orbital sander?
Before sanding drywall mud with an orbital sander, it’s crucial to prepare the surface properly. Start by allowing the mud to fully dry according to the manufacturer’s instructions. Once it’s dry, use a wide putty knife or drywall trowel to gently scrape off any high spots or ridges in the mud. This preliminary step helps create a smoother surface before sanding. Remove any dust or debris from the surface by wiping it with a clean, dry cloth or using a vacuum cleaner.
It’s also good practice to apply a thin layer of primer or sealer over the drywall mud before sanding. This helps seal the surface and provide better adhesion for paint or other finishing materials. Allow the primer to dry completely before proceeding with the sanding process.
4. How can I minimize dust while sanding drywall mud with an orbital sander?
Sanding drywall mud can generate a significant amount of dust, which can be messy and unhealthy to breathe in. To minimize dust, there are a few steps you can take. Firstly, consider using an orbital sander with a built-in dust collection system or a vacuum attachment. These accessories help capture dust particles directly at the source, keeping the air cleaner and reducing cleanup time.
Secondly, work in a well-ventilated area or use a fan to create airflow. This can help disperse some of the dust and prevent it from settling in one spot. It’s also recommended to wear a dust mask and safety goggles to protect yourself from airborne particles. Once you’re done sanding, clean up any remaining dust using a damp cloth or vacuum cleaner with a brush attachment.
5. Can I use an orbital sander to remove texture from drywall mud?
An orbital sander is not the ideal tool for removing texture from drywall mud. While it can be used to smooth out minor texture imperfections, heavy texture removal requires a different approach. For significant texture removal, it’s best to use a specialized tool, such as a drywall texture scraper or a powered texture removal tool. These tools are designed to efficiently remove texture without damaging the underlying drywall surface. However, it’s important to note that heavy texture removal may require professional assistance depending on the complexity of the job and your level of experience.
If you’re unsure about the best way to remove texture from drywall mud, it’s always recommended to consult with a professional contractor or drywall expert who can provide guidance based on your specific project requirements.
Summary
Using an orbital sander on drywall mud can be risky and may cause damage. It’s best to use hand sanding tools or sanding sponges for a smoother finish. Remember to prime the drywall before painting to achieve professional results and avoid any potential problems.