
Are you wondering if you can use an orbital sander on walls? Well, let’s dig into that question. Using an orbital sander on walls can be a great way to achieve a smooth, professional finish. But before you break out that tool, let’s explore the ins and outs of this DIY technique.
Now, you might be thinking, “Can’t I just use an orbital sander for wood?” While it’s true that orbital sanders are commonly used for woodworking projects, they can also be effective for sanding walls. By using the right technique and the appropriate sandpaper grit, you can make quick work of removing imperfections and preparing your walls for a flawless paint job.
But hold on a second! Before you rush off to grab your orbital sander, there are a few things you should know. In the next section, we’ll discuss the key factors to consider before using an orbital sander on walls. So, let’s get started and discover the dos and don’ts of this handy tool on your walls!
- Prepare the wall by removing any nails or screws.
- Cover nearby furniture and floors with drop cloths.
- Attach a medium-grit sandpaper to the orbital sander.
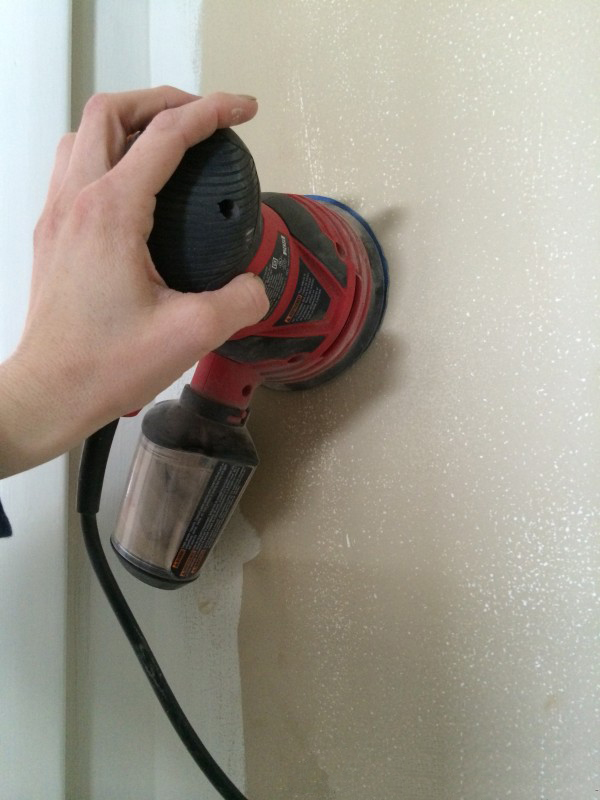
- Hold the sander against the wall and move it in circular motions.
- Check for smoothness and repeat if necessary.
By following these steps, you can achieve professional-looking results on your walls.
Can You Use an Orbital Sander on Walls? Exploring the Pros and Cons
When it comes to sanding walls, many people wonder if an orbital sander can get the job done effectively. While this versatile tool is commonly used for woodworking projects, it can also be used on walls with the right technique and attachments. In this article, we will delve into the world of orbital sanders and explore whether they are a suitable option for sanding walls. We will discuss the benefits, the potential drawbacks, and provide some useful tips to help you achieve a smooth and professional finish.
Benefits of Using an Orbital Sander on Walls
Using an orbital sander on walls offers several advantages. Firstly, these sanders are designed to provide a smooth and even sanding surface. Their circular motion and random orbital pattern help to reduce the risk of leaving visible sanding marks or swirls on the wall. This makes them especially well-suited for achieving a professional finish on painted or primed walls.
Secondly, orbital sanders are efficient and time-saving tools. They have a high removal rate, which means they can quickly and effectively remove old paint, varnish, or other coatings from your walls. This is particularly useful if you are planning to refinish your walls or remove imperfections before repainting.
Lastly, orbital sanders are relatively easy to use and control. They are designed to be user-friendly, with ergonomic handles and lightweight bodies. This allows you to work comfortably and maneuver the sander effortlessly on large wall surfaces without experiencing excessive fatigue.
Drawbacks of Using an Orbital Sander on Walls
While an orbital sander can be a great tool for sanding walls, it’s important to be aware of some potential drawbacks. One of the main challenges is that orbital sanders produce a significant amount of dust during operation. This can create a messy work environment, and if proper precautions are not taken, it can lead to health issues and damage to surrounding surfaces. Thus, it is essential to wear protective gear such as a dust mask and goggles, and to cover nearby furniture and floors to minimize the spread of dust.
Another potential drawback is that orbital sanders can be aggressive in their sanding action. If you are not careful and apply too much pressure, you run the risk of removing too much material or creating uneven surfaces. It’s crucial to use the appropriate grit sandpaper for the task at hand and to let the sander do the work without exerting excessive pressure.
Lastly, using an orbital sander on walls may not be suitable for certain situations. For instance, if you are dealing with delicate plaster walls or intricate architectural details, it’s recommended to opt for lighter sanding techniques or manual sanding methods to avoid causing any damage.
The Right Technique for Using an Orbital Sander on Walls
Using an orbital sander on walls requires a bit of finesse and technique. Follow these steps to achieve the best results:
- Clean the walls: Ensure that the walls are free from any dust, dirt, or debris before starting the sanding process. Use a damp cloth or sponge to wipe down the surface and allow it to dry completely.
- Choose the right sandpaper: Select the appropriate grit sandpaper for the task. Generally, a medium grit sandpaper (around 120 to 150) works well for removing paint or imperfections on walls.
- Sand in circular motions: Hold the orbital sander at a slight angle, and move it in circular motions over the wall surface. Avoid applying excessive pressure, as this can cause damage or uneven sanding.
- Change direction: After sanding in circular motions, switch to sanding in a straight back-and-forth motion to ensure an even finish and to remove any circular marks left by the orbital motion.
- Check the surface: Periodically check the surface of the wall to ensure that you are achieving the desired level of smoothness. If necessary, repeat the sanding process until the surface is even and free from imperfections.
- Clean up: Once you have finished sanding, clean up the dust and debris using a vacuum cleaner or a damp cloth. Dispose of the waste material properly and remove any protective coverings from furniture and floors.
Additional Tips for Using an Orbital Sander on Walls
Here are a few additional tips to help you achieve the best results when using an orbital sander on walls:
- Start with a lower grit sandpaper and gradually work your way up to a higher grit for a smoother finish.
- Be mindful of the sanding speed. Moving the sander too quickly can result in uneven sanding, while moving too slowly can cause excessive material removal.
- Pay attention to the edges and corners of the walls. Use a smaller sanding attachment or sandpaper to reach these areas effectively.
- Take breaks if necessary to avoid fatigue and ensure that you are maintaining a consistent sanding technique.
- Consider using a dust collection system or a vacuum attachment to minimize dust and keep your work area clean.
Can You Use an Orbital Sander on Walls? The Verdict
In conclusion, using an orbital sander on walls can be an effective way to achieve a smooth and professional finish. However, it is important to take precautions to minimize dust, use the right technique, and be mindful of the potential drawbacks. By following the proper steps, selecting the correct sandpaper, and practicing good technique, you can achieve excellent results and transform your walls with ease. So, the next time you embark on a wall refinishing or painting project, don’t hesitate to try out an orbital sander and see the difference it can make!
Key Takeaways: Can You Use an Orbital Sander on Walls?
- Using an orbital sander on walls is not recommended as it can cause damage to the surface.
- Orbital sanders are more suitable for woodworking projects and flat surfaces.
- For walls, it is best to use a pole sander or sanding block to ensure even and controlled sanding.
- An orbital sander may remove too much material and create an uneven surface on walls.
- Always follow manufacturer instructions and use the appropriate tools for the task at hand.
Frequently Asked Questions
When it comes to sanding walls, the orbital sander can be a handy tool. Take a look at the following questions to learn more about using an orbital sander on walls.
1. How does an orbital sander work on walls?
An orbital sander is a power tool that moves the sanding pad in a circular motion. It’s designed to remove material evenly as it sands, leaving a smooth finish. When using an orbital sander on walls, you simply move the sander in a back-and-forth or circular motion to sand the surface.
Unlike other types of sanders, the orbital sander creates less vibration, reducing the risk of leaving swirl marks on the wall. It’s a great tool for removing paint, smoothing out rough surfaces, and preparing the wall for painting or varnishing.
2. Can I use an orbital sander to remove wallpaper?
Yes, an orbital sander can be used to remove wallpaper from walls. Before sanding, it’s important to score or perforate the wallpaper to allow the sander to penetrate and remove the adhesive beneath. Once the wallpaper is scored, you can use the orbital sander with a sanding pad to gently sand the surface, removing any residual wallpaper and adhesive.
Keep in mind that sanding can create dust, so it’s important to take proper precautions such as wearing a mask and covering nearby furniture or surfaces to prevent any damage or mess. Additionally, make sure to use the appropriate sandpaper grit for the job to avoid damaging the wall surface.
3. Is it safe to use an orbital sander on plaster walls?
Yes, an orbital sander can be safely used on plaster walls. However, it’s important to be cautious and take a few precautions to avoid unnecessary damage. Before sanding, inspect the plaster walls for any cracks or loose areas. If there are significant cracks or areas with loose plaster, it’s best to repair those sections before sanding.
When sanding plaster walls, it’s recommended to use a fine-grit sandpaper to avoid removing too much material and causing further damage. Start with a light touch and gradually increase pressure as needed. Always wear protective goggles to shield your eyes from any dust or debris that may be generated during the sanding process.
4. Can I use an orbital sander for drywall?
An orbital sander can be used for drywall, but it’s important to use the right technique and take certain precautions. Start by applying a coat of joint compound or spackle over any dents, holes, or imperfections in the drywall. Once it’s dry, you can use the orbital sander with a fine-grit sandpaper to smooth out the surface.
When sanding drywall, be careful not to press too hard or sand in one spot for too long, as it can create uneven surfaces. Keep the sander moving in a back-and-forth or circular motion to ensure a consistent sanding pattern. Also, remember to wear a mask and safety goggles to protect yourself from dust and debris.
5. Are there any tips for using an orbital sander on walls?
Here are a few tips to help you when using an orbital sander on walls:
– Start with a lower grit sandpaper if you need to remove old paint or rough patches and gradually work your way up to a finer grit for a smoother finish.
– Keep the sander moving at all times to avoid creating uneven surfaces or gouges in the wall.
– Use light to medium pressure on the sander to prevent excessive material removal.
– After sanding, make sure to clean up any dust or debris before proceeding with painting or other finishing tasks.
By following these tips, you can achieve a professional-looking finish when using an orbital sander on walls.

Summary
You can use an orbital sander on walls, but it may not always be the best choice.
Orbital sanders can smooth out rough surfaces and remove old paint, making them suitable for walls. However, they can sometimes leave swirl marks, so it’s important to use the right technique and sandpaper grit. It’s also important to protect yourself with safety gear and prepare the area properly before sanding. Overall, an orbital sander can be a useful tool for wall sanding, but be cautious and take necessary precautions.