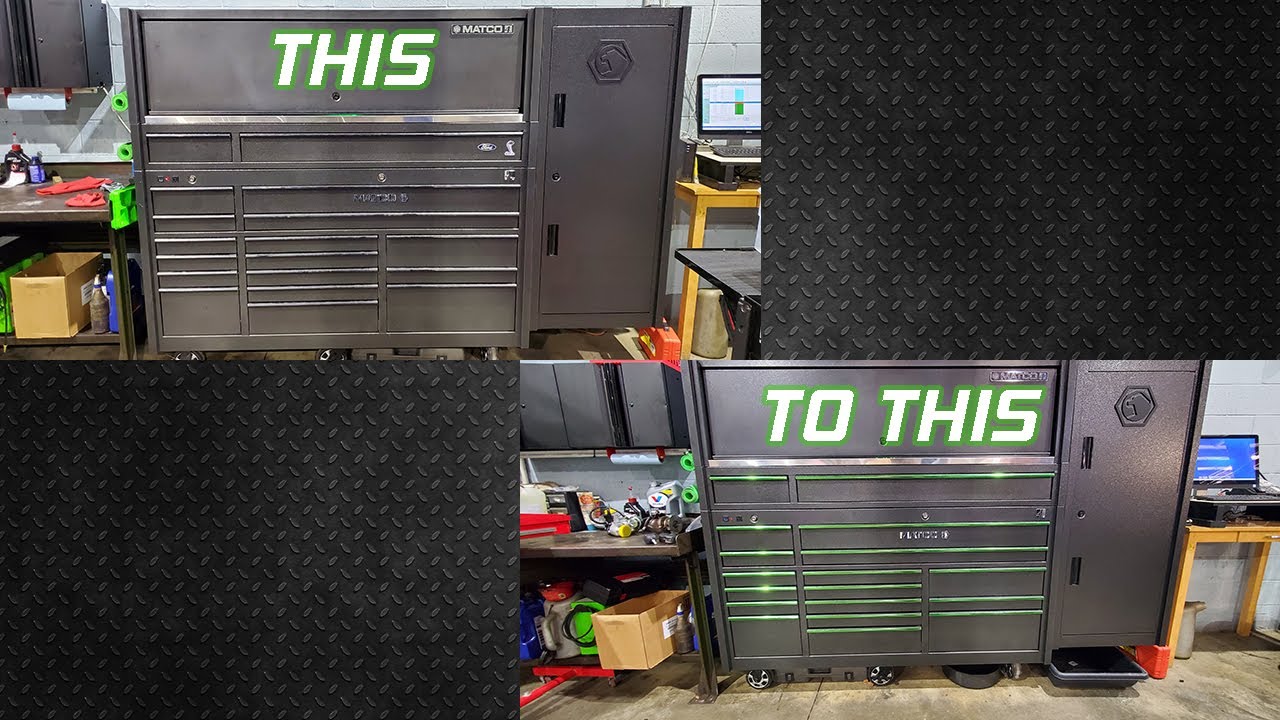
Can you vinyl wrap a tool box? If you’re someone who loves to personalize their belongings and make them stand out, you’ve come to the right place! Adding a vinyl wrap to your tool box is a fantastic way to transform its appearance and make it truly one-of-a-kind. Whether you want a sleek and professional look or a fun and vibrant design, vinyl wrapping offers endless possibilities.
Now, you might be wondering, what exactly is vinyl wrapping? Well, it’s a process where a thin, adhesive-backed vinyl film is applied to the surface of an object, such as a tool box. The vinyl can be cut into different shapes, patterns, or images, allowing you to create a customized look that suits your style.
Vinyl wrapping your tool box comes with numerous benefits. Not only does it protect the surface from scratches, dents, and fading, but it also adds a layer of durability and can be easily removed or replaced if you ever change your mind. Plus, it’s a cost-effective alternative to repainting, providing you with a new and refreshed appearance without breaking the bank.
So, whether you’re a professional tradesperson looking to showcase your brand or a DIY enthusiast who wants to add some personality to their workspace, vinyl wrapping is a fantastic option for transforming your tool box. Let your creativity run wild, and get ready to make a statement with a vinyl-wrapped tool box that reflects your unique style!

Can You Vinyl Wrap a Tool Box?
Tool boxes are essential for keeping your tools organized and protected. But what if you want to customize your tool box and give it a unique look? Vinyl wrapping is a popular trend that allows you to apply a thin, adhesive vinyl film to a variety of surfaces, including tool boxes. In this article, we will explore the process of vinyl wrapping a tool box, the benefits it offers, and some tips to achieve the best results.
The Basics of Vinyl Wrapping
Vinyl wrapping involves applying a thin layer of vinyl film to a surface, such as a tool box, to change its appearance. The process typically involves the following steps:
- Clean and prepare the surface: Before applying the vinyl, make sure the tool box is clean and free of any dust, dirt, or grease. Use soap and water or a suitable cleaning solution to remove any contaminants.
- Measure and cut the vinyl: Measure the dimensions of your tool box and cut the vinyl film accordingly, leaving a few inches of extra material on each side to ensure full coverage.
- Apply the vinyl: Carefully peel off the backing of the vinyl film and start applying it to the tool box, starting from one edge and working your way across. Use a squeegee or a soft cloth to smooth out any air bubbles or wrinkles.
- Trim and finish: Once the vinyl is applied, trim off the excess material using a sharp knife or a vinyl cutter. Pay attention to corners and edges to ensure a clean finish.
Vinyl wrapping can be a DIY project, but it requires precision and attention to detail. If you’re not confident in your skills, it’s best to seek professional help to achieve the desired results.
Benefits of Vinyl Wrapping a Tool Box
Vinyl wrapping a tool box offers several benefits. Here are a few:
1. Protection:
Vinyl wrap acts as a protective layer, shielding your tool box from scratches, dents, and other forms of damage. It can also protect against UV rays and moisture, preventing premature deterioration.
2. Customization:
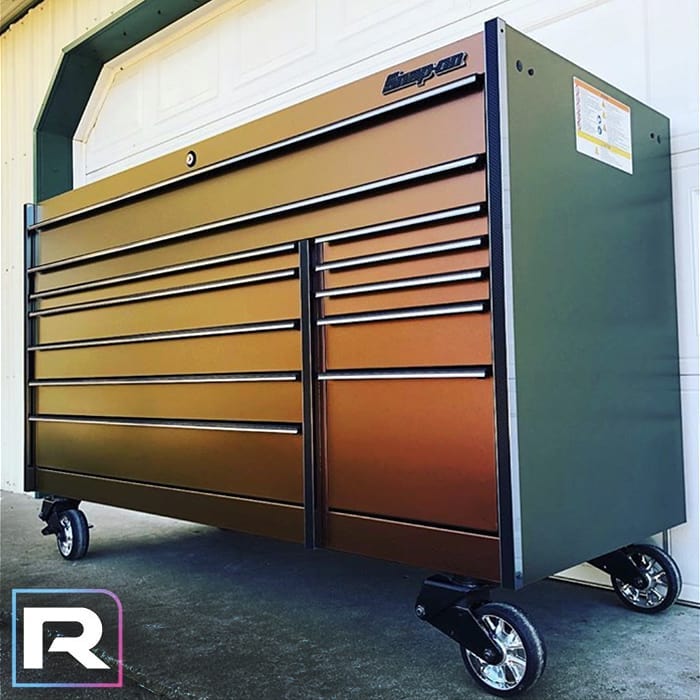
With vinyl wrapping, you have countless design options to choose from. Whether you want a sleek and modern look or a bold and vibrant design, vinyl allows you to completely transform the appearance of your tool box to reflect your personal style.
3. Easy Maintenance:
Vinyl wraps are easy to clean and maintain. Simply wipe the surface with a soft cloth and mild cleaning solution to keep it looking fresh and new. Unlike paint, vinyl does not require regular touch-ups or repainting.
Tips for Vinyl Wrapping a Tool Box
To ensure a successful vinyl wrapping project for your tool box, keep the following tips in mind:
1. Surface Preparation:
Thoroughly clean the tool box surface before applying the vinyl. Any dirt or debris left behind can affect the adhesive’s ability to bond properly.
2. Use Heat for Stretching:
If you encounter areas that are difficult to wrap, such as corners or curved surfaces, gently heat the vinyl with a heat gun or hairdryer. This will make it more pliable and easier to stretch and apply.
3. Take Your Time:
Vinyl wrapping requires patience and attention to detail. Take your time during the application process to ensure a smooth and bubble-free finish. Rushing the process can lead to mistakes and unsatisfactory results.
Remember, vinyl wrapping a tool box allows you to unleash your creativity and personalize your toolbox. Whether you’re a professional tradesperson or a DIY enthusiast, vinyl wrapping offers a unique and stylish way to showcase your tools and stand out from the crowd.
Common Mistakes to Avoid When Vinyl Wrapping a Tool Box
While vinyl wrapping a tool box may seem straightforward, there are some common mistakes that can affect the final result. Here are a few mistakes to avoid:
1. Lack of Surface Preparation:
Skipping the crucial step of cleaning and preparing the tool box surface can compromise the adhesive’s ability to bond properly. Make sure to thoroughly clean and dry the surface before applying the vinyl.
2. Applying Too Much Heat:
While heat can help make the vinyl more pliable, applying too much heat can cause the vinyl to stretch excessively, leading to wrinkles or an uneven finish. Use heat sparingly and with caution.
3. Rushing the Application Process:
Vinyl wrapping requires precision and attention to detail. Rushing through the process can lead to mistakes, air bubbles, and misalignment. Take your time and apply the vinyl carefully for the best results.
By avoiding these common mistakes and following the proper techniques, you can achieve a professional-looking vinyl-wrapped tool box that reflects your personal style and protects your tools.
Can You Vinyl Wrap a Tool Box?
Yes, you can vinyl wrap a tool box to give it a fresh new look.
- Vinyl wrapping can protect your tool box from scratches and damage.
- You can choose from a wide variety of vinyl wrap designs and colors to make your tool box stand out.
- Cleaning and preparing the surface of the tool box is important before applying the vinyl wrap.
- Applying the vinyl wrap requires patience and attention to detail to ensure a smooth and bubble-free finish.
- Vinyl wrapping a tool box is a fun DIY project that can be easily done with some basic tools and materials.
Frequently Asked Questions
Are you wondering about vinyl wrapping your tool box? Here are some answers to common questions.
1. How long does a vinyl wrap on a tool box typically last?
A vinyl wrap on a tool box can last for several years if properly maintained. The lifespan of the wrap depends on various factors such as the quality of the vinyl material, the skill of the installation, and the level of exposure to external elements.
To ensure the longevity of your vinyl wrap, it’s essential to clean it regularly and avoid using harsh chemicals that could damage the material. Additionally, protecting the wrap from direct sunlight and extreme temperatures can help extend its lifespan. With proper care, a vinyl wrap on a tool box can maintain its appearance and functionality for a significant amount of time.
2. Can I apply a vinyl wrap on a tool box by myself, or do I need professional help?
While it is possible to apply a vinyl wrap on a tool box by yourself, it can be a tricky and time-consuming process. Achieving a seamless and bubble-free application requires skill and experience. If you have never attempted a vinyl wrap before, it may be advisable to seek professional help.
Professional installers have the expertise and tools needed to ensure a smooth and precise application. They can also provide advice on the best vinyl material to use and suggest any additional modifications or preparations necessary for a successful wrap. Investing in professional installation can save you time and frustration, as well as ensure a high-quality result.
3. Can a vinyl wrap on a tool box be removed without damaging the surface?
Yes, a vinyl wrap on a tool box can usually be removed without causing significant damage to the surface underneath. However, the ease of removal depends on various factors such as the quality of the adhesive used and the length of time the wrap has been applied.
To remove a vinyl wrap, it is recommended to use heat, like a heat gun or a hairdryer, to soften the adhesive. This makes the removal process easier and reduces the likelihood of any adhesive residue being left behind. It is essential to take your time and be gentle during the removal to avoid damaging the tool box’s surface. If you are uncertain or worried about removing the wrap yourself, it is best to consult a professional.
4. Can a vinyl wrap on a tool box be customized with graphics or designs?
Absolutely! Vinyl wraps allow for endless customization options when it comes to tool boxes. Whether you want to showcase your company logo, add a unique design, or personalize it with your favorite graphics, vinyl wraps can make it happen.
Professional vinyl wrap installers can work with you to design and create a customized wrap that matches your vision. They have access to a wide range of colors, patterns, and finishes, allowing you to achieve a truly unique look for your tool box. With a vinyl wrap, you can transform your plain tool box into a personalized and visually striking piece.
5. Can a vinyl wrap on a tool box protect it from scratches and dents?
Yes, a vinyl wrap can provide an additional layer of protection to your tool box, minimizing the risk of scratches and dents. The vinyl material acts as a barrier, shielding the underlying surface from everyday wear and tear.
Moreover, some vinyl options, such as those with textured finishes, offer an extra level of durability, making them more resistant to scratches caused by accidental impacts. However, it’s important to remember that a vinyl wrap does not guarantee complete protection against severe damage. It serves as a preventative measure but cannot fully safeguard your tool box from heavy impacts or other extreme conditions.
How To: Vinyl Wrap Your Toolbox with Indestructible Vinyl
Summary
You can definitely vinyl wrap your toolbox to give it a cool and personalized look. Vinyl wrapping is a fun way to add some style and protection to your toolbox.
It’s important to make sure the surface is clean and dry before applying the vinyl. Take your time and be careful when cutting and smoothing out the vinyl to avoid any wrinkles or air bubbles. Vinyl wrapping is a fairly simple and affordable way to give your toolbox a fresh new look. So go ahead and get creative with your toolbox!