
Picture this: you’ve decided to take on a DIY tiling project, and you’re faced with a question – do I need to prime plywood before tiling? Well, my friend, you’ve come to the right place! In this handy guide, we’ll explore the importance of priming plywood before tiling and why it can make all the difference in the longevity and performance of your beautiful tiles. So let’s dive in and get those tiles ready to shine!
Ah, the sweet allure of fresh tiles and a new look for your space. It’s a project that can truly transform any room, but before you start slapping those tiles onto plywood, there’s something you should know. Priming plywood before tiling is like giving your tiles a solid foundation to stand on, one that will ensure their beauty lasts for years to come. Trust me, you don’t want to skip this step!
So why is priming so important, you ask? Well, the thing about plywood is that it can be a bit tricky when it comes to absorbing moisture. And guess what? Moisture and tiles don’t make the best of friends. By priming the plywood, you create a barrier that protects the tiles from any potential moisture damage that could arise from the plywood. It’s like a shield, safeguarding your tiles and ensuring they stay in place and look stunning for years to come.
In a nutshell, priming plywood before tiling is a crucial step that sets the stage for a successful tile installation. It’s like giving your tiles a head start in the endurance race against time. So, my DIY enthusiast, remember this valuable advice as you embark on your tiling journey: take the time to prime that plywood, and your tiles will thank you with a long-lasting shine. Let’s get tiling!
- Clean the plywood surface and ensure it is dry.
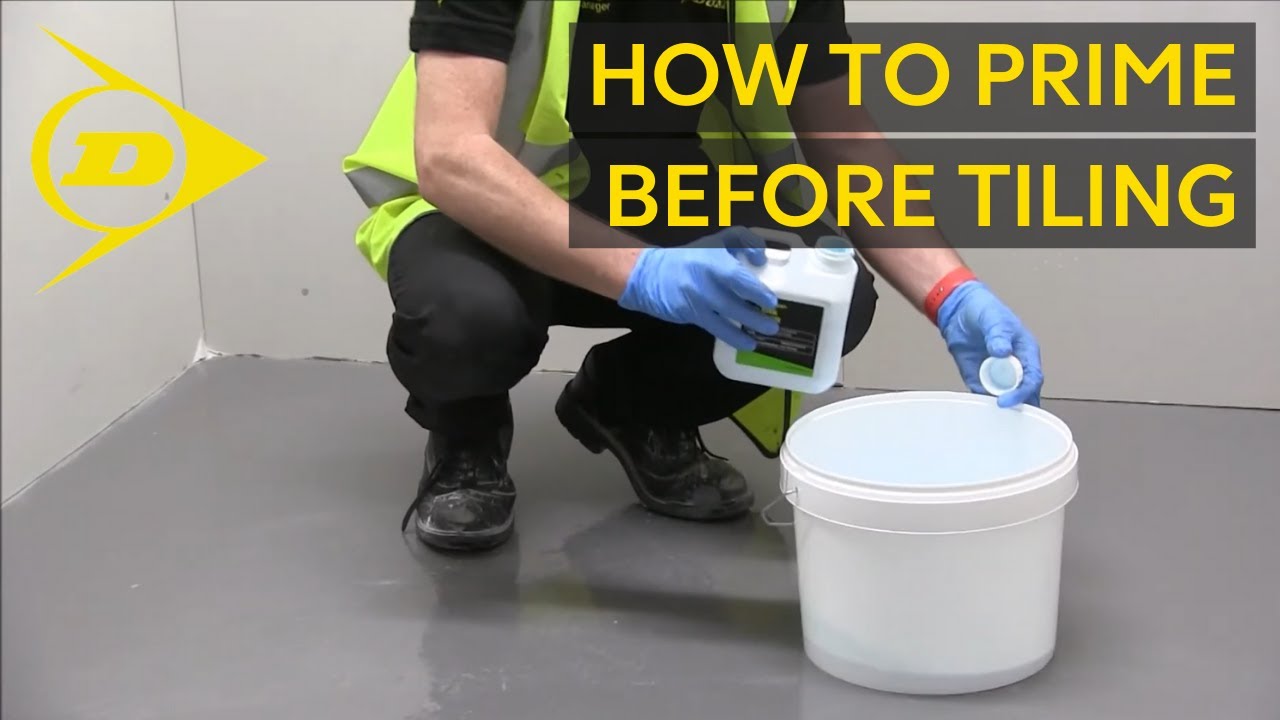
- Apply a coat of primer using a paintbrush or roller.
- Allow the primer to dry completely.
- Inspect the primed surface for any imperfections and sand if necessary.
- Your plywood is now ready for tiling!
Do I Need to Prime Plywood Before Tiling?
Why Priming Plywood Before Tiling is Important
Priming plywood before tiling is crucial for ensuring the success and longevity of your tile installation. Plywood is a porous material that can absorb moisture, expand, and warp. Without proper priming, the plywood can cause various issues, such as tile cracking, adhesive failure, and mold growth. Priming creates a barrier between the plywood and the tile adhesive, preventing moisture absorption and providing a strong bond.
When you prime plywood, you seal the surface, making it less porous. This allows the tile adhesive to adhere better and prevents it from being absorbed too quickly. It also helps to avoid any chemical reactions between the adhesive and the wood, which can compromise the bond. Priming also smooths out the surface of the plywood, reducing any unevenness or imperfections that could affect the tile installation.
Another important reason for priming plywood is to improve the overall durability and stability of the tile installation. By sealing the plywood, you protect it from moisture damage and minimize the risk of warping or rotting. Additionally, priming can enhance the overall appearance of the finished tile by preventing any discoloration or staining that may occur if the plywood is left unprimed.
How to Prime Plywood for Tiling
Priming plywood before tiling can be done in a few simple steps. Here’s a step-by-step guide:
- Start by ensuring that the plywood is clean, dry, and free from any dust, debris, or oil.
- Using a sanding block or sandpaper, lightly sand the plywood surface to remove any rough spots or imperfections.
- Wipe down the plywood surface with a damp cloth to remove any sanding dust.
- Choose a suitable primer specifically designed for plywood and tile adhesion. You can consult with your local hardware store for recommendations.
- Using a paintbrush or roller, apply a thin and even coat of primer to the entire plywood surface. Make sure to cover all areas, including the edges and corners.
- Allow the primer to dry according to the manufacturer’s instructions. This typically takes around 24 hours.
- Once the primer is completely dry, you can proceed with tiling your plywood surface. Apply the tile adhesive directly onto the primed plywood and press the tiles firmly into place.
- Follow the recommended drying and grouting time for the tiles before using the tiled area.
The Benefits of Priming Plywood Before Tiling
Priming plywood before tiling offers several benefits that contribute to a successful and long-lasting tile installation:
- Improved adhesion: Priming creates a stronger bond between the plywood and the tile adhesive, reducing the risk of tile failure.
- Moisture resistance: Priming seals the porous surface of plywood, preventing moisture from infiltrating and causing damage.
- Prevents mold and mildew growth: By minimizing the absorption of moisture, priming helps to prevent mold and mildew growth, which can be detrimental to the structure of your installation.
- Enhanced durability: Priming reinforces the structural integrity of the plywood, making it less prone to warping, rotting, or deterioration over time.
- Improved aesthetics: Priming prevents any discoloration or staining of the plywood, ensuring a clean and professional-looking tile installation.
Priming vs. Not Priming: The Consequences
While it may be tempting to skip the step of priming plywood before tiling, it can lead to various negative consequences. Here are some potential issues that can arise if you choose not to prime:
Tile Failure
Without proper priming, the tile adhesive might not adhere properly to the plywood. This can result in the tiles coming loose, cracking, or shifting over time. Additionally, if the plywood absorbs moisture from the adhesive, it can weaken the bond and cause the tiles to fail.
Moisture Damage
Plywood is porous and can easily absorb moisture. Without primer, the plywood will quickly absorb the moisture from the tile adhesive, potentially leading to swelling, warping, and mold growth. Moisture damage can compromise the structural integrity of the plywood and the tiles.
Discoloration and Staining
If the plywood is left unprimed, there is a higher chance that it will discolor or stain due to chemical reactions with the adhesive or moisture absorption. This can detract from the overall appearance of the tile installation and be difficult to rectify.
Shortened Lifespan
By skipping the step of priming, you risk compromising the durability and lifespan of your tile installation. Unprimed plywood is more susceptible to damage, leading to potential repairs or replacements in the future.
Common Priming Mistakes to Avoid
When priming plywood before tiling, it’s important to avoid common mistakes that can affect the quality and success of your tile installation. Here are a few mistakes to watch out for:
Conclusion
Priming plywood before tiling is a crucial step for ensuring a successful and long-lasting tile installation. It provides numerous benefits, including improved adhesion, moisture resistance, prevention of mold growth, enhanced durability, and better aesthetics. By following the proper priming process and avoiding common mistakes, you can achieve a professional-looking tile installation that will stand the test of time.
Key Takeaways: Do I Need to Prime Plywood Before Tiling?
- Priming plywood before tiling is crucial for a strong and durable tile installation.
- Primer helps the tiles adhere better to the plywood surface, preventing them from coming loose over time.
- Priming also helps to seal the plywood, preventing moisture from seeping through and causing damage.
- Using a quality primer specifically designed for plywood is important for the best results.
- Don’t forget to clean and sand the plywood surface before priming to ensure proper adhesion.
Frequently Asked Questions
When it comes to tiling over plywood, it’s important to ensure a proper surface for the best results. Here are some common questions related to priming plywood before tiling.
1. Can I tile directly onto plywood without priming it?
While it might seem tempting to skip the priming step, it’s generally not recommended to tile directly onto plywood. Priming helps to create a barrier and improve the bond between the plywood and the tile adhesive. Without prime, the plywood may absorb moisture from the adhesive, leading to weakened adhesion and potential future issues.
Priming the plywood helps to seal the surface and prevent moisture from penetrating it. It also provides a better grip for the tile adhesive, resulting in a stronger bond and overall stability for the tiled surface. So, it’s best not to skip the priming step for optimal results.
2. What type of primer should I use on plywood before tiling?
When selecting a primer for plywood before tiling, it’s crucial to choose one that is specifically designed for this purpose. Look for a high-quality latex-based or acrylic primer that is suitable for both wood and tile applications. These types of primers are often formulated to provide strong adhesion to plywood surfaces and create a good bond with the tile adhesive.
Additionally, consider using a primer that also offers moisture resistance properties, especially if the tiled area will be exposed to moisture frequently, such as in bathrooms or kitchens. Always follow the manufacturer’s instructions regarding application and drying times for the chosen primer.
3. Do I need to sand the plywood before priming it for tiling?
Sanding the plywood surface before priming is generally recommended to ensure proper adhesion. Sanding helps to remove any rough or uneven areas, allowing the primer to penetrate and adhere better to the wood. It also helps to create a smoother surface for better tile installation.
Before sanding, make sure to clean the surface thoroughly to remove any dust or debris. Use fine-grit sandpaper, and sand in the direction of the wood grain. After sanding, wipe away any residual dust before applying the primer. This preparation step will help to ensure a more successful tiling project.
4. How many coats of primer should I apply on plywood before tiling?
Typically, one coat of primer is sufficient for plywood before tiling. However, the number of coats may depend on the specific primer product you are using. Some manufacturers may recommend applying multiple coats, especially if the plywood surface is highly porous.
Always refer to the instructions provided by the primer manufacturer for the recommended number of coats. Applying too many coats can lead to an overly thick layer, which may affect the bond with the tile adhesive. Conversely, applying too few coats may result in insufficient sealing and adhesion. As with any coating, follow the manufacturer’s guidelines for the best outcome.
5. Can I tile directly onto primed plywood after it dries?
Yes, once the primer has thoroughly dried according to the manufacturer’s instructions, you can proceed with tiling over the primed plywood surface. Make sure the primer is fully dry and no longer tacky to the touch before applying the tile adhesive.
Before tiling, it’s advisable to lightly sand the primed surface to remove any imperfections or raised areas that may have occurred during the drying process. This ensures a smoother and more even substrate for tile installation. Once the surface is prepped, you can start tiling as per the standard tiling practices and recommendations.

Summary
When it comes to tiling on plywood, priming is an essential step to ensure success. By applying a primer, you create a protective barrier that helps the tile adhesive bond securely to the surface. This prevents the tiles from loosening or popping off over time. Remember to choose a primer specifically designed for plywood to get the best results.
In addition to priming, it’s crucial to properly prepare the plywood by cleaning it thoroughly and removing any debris. This will help the primer and the adhesive to adhere better. Taking these precautions will ensure that your tiles stay in place and your tiling project lasts for a long time. So, don’t skip the priming step when tiling on plywood!