
Are you interested in woodworking? Wondering if you need a jointer for your projects? Well, you’ve come to the right place! Woodworking can be a rewarding and enjoyable hobby, and having the right tools is essential. In this article, we’ll explore the question, “Do you need a jointer for woodworking?” and help you understand its significance in the craft.
Woodworking requires precision and attention to detail, and a jointer is a tool that can greatly assist in achieving those perfect edges. But is it a must-have? That’s a question many beginners ask. We’ll delve into the purpose and benefits of a jointer to help you make an informed decision.
So, if you’re curious about whether a jointer is essential for your woodworking endeavors or if you can get by without one, keep reading. We’ll provide you with the information you need to determine if investing in a jointer is right for you. Let’s get started!
Do You Need a Jointer for Woodworking?
Woodworking is a craft that requires the right tools and equipment to achieve precise and polished results. One common question among woodworkers is whether a jointer is necessary for their projects. A jointer is a powerful tool that helps create flat and smooth surfaces on wood, making it an invaluable asset in many woodworking shops. In this article, we will explore the benefits of using a jointer, its alternatives, and useful tips for woodworking enthusiasts.
Benefits of Using a Jointer
A jointer offers several advantages that make it an essential tool for serious woodworkers.
1. Achieving Flat and Smooth Surfaces
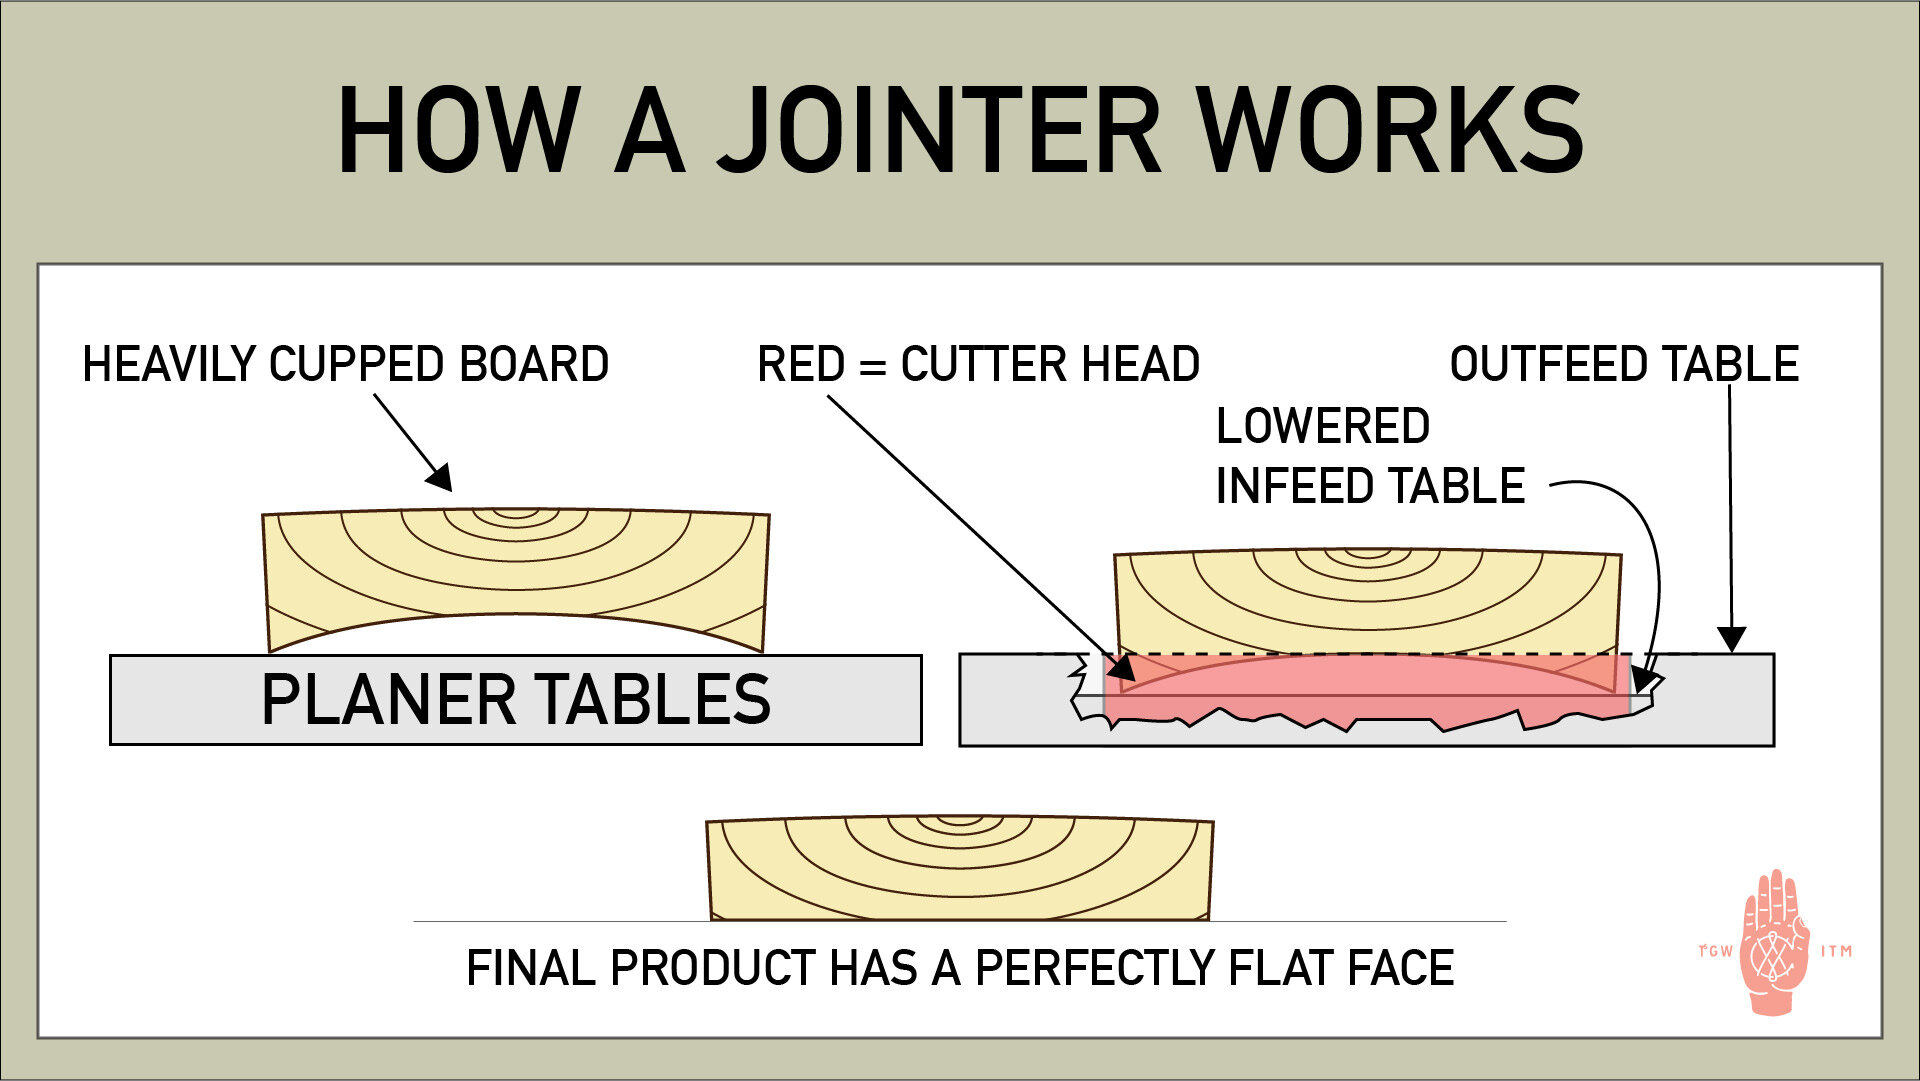
A jointer excels at creating flat and smooth surfaces on wood by leveling one face and one edge of a board. This ensures that the wood is prepared for precise cutting, joinery, and gluing. With a jointer, you can easily correct any warp, twist, or cupping in the wood, resulting in a professional finish for your projects.
Moreover, a jointer allows you to produce flat and even thickness throughout the length of a board, making it ideal for projects that require uniformity, such as table tops, doors, or panels.
Overall, the ability to achieve flat and smooth surfaces is one of the primary benefits of using a jointer in woodworking.
2. Enhancing Accuracy and Precision
Accuracy and precision are crucial in woodworking, as even minor imperfections can affect the final outcome of a project. A jointer helps in achieving this high level of accuracy by creating straight and true edges, which are essential for precise joinery and seamless connections between boards.
Additionally, a jointer allows you to create perfectly square corners and edges, ensuring that your woodworking projects fit together perfectly. This enables you to create furniture, cabinets, and other wooden items with professional craftsmanship.
By enhancing accuracy and precision, a jointer ultimately improves the quality of your finished pieces.
3. Saving Time and Effort
Another significant advantage of using a jointer is its ability to save time and effort in the woodworking process. A jointer helps you quickly flatten and square stock, eliminating the need for manual hand planing or sanding to achieve the desired results.
With a jointer, you can efficiently prepare your wood for subsequent steps in your project, such as table sawing or routing. This not only speeds up the overall process but also reduces the physical strain on your body, making woodworking a more enjoyable experience.
By saving time and effort, a jointer allows you to focus on the creative aspects of woodworking rather than spending excessive time on surface preparation.
Alternatives to a Jointer
While a jointer is a valuable tool for woodworking, it may not be an absolute necessity depending on the nature of your projects and available resources. Here are a few alternatives to consider:
1. Hand Planing
Hand planing is a traditional woodworking technique that involves using a hand plane to level and smooth wood surfaces. Although it requires more time and effort compared to using a jointer, hand planing can yield excellent results if done correctly.
This method is suitable for small-scale projects or when working with limited resources. It also offers greater control and precision in certain situations, especially when dealing with delicate or irregularly shaped pieces of wood.
However, hand planing requires skill and practice to achieve consistent results, so it may not be the most efficient option for larger projects or production work.
2. Router and Router Sled
Another alternative to a jointer is using a router and a router sled. A router sled is a simple jig that holds the router securely and allows you to flatten and smooth large pieces of wood. By moving the router across the surface of the wood, you can achieve a flat and even result.
This method is particularly useful when dealing with wide or long boards that may not fit on a jointer. While it requires some setup and adjustment, a router sled can be a cost-effective solution for achieving flat surfaces without investing in a jointer.
3. Panel Saws and Sanders
If you primarily work with smaller pieces of wood or require flat and smooth surfaces for specific parts of your projects, panel saws and sanders can be valuable alternatives to a jointer.
A panel saw allows you to cut accurately and straight, while a sander can help you smooth any rough or uneven surfaces. While these tools may not offer the same level of precision and efficiency as a jointer, they can still achieve satisfactory results for certain applications.
Consider the scale and requirements of your woodworking projects before determining whether a jointer or alternative methods are more suitable for your needs.
Tips for Using a Jointer
If you decide to invest in a jointer for your woodworking projects, here are some helpful tips to ensure optimal results:
1. Choose the Right Jointer
When selecting a jointer, consider the size and capacity that matches the scale of your projects. Larger jointers are more suitable for professional workshops and larger pieces of wood, while smaller benchtop or handheld jointers are ideal for hobbyists and smaller projects.
Additionally, pay attention to the quality of the blades and the overall stability and durability of the jointer. A well-made and properly maintained jointer can provide reliable and accurate results for years to come.
2. Understand Grain Direction
Always consider the direction of the wood grain when using a jointer. Feeding the wood against the grain can result in tear-out and rough surfaces. Instead, feed the wood with the grain to achieve smoother and cleaner cuts.
By understanding and working with the grain direction, you can minimize surface imperfections and achieve better results with your jointer.
3. Take Light Passes
When jointing a piece of wood, it is best to take light passes rather than aggressive cuts. This allows you to maintain control over the process and avoid overloading the jointer or risking damage to the wood.
In general, removing no more than 1/8 inch of material per pass is a good rule to follow. Gradually work your way to the desired result, making multiple passes if necessary.
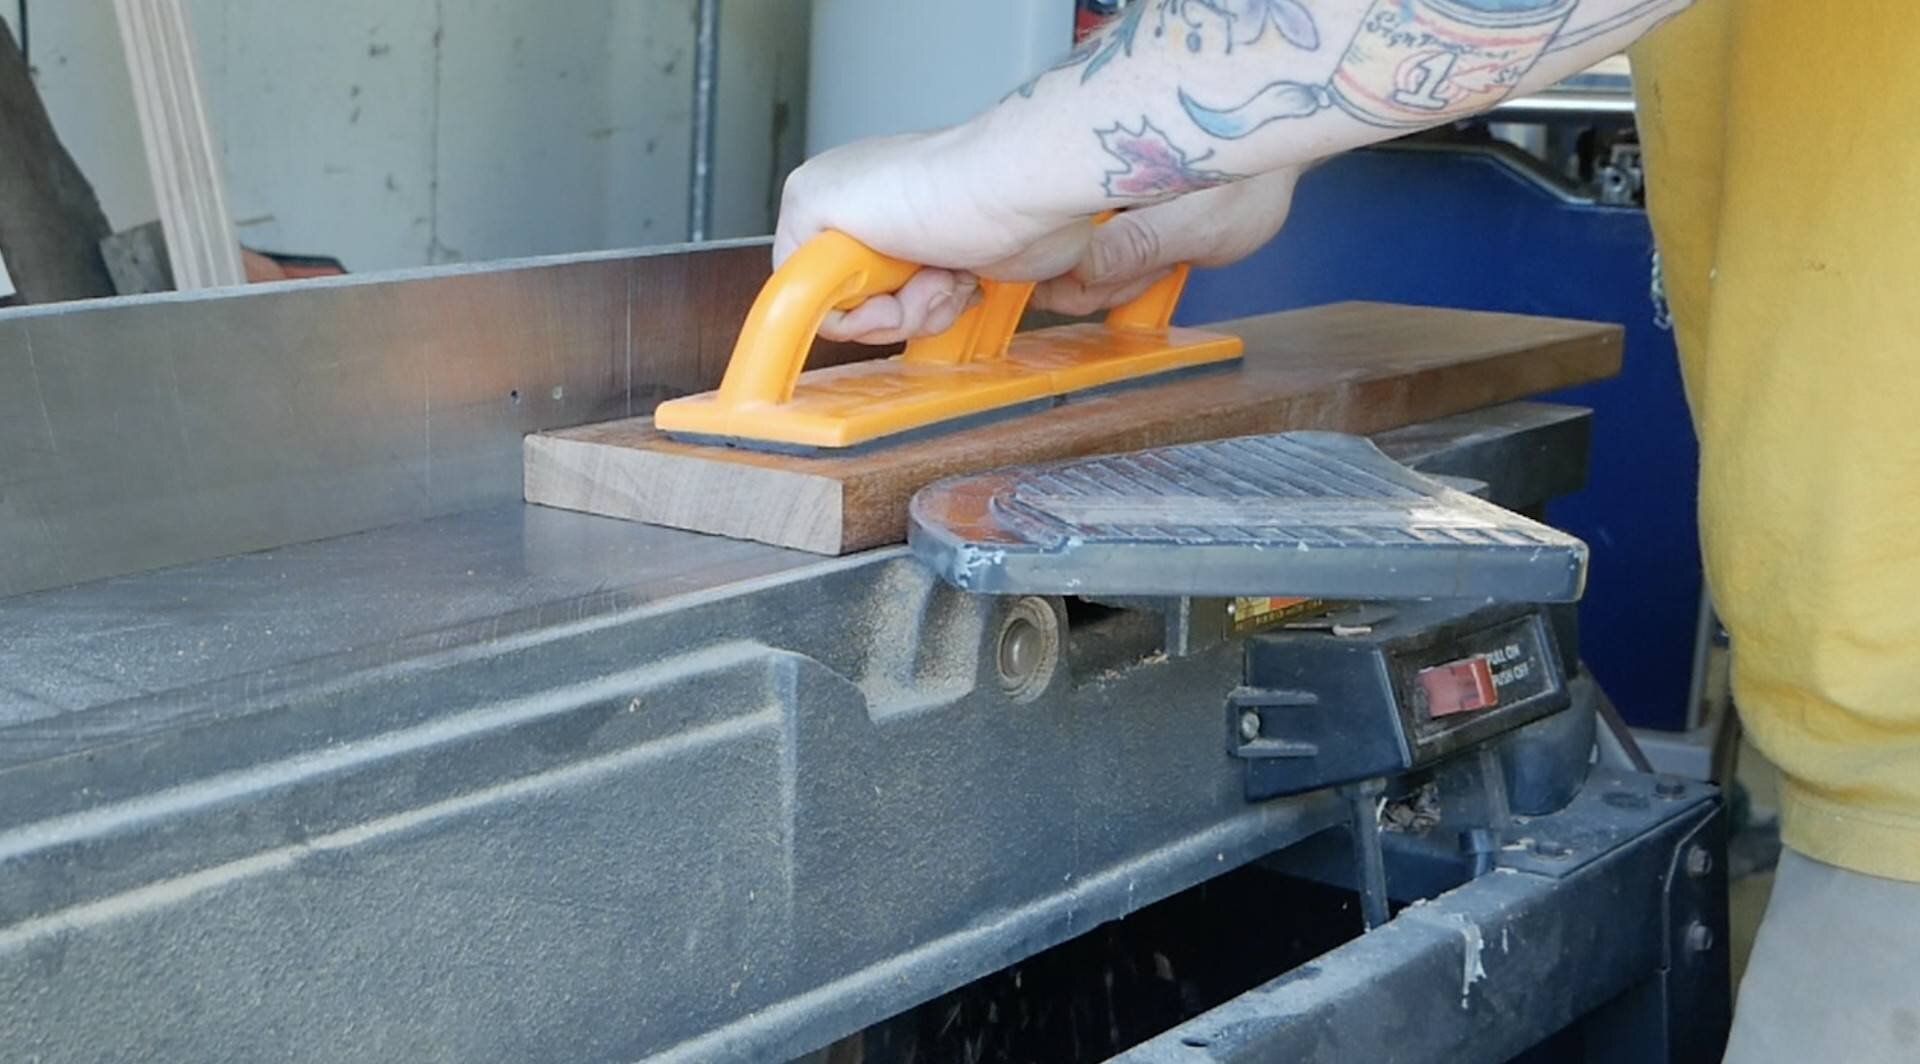
4. Use a Push Block
When feeding the wood into the jointer, always use a push block or push stick to keep your hands a safe distance from the blades. This helps prevent accidents and ensures your fingers are protected throughout the jointing process.
A push block also provides better control and stability, allowing you to guide the wood accurately along the jointer’s table.
5. Maintain Your Jointer
Regular maintenance is key to keeping your jointer in optimal condition and prolonging its lifespan. Keep the blades sharp by regularly sharpening or replacing them when necessary. Ensure that the cutter head is properly aligned and adjusted to prevent vibration and ensure accurate cuts.
Additionally, regularly clean and lubricate the moving parts of the jointer to prevent dust buildup and ensure smooth operation. Check the belts and pulleys for any signs of wear or damage and replace them as needed.
6. Practice Safety Precautions
Always prioritize safety when operating a jointer. Wear appropriate personal protective equipment (PPE), such as safety glasses, ear protection, and a dust mask, to protect yourself from potential hazards.
Ensure that the jointer is securely positioned and stable before use. Avoid loose clothing or jewelry that could get caught in the machinery. Never reach over the spinning blades, and always wait for the blades to come to a complete stop before making any adjustments or changes.
By following these tips, you can make the most of your jointer and ensure safe and successful woodworking projects.
Conclusion
A jointer is a valuable tool for woodworking, offering benefits such as achieving flat and smooth surfaces, enhancing accuracy and precision, and saving time and effort. However, it is not always necessary for every project. Alternatives like hand planing, router sleds, or panel saws can be used depending on the scale and requirements of your projects.
If you decide to use a jointer, be sure to choose the right one for your needs, understand the grain direction, take light passes, use a push block, maintain your jointer, and practice safety precautions. These tips will help you achieve the best results and enjoy a successful woodworking experience.
Key Takeaways: Do You Need a Jointer for Woodworking?
- A jointer is a power tool used in woodworking to create flat and smooth surfaces on wood boards.
- While it is not absolutely necessary, a jointer can greatly improve the quality and efficiency of your woodworking projects.
- Jointers are especially helpful in straightening and flattening warped or uneven boards.
- If you frequently work with rough or reclaimed lumber, a jointer can help you achieve better results.
- However, if you are on a tight budget or only work with pre-surfaced lumber, you may be able to get by without a jointer.
Frequently Asked Questions
Woodworking involves various techniques and tools, and one tool often mentioned is a jointer. Here are some common questions related to whether you need a jointer for woodworking.
1. What is the purpose of a jointer in woodworking?
A jointer is a specialized woodworking tool used to create flat and smooth surfaces on pieces of lumber. It is primarily used to straighten and square the edges of boards, preparing them for joining together.
By passing a board through a jointer, it removes any twists, warps, or unevenness, resulting in a straight edge. This creates a solid and secure joint when two or more pieces of wood are glued together for projects such as furniture or cabinetry.
2. Can you do woodworking without a jointer?
Absolutely! While a jointer is a powerful tool for achieving precise and professional results, it is not mandatory for all woodworking projects. There are alternative techniques and tools that can be used to achieve similar outcomes.
If you don’t have a jointer, you can still achieve flat and straight edges by using a table saw, hand planes, or a router with a straight bit. These tools allow you to create clean and jointable edges, although they may require a bit more effort and skill.
3. When is a jointer necessary in woodworking?
A jointer becomes particularly necessary when working with rough and uneven stock, such as reclaimed lumber or freshly cut wood. In these cases, a jointer can save you time and effort by quickly and accurately flattening the surfaces.
If you frequently work with larger boards, a jointer also becomes more beneficial. It helps in dealing with bowing, cupping, or warping issues, ensuring that the boards are proper and stable before joining them together.
4. Are there alternatives to using a jointer in woodworking?
Yes, there are alternatives to using a jointer in woodworking. Hand planes are commonly used to flatten and smooth surfaces, especially for smaller projects or intricate details. They allow for more control and precision, albeit with more manual effort.
Another alternative is using a thickness planer. While a thickness planer is designed for thicknessing or reducing the thickness of boards, it can also be used to create flat and parallel surfaces by running the boards through multiple passes.
5. Can a jointer be replaced by a planer?
No, a jointer cannot be directly replaced by a planer. While both tools can be used to flatten and straighten surfaces, they serve different purposes and excel in different areas. A jointer primarily focuses on creating straight edges and flattening one face of the board, while a planer is used to achieve consistent thickness throughout the length of the board.
To achieve optimal results, it is recommended to use both tools in conjunction with each other. First, you can use a jointer to create flat surfaces and straight edges, and then a planer can be used to ensure uniform thickness across the whole board.
Tools you DON’T need: Jointer vs Planer vs Drum sander
Summary
When it comes to woodworking, having a jointer can be helpful but not always necessary. A jointer is a tool used to straighten and smooth the edges of boards, making it easier to create flat and even surfaces. If you’re working on projects that require precise and professional-looking finishes, a jointer can be a valuable addition to your workshop. However, for simpler projects or if you’re on a budget, there are alternative methods to achieve similar results.
Using a table saw or a hand plane can serve as alternatives to a jointer. These tools can help you achieve straight edges and smooth surfaces. It all depends on the level of precision and the complexity of your projects. Ultimately, whether or not you need a jointer for woodworking depends on your specific needs and budget. So, assess your projects and decide accordingly – a jointer may be a helpful investment, but it’s not always a requirement.