
Are you wondering if a random orbital sander leaves swirl marks on your projects? Well, you’ve come to the right place! In this article, we’ll explore whether a random orbital sander is prone to leaving those pesky swirl marks that can ruin the smooth finish you desire. So, let’s dive in and find out!
When it comes to woodworking or DIY projects, achieving a flawless finish is crucial. Nobody wants visible swirl marks marring their hard work! That’s why it’s important to understand how different sanding tools perform. In this case, we’re examining the random orbital sander. Keep reading to discover whether this popular tool lives up to its promise of a flawless, swirl-free finish.
You might be relieved to learn that a well-maintained random orbital sander is designed to minimize the risk of leaving unsightly swirl marks behind. But, as with any power tool, there are certain factors to consider to ensure you get the best results. So, if you’re ready to learn more about whether a random orbital sander can leave swirl marks, read on for some useful insights!
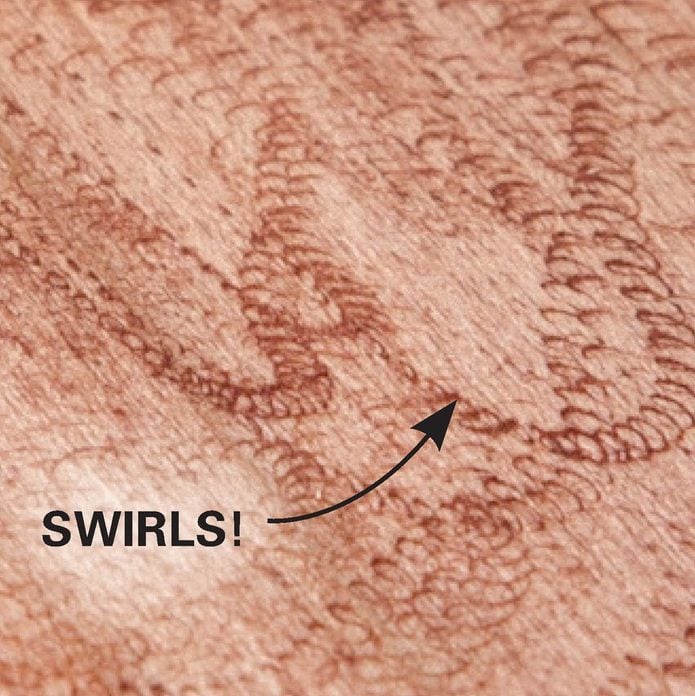
Does a Random Orbital Sander Leave Swirl Marks?
When it comes to sanding surfaces, achieving a smooth and flawless finish is essential. Random orbital sanders, with their unique sanding motion, have gained popularity among DIY enthusiasts and professionals. However, one question that often arises is whether a random orbital sander leaves swirl marks on the surface being sanded. In this article, we will delve into this topic and provide you with a thorough understanding of the matter at hand.
The Mechanics of a Random Orbital Sander
Before we dive into whether a random orbital sander leaves swirl marks, let’s first understand how these sanders work. A random orbital sander combines two distinct motions: rotary action and random orbiting. The sanding disk rotates in a circular motion while also moving in an elliptical orbit. This dual-action helps to minimize visible sanding marks on the surface, making it a popular choice for achieving a smooth finish.
The random orbital sander’s random orbiting motion prevents the creation of regular, repetitive patterns on the surface, hence reducing the likelihood of swirl marks. The sandpaper attached to the sander’s pad moves in various directions, minimizing the chances of leaving visible marks that can mar the final result.
Factors That Influence Swirl Marks
While a random orbital sander is designed to minimize swirl marks, certain factors can still contribute to their occurrence. Understanding these factors can help you prevent or minimize the appearance of swirl marks during the sanding process.
1. Grit size: The grit size of the sandpaper used plays a significant role in the formation of swirl marks. Coarser grits, such as 40 or 60, can leave deeper scratches that are difficult to remove, resulting in visible marks on the surface. Finer grits, like 180 or 220, are less likely to create noticeable swirl marks.
2. Pressure: Applying excessive pressure during sanding can lead to deeper scratches, which can translate into visible swirl marks. It’s important to let the sander and sandpaper do the work, applying only light to medium pressure to achieve the desired results without causing surface damage.
3. Sanding technique: The way you handle the sander and move it across the surface can also impact the presence of swirl marks. It’s advisable to move the sander in a slow and steady motion, overlapping each pass to ensure even sanding. Avoid staying in one spot for too long as this can result in over-sanding and potentially leave marks.
Tips to Minimize Swirl Marks
While swirl marks may be an occasional concern when using a random orbital sander, taking the following precautions can help minimize their occurrence:
1. Start with a lower grit: Begin by using a coarser grit sandpaper, such as 80 or 120, to remove any inconsistencies or imperfections on the surface. Gradually progress to finer grits to achieve a smoother finish.
2. Use a sanding pad with a good dust collection system: A sanding pad with a reliable dust collection system helps prevent the accumulation of dust particles that can create scratch marks on the surface.
3. Maintain an even sanding technique: Consistency is key when it comes to achieving a swirl-free finish. Move the sander in a slow and controlled manner, allowing the random orbital motion to work its magic without overexerting pressure on the surface.
Debunking Common Myths About Random Orbital Sanders and Swirl Marks
Myth 1: Random orbital sanders always leave swirl marks.
This is not entirely true. While no sanding method can guarantee a completely swirl-free finish, random orbital sanders are designed specifically to minimize the appearance of swirl marks. By using the appropriate sandpaper grit and practicing proper sanding techniques, you can significantly reduce the likelihood of swirl marks on your surface.
Myth 2: Only professionals can achieve a swirl-free finish.
Random orbital sanders are user-friendly tools that can be used by both amateurs and professionals alike. With the right knowledge, techniques, and practice, anyone can achieve a smooth, swirl-free finish. Don’t be discouraged – all it takes is a bit of patience and perseverance.
Myth 3: Swirl marks can only be removed by hand sanding.
Although hand sanding can be effective in removing swirl marks, it is not the only solution. Random orbital sanders can still achieve a swirl-free finish when used correctly. By selecting the appropriate sandpaper, using the right technique, and applying consistent pressure, you can achieve a flawless result without the need for extensive manual sanding.
Key Takeaways: Does a Random Orbital Sander Leave Swirl Marks?
- A random orbital sander is designed to minimize swirl marks on surfaces.
- While it is possible for a random orbital sander to leave swirl marks if used incorrectly, they are less likely compared to other sanding methods.
- Using the right sandpaper grit and applying even pressure can help minimize the likelihood of swirl marks.
- Regularly inspecting and changing the sandpaper can prevent buildup and potential swirl marks.
- Understanding proper sanding techniques and practicing on scrap material can improve the results and reduce the risk of swirl marks.
Frequently Asked Questions
Welcome to our frequently asked questions section about random orbital sanders and swirl marks. Whether you’re a DIY enthusiast or a professional woodworker, understanding how a random orbital sander affects the surface is crucial for achieving a smooth finish. Read on to find answers to some common queries.
1. Can a random orbital sander leave swirl marks on the surface?
While random orbital sanders are designed to minimize swirl marks, they can sometimes occur. These sanders feature a circular sanding action combined with random movements to prevent the formation of visible scratch patterns. By using an orbital motion and rotating the sanding pad, these sanders greatly reduce the chance of swirl marks.
However, it’s important to note that in certain situations, such as when using the wrong grit sandpaper or applying excessive pressure, a random orbital sander can leave behind swirl marks. To minimize the risk, it’s crucial to use the right sandpaper grit and apply even pressure over the surface while sanding.
2. What causes swirl marks when using a random orbital sander?
Swirl marks can occur when using a random orbital sander if certain factors align. One common cause is using sandpaper with a grit that’s too coarse for the task. The rougher grit can leave visible scratches on the surface, resulting in swirl marks.
Another cause is applying excessive pressure on the sander while sanding. Pressing too hard can lead to uneven sanding and the creation of swirl marks. It’s important to let the weight of the sander and the rotation of the sanding pad do the work, instead of pushing down forcefully on the surface.
3. How can I avoid swirl marks when using a random orbital sander?
To minimize the chances of swirl marks, there are a few key steps you can take. Firstly, always start with the right grit sandpaper for the job. Choose a grit that suits the level of sanding required and gradually work your way up to finer grits for a smoother finish.
Secondly, apply even pressure on the sander and let the machine do the work. Avoid pressing down too hard, as this can result in uneven sanding and swirl marks. Additionally, regularly check the sandpaper for wear and tear, as using worn-out sandpaper can increase the risk of swirl marks.
4. Are there any specific sanding techniques to prevent swirl marks?
Yes, adopting proper sanding techniques can help prevent swirl marks. Start by sanding in a consistent pattern, moving the sander in straight lines or gentle curves. Avoiding random movements can minimize the chances of swirl marks.
Additionally, make sure to keep the sander moving at a steady pace. Dwelling in one spot for too long can cause uneven sanding and potentially lead to swirl marks. Regularly check the surface to ensure the sanding is even and adjust your technique accordingly.
5. How do I remove swirl marks caused by a random orbital sander?
If you’ve ended up with swirl marks on your surface, don’t worry, they can often be corrected. Start by sanding the entire surface with a finer grit sandpaper to remove the visible swirl marks. Gradually work your way up to even finer grits until the surface is smooth and the swirl marks are no longer visible.
After sanding, apply a high-quality wood finish or polishing compound to restore the surface to its desired level of smoothness. Remember to follow the manufacturer’s instructions for the specific product you’re using, and take your time to achieve the best results.

Summary
So, random orbital sanders can leave swirl marks if not used properly. The key is to choose the right grit sandpaper, apply even pressure, and move the sander in a controlled manner. Keep in mind that slower speeds and lighter pressure are best to avoid swirl marks. Take your time and practice to achieve the smoothest finish possible. Happy sanding!