If you’ve ever wondered how fast you can sand with an orbital sander, you’re in the right place! Sanding with an orbital sander can be a breeze, and in this article, we’ll explore just how speedy you can be. So grab your tool and let’s dive in!
When it comes to sanding with an orbital sander, speed is key. Imagine being able to complete your sanding projects quickly and efficiently, leaving you more time for other activities. Well, with the right technique and some helpful tips, you can achieve just that.
So, whether you have a DIY project or are a professional woodworker, get ready to discover the optimal speed for sanding with an orbital sander. Let’s make your sanding experience faster and smoother than ever before!
- Prepare the surface by removing any obstacles.
- Choose the appropriate grit sandpaper for your project.
- Secure the sandpaper onto the sander’s base.
- Hold the sander firmly and turn it on.
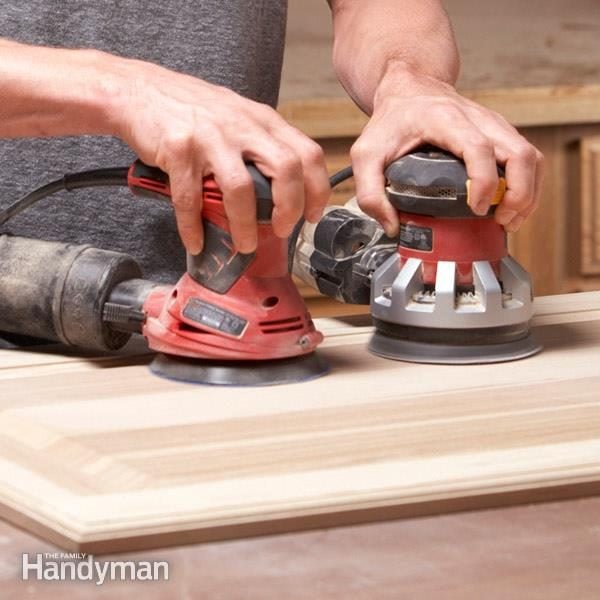
- Move the sander in a back-and-forth or circular motion, following the grain of the wood.
- Apply even pressure and avoid applying too much force.
- Continue sanding until you achieve the desired smoothness.
- Wipe away the dust and debris.
- Clean and maintain your sander for future use.

“How Fast to Sand With an Orbital Sander?”: A Guide to Efficient Sanding
When it comes to sanding, time is of the essence. The speed at which you can sand a surface can make a significant difference in your overall productivity and the quality of the finish. One tool that can help you achieve efficient sanding is an orbital sander. In this article, we will explore the various factors that affect sanding speed with an orbital sander and provide practical tips to help you sand faster without compromising on quality.
Factors Affecting Sanding Speed
1. Grit Selection
The grit of the sandpaper used in an orbital sander plays a crucial role in determining the speed of sanding. Finer grits, such as 220 or 320, can provide a smoother finish but tend to take longer to remove material. On the other hand, coarser grits like 80 or 100 are more aggressive and can remove material quickly, but may leave behind noticeable scratches.
To sand faster, start with a coarser grit to remove the bulk of the material efficiently. As you progress, gradually switch to finer grits for a smoother finish. This step-by-step approach will save you time without sacrificing the quality of the end result.
Top Tip: It’s always a good idea to consult the manufacturer’s recommendations for the optimal grit sequence for a specific material.
2. Pressure Applied
The amount of pressure you apply while sanding with an orbital sander can significantly impact your sanding speed. Many people assume that pressing down harder will result in faster sanding, but this is not always the case. In fact, excessive pressure can cause the sander to bog down and reduce its effectiveness.
Instead, let the weight of the orbital sander do the work for you. Apply gentle, consistent pressure and allow the sandpaper to glide smoothly over the surface. This approach not only maximizes efficiency but also reduces the risk of damaging the material or creating uneven surfaces.
Pro Tip: Experiment with different levels of pressure to find the sweet spot that provides optimal sanding speed without compromising the quality of the finish.
3. Speed Setting
Most orbital sanders come with variable speed settings, allowing you to adjust the rotational speed of the sanding pad. The speed setting you choose can have a significant impact on your sanding efficiency.
For rough and aggressive sanding, a higher speed setting can help you remove material faster. However, when working with delicate or intricate surfaces, it’s best to dial down the speed to minimize the risk of causing damage. Finding the right balance between speed and control is key to achieving fast and precise sanding results.
Handy Hint: Always start at a lower speed setting and gradually increase it as needed. This approach gives you better control over the sanding process.
4. Sandpaper Maintenance
The condition of your sandpaper can influence the speed and quality of your sanding. Worn-out or clogged sandpaper will be less effective in removing material and may result in longer sanding times.
To maximize sanding speed, regularly inspect your sandpaper for signs of wear or clogging. If necessary, clean or replace the sandpaper to ensure optimal performance. Additionally, using sandpaper with a dust extraction feature can help keep the sanding surface clean, reducing clogging and improving efficiency.
Hot Tip: Keep spare sandpaper on hand to avoid unnecessary downtime when your current sandpaper becomes ineffective.
5. Surface Preparation
Proper surface preparation is essential for efficient sanding. Before you begin sanding with an orbital sander, make sure the surface is clean, free of debris, and properly prepped. This includes removing any loose paint, varnish, or other coatings that may impede the sanding process.
In addition, consider using a sanding block or an accessory that fits the shape of the surface you are working on. This will allow you to achieve more precise sanding and save time by avoiding unnecessary sanding of surrounding areas.
Useful Tip: Take the time to thoroughly clean the surface and remove any obstructions before starting the sanding process. This extra step will help you achieve smoother and faster results.
6. Sanding Technique
Your sanding technique can greatly influence your sanding speed. When using an orbital sander, it’s important to maintain a consistent motion and avoid dwelling or applying uneven pressure in one area.
Instead, move the sander in smooth, overlapping strokes, making sure to cover the entire surface evenly. This technique promotes consistent material removal and prevents over-sanding in certain areas. Additionally, periodically changing the direction of your sanding strokes can help you achieve a more even and uniform finish.
Pro Trick: Practice your sanding technique on scrap material before starting a project to improve your efficiency and achieve better results.
7. Material Type
The type of material you are sanding can have a significant impact on the speed at which you can sand with an orbital sander. Softer materials like wood may be easier to sand faster, while harder materials like metal or concrete may require slower and more deliberate sanding.
Before beginning a sanding project, familiarize yourself with the material you are working with and adjust your sanding technique accordingly. This will help you optimize your sanding speed and achieve the desired finish efficiently.
Insider Tip: Research specific sanding techniques for different materials to ensure you’re employing the most effective approach for each one.
The Benefits of Fast Sanding: Why Speed Matters
By embracing efficient sanding techniques with an orbital sander, you can enjoy several benefits:
1. Time Savings
The most obvious benefit of sanding faster is the time savings. By increasing your sanding speed, you can complete projects more quickly and move on to the next task. This is particularly advantageous for professional woodworkers or contractors who have multiple projects lined up.
2. Increased Productivity
Efficient sanding allows you to accomplish more in less time, boosting your overall productivity. This can lead to greater output, increased client satisfaction, and potentially higher profits for businesses.
3. Consistent Results
When sanding quickly, it’s crucial to maintain a methodical and precise approach. By doing so, you can achieve consistent results throughout your work, ensuring an even finish and minimizing the need for rework or touch-ups.
4. Less Fatigue
Sanding can be physically demanding, especially when working on large projects or for extended periods. By sanding faster, you can reduce the amount of time spent on each project and reduce the strain on your body, minimizing fatigue.
Tips for Maximizing Sanding Speed with an Orbital Sander
1. Choose the Right Grit Sequence
Identify the optimal grit sequence for the material you are sanding and follow it diligently. This will ensure efficient material removal and a high-quality finish.
2. Invest in Quality Sandpaper
Using high-quality sandpaper can significantly improve your sanding speed and the overall results. Invest in reputable brands and choose the appropriate grits for your project.
3. Keep Your Orbital Sander in Good Condition
Regularly clean and maintain your orbital sander to ensure it works at its best. This includes cleaning or replacing sandpaper, lubricating moving parts, and addressing any mechanical issues promptly.
4. Work in Sections
Sanding a large surface all at once can be time-consuming. Instead, divide the surface into manageable sections and sand one section at a time. This approach makes it easier to maintain a consistent sanding speed and ensures even results.
5. Take Breaks
While sanding efficiently is essential, don’t forget to take short breaks to rest and recharge. Continuous sanding without breaks can lead to decreased efficiency and potential mistakes.
6. Practice Patience
Although sanding faster is the goal, it’s important to remain patient and not rush the process. Rushing can lead to mistakes, uneven surfaces, and ultimately, more time spent on corrections.
Conclusion
Efficiency is key when it comes to sanding with an orbital sander. By carefully considering factors such as grit selection, pressure applied, speed settings, and surface preparation, you can significantly increase your sanding speed without sacrificing the quality of your work. Additionally, practicing proper sanding techniques and adjusting your approach based on the material type will further enhance your efficiency. By following these tips and maintaining your equipment, you can complete sanding projects quickly, achieve consistent results, and enjoy the benefits of improved productivity and time savings.
“How Fast to Sand with Orbital Sander?” – Key Takeaways
- Sanding speed depends on the type of material – always start slow and gradually increase speed.
- Aim for a consistent and smooth sanding motion, applying even pressure.
- Orbital sanders work best with medium speed settings for most projects.
- Take breaks to avoid overheating the sander and to give the material time to cool down.
- Always wear protective gear like goggles and a mask when sanding to keep yourself safe.
Frequently Asked Questions
When it comes to sanding with an orbital sander, finding the right speed is crucial for achieving optimal results. Below are some common questions and answers to guide you in determining how fast to sand with an orbital sander.
1. What speed setting should I use on my orbital sander?
The appropriate speed setting for your orbital sander depends on the type of material you are sanding and the desired finish. As a general rule of thumb, lower speeds are ideal for delicate projects, such as fine woodworking or finishing touches. Higher speeds, on the other hand, are better suited for rougher surfaces that require heavier sanding, such as removing paint or smoothing out rough edges.
Keep in mind that every sander is different, so it’s essential to consult the manufacturer’s instructions or experiment on a test piece to determine the best speed setting for your specific orbital sander.
2. How can I test the speed of my orbital sander?
To determine the speed of your orbital sander, start by setting it to the lowest speed setting. Hold the sander above a scrap material or spare piece of wood and turn it on. Gradually increase the speed until you find a comfortable and effective sanding pace. Pay attention to how the sander feels in your hand and observe the sanding action on the test material.
Remember to always wear appropriate safety gear like goggles and a dust mask when testing your sander’s speed or sanding any material.
3. Is there a specific speed chart for different sanding tasks?
While there isn’t a one-size-fits-all speed chart for orbital sanders due to variations between models and brands, you can use speed recommendations as a starting point. Generally, fine sanding or finishing tasks may require speeds between 5,000 and 8,000 orbits per minute (OPM), while rough sanding or paint removal might benefit from speeds between 10,000 and 13,000 OPM. However, always refer to the manufacturer’s guidelines for your specific orbital sander model.
Additionally, consider the grit of the sandpaper and the type of wood or material being sanded. Softer woods may require lower speeds, while harder woods or metal might need higher speeds. Adjust the speed setting accordingly to achieve the desired results.
4. Can I damage my project by using the wrong speed setting?
Using the wrong speed setting on your orbital sander can potentially damage your project. If you use a high speed on delicate materials or intricate surfaces, you risk removing too much material or creating uneven sanding marks. Conversely, using a low speed on tougher materials may result in inefficient sanding or taking an unnecessarily long time to complete the task.
To avoid damage, always start with a lower speed setting and gradually increase as needed. Test the speed on a small, inconspicuous area before sanding the entire surface and make adjustments accordingly. By being cautious and mindful of the material and desired outcome, you can minimize the risk of damaging your project.
5. Are there any signs that indicate I’m using the wrong speed setting?
You can look out for a few signs to determine whether the speed setting on your orbital sander is not appropriate. If you notice excessive heat, burning marks, or the material not being adequately sanded, these are indications that you may be using the wrong speed setting. Also, if the sander feels hard to control or vibrates excessively, it’s a sign that adjustment might be necessary.
If you encounter any of these signs, try adjusting the speed setting to see if it improves the sanding results. Remember to always take your time, make small adjustments, and test the new speed on a small area before proceeding to the larger project area.

Summary
Sanding with an orbital sander is all about finding the right speed. Start with a slow speed to avoid damaging the surface, and gradually increase it until you achieve the desired result. Remember to let the sander do the work and avoid pressing too hard.
It is important to choose the right sandpaper grit for the job. Lower grits are rougher and used for heavy sanding, while higher grits are finer and ideal for finishing touches. Be patient and take your time to sand evenly and smoothly, and don’t forget to wear protective gear for safety!