
Do you ever wonder how carpenters achieve smooth and precise cuts on wood? Well, let’s take a closer look at the trusty hand plane and discover how it’s used to create wonders in woodworking. Whether you’re a beginner or a seasoned craftsman, understanding the art of hand planing is a valuable skill. So, let’s dive in and explore the fascinating world of hand planes together!
A hand plane is a simple yet powerful tool that has been used for centuries to shape and smooth wood surfaces. It’s like a magic wand in the hands of a skilled woodworker. With just a few simple techniques and some practice, you can transform rough and uneven lumber into a polished and refined piece of art. So, if you’re ready to unlock the secrets of this essential woodworking tool, keep reading!
From leveling rough edges to creating perfectly flat surfaces, the hand plane is a versatile tool that offers endless possibilities. Whether you’re crafting furniture, building cabinets, or working on smaller projects, the hand plane is your go-to companion. So, let’s roll up our sleeves and explore the different types of hand planes, their unique features, and the techniques to achieve exceptional results. Are you excited? Great! Let’s get started on this wood-shaping adventure!
Discovering the Versatility of a Hand Plane
A hand plane is a versatile woodworking tool used to shape, smooth, and remove material from wood surfaces. It is commonly used to flatten boards, chamfer edges, and create precise joints. To use a hand plane, follow these steps:
- Secure the workpiece in a vise.
- Adjust the blade depth and secure it in place.
- Hold the plane firmly and start planing with the grain.
- Maintain consistent pressure and use smooth, even strokes.
- Check the surface frequently for progress and make adjustments as needed.
- Finish by sanding the surface for a smooth, polished result.
With practice and proper technique, the hand plane can become an indispensable tool in your woodworking arsenal.

How is a Hand Plane Used? A Guide to the Essential Carpentry Tool
Hand planes are versatile tools that have been used in carpentry for centuries. Whether you’re a professional woodworker or a DIY enthusiast, understanding how to use a hand plane is essential for achieving smooth and precise finishes on your projects. In this article, we’ll explore the different types of hand planes, their components, and step-by-step instructions on how to use them effectively. Whether you’re smoothing rough lumber or creating intricate joinery, mastering the art of hand planing will elevate your woodworking skills to the next level.
Types of Hand Planes
Before diving into how to use a hand plane, it’s important to understand the different types available. Each type is designed for specific tasks and has its own unique features. Let’s explore the most common types of hand planes:
Bench Planes
Bench planes are the workhorses of the hand plane family. They are available in various sizes, ranging from the smallest No. 1 to the largest No. 8. Bench planes are mainly used for flattening and smoothing surfaces, removing rough edges, and leveling boards. With their wide blades and substantial heft, they can tackle a wide range of tasks with ease.
While bench planes can be used for all stages of woodworking, they are especially useful in the initial roughing-out phase. The No. 5 bench plane, also known as the jack plane, is a popular choice for both rough and finish work due to its versatility.
Block Planes
Block planes, as the name suggests, are compact and portable planes that fit comfortably in the palm of your hand. Their primary function is to trim end grain, chamfer edges, and perform small-scale tasks such as fitting and adjusting joinery. Block planes are perfect for tasks that require precision and control due to their ergonomic design and adjustable throat opening.
One of the key features of a block plane is its low-angle design. This design allows the blade to slice through the wood fibers cleanly, resulting in an exceptionally smooth cut. The adjustable mouth allows for fine-tuning the plane’s performance based on the wood species and the desired finish.
Smoothing Planes
Smoothing planes are specifically designed for achieving a polished and glassy smooth surface on your workpiece. They have a shorter sole length compared to bench planes and a finely tuned blade that takes very thin shavings. Smoothing planes are the final touch in the hand planing process and are used after rougher planes to achieve that coveted silky finish.
Smoothing planes are typically available in sizes ranging from No. 2 to No. 4, with the No. 4 being the most common choice among woodworkers. Their compact size and curved blade allow for maximum control and precision, making them ideal for tackling tricky grain patterns and highly figured woods.
How to Use a Hand Plane: Step-by-Step Guide
Now that we’ve explored the different types of hand planes, let’s dive into a step-by-step guide on how to use them effectively. While each hand plane has its own unique techniques, there are some general guidelines that apply to all.
Step 1: Prepare Your Workpiece
Before reaching for your hand plane, it’s crucial to ensure that your workpiece is properly prepared. This involves jointing the edges, flattening any uneven surfaces, and ensuring that the wood is clean and free from debris. Taking the time to prepare your workpiece will result in a smoother and more accurate planing process.
Pro tip: Use a carpenter’s square to ensure that your edges are perfectly straight and square before proceeding with the hand plane.
Step 2: Set Up Your Hand Plane
Each hand plane requires specific setup and adjustments to perform optimally. Here are some general steps to follow:
- Sharpen the blade: A sharp blade is crucial for a smooth planing experience. Use a sharpening stone or honing guide to achieve a keen edge.
- Adjust the blade depth: Start by retracting the blade fully and gradually extend it until it just extends below the sole of the plane. This will allow for fine adjustments as you work.
- Set the mouth opening: The mouth opening refers to the gap between the blade and the sole of the plane. For fine work, a narrow mouth opening is ideal, while larger openings suit rougher tasks.
Step 3: Planing Techniques
When it comes to using a hand plane, the techniques can vary depending on the type and task at hand. However, here are some fundamental techniques to keep in mind:
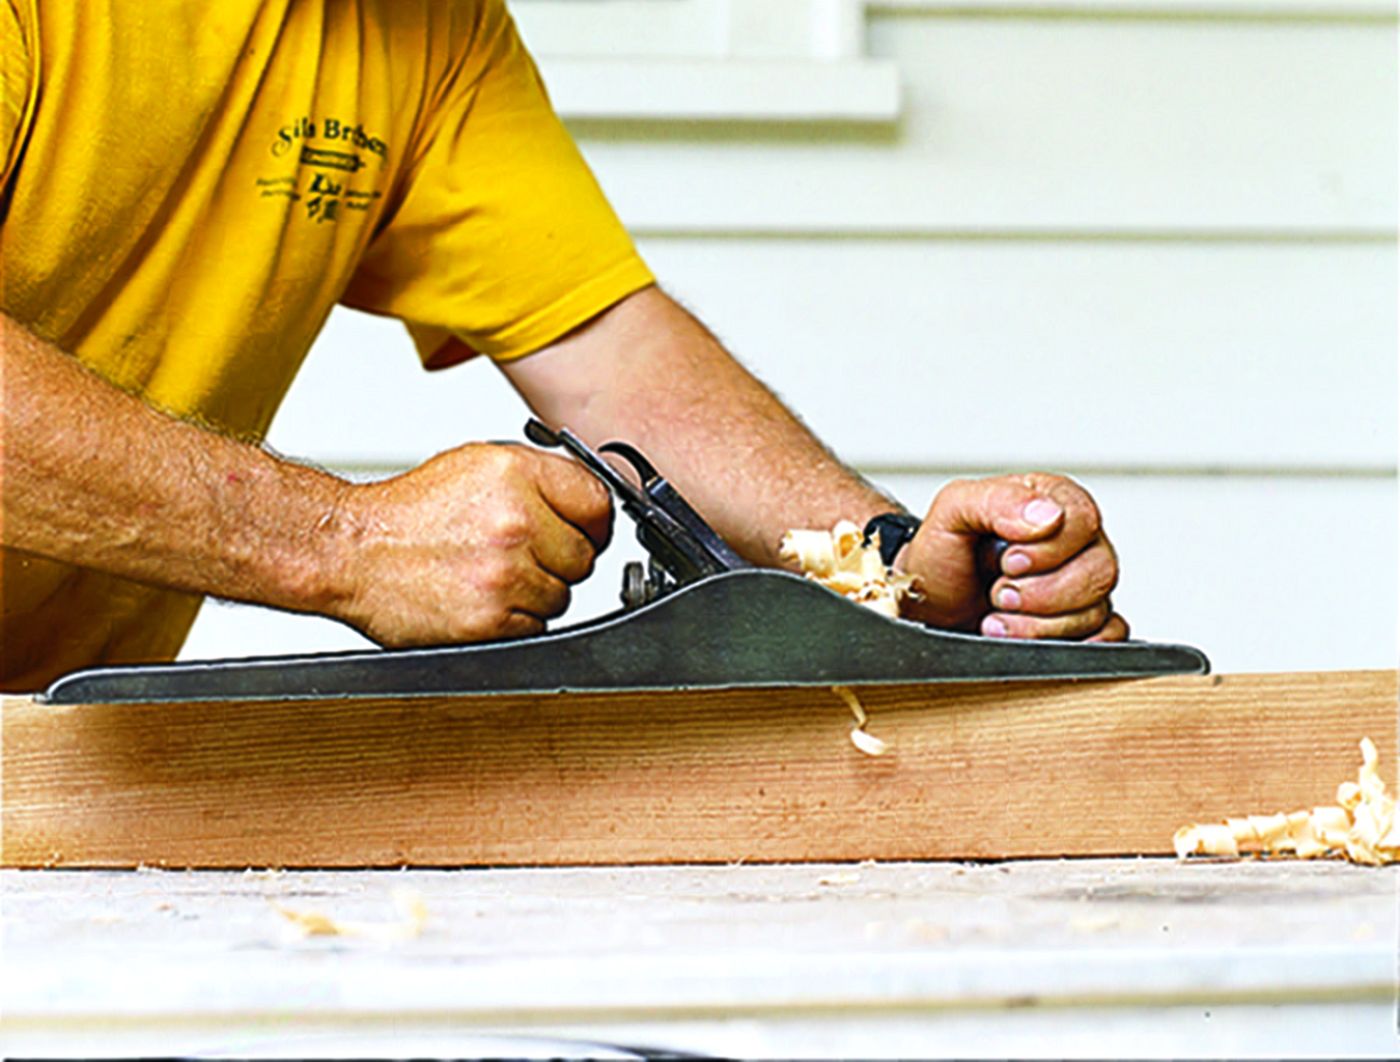
- Grasp the handle firmly with one hand and place the other hand on the front knob for stability and control.
- Apply even downward pressure on the plane as you move it forward across the workpiece. Start at one end and gradually work your way to the other for a consistent cut.
- Keep the sole of the plane parallel to the grain to avoid tear-out. If you’re working with highly figured wood, consider using a skew angle to minimize tear-out.
- Take light, controlled passes to remove thin shavings. This allows for better control and prevents the plane from digging into the wood.
Step 4: Finishing Touches
After each pass with the hand plane, inspect your workpiece visually and by touch. Run your hand over the surface to detect any imperfections or high spots. If necessary, repeat the planing process, adjusting the blade depth and mouth opening as needed, until you achieve the desired outcome.
Pro tip: To achieve an ultra-smooth surface, consider incorporating a final pass with a smoothing plane or perform light sanding with fine-grit sandpaper.
Beyond the Basics: Advanced Hand Planing Techniques
Now that you’ve mastered the fundamentals of hand planing, let’s explore some advanced techniques to take your woodworking skills to the next level:
Creating Chamfers and Bevels
Hand planes are excellent tools for creating beautiful chamfers and bevels on your workpiece. By adjusting the angle of the blade and the plane’s positioning, you can achieve precise and consistent results. Experiment with different blade angles and techniques to create unique profiles and add visual interest to your projects.
Joinery and Rabbets
Hand planes are indispensable when it comes to fitting joinery and creating accurate rabbets. By using a combination of bench planes, block planes, and chisels, you can achieve tight-fitting joints and create clean and precise rabbet cuts. Mastering these techniques will allow you to tackle complex joinery projects with confidence.
Creating Curved Surfaces
While hand planes are often associated with flat surfaces, they can also be used to create beautiful curved surfaces. By using a variety of hand planes and shaping tools, such as spokeshaves and rasps, you can sculpt wood into elegant curves and contours. Whether you’re shaping a chair leg or a decorative element, hand plane techniques can be adapted to accommodate curved surfaces.
Remember, mastering these advanced techniques requires practice, patience, and a keen eye for detail. Don’t be afraid to experiment and push the boundaries of what you can achieve with a hand plane.
Hand Plane Maintenance and Care
To ensure that your hand planes perform optimally and last for years to come, proper maintenance is essential. Here are some key maintenance tips:
Regular Blade Sharpening
Keep your hand plane blades sharp by regularly sharpening them using a sharpening stone or honing guide. A sharp blade not only improves the performance of the plane but also reduces the risk of tear-out and increases the longevity of the blade.
Periodic Cleaning and Lubrication
Woodworking can be a messy endeavor, and hand planes are no exception. Clean your hand planes regularly by removing any debris and sawdust that may have accumulated. Lubricate the moving parts, such as the adjustment mechanisms and the blade depth adjuster. This will ensure smooth operation and prevent rust or corrosion.
Proper Storage
Store your hand planes in a dry and moisture-free environment to prevent rust and damage. Consider investing in a dedicated plane storage rack or a wooden box to protect your planes from dust, moisture, and accidental damage.
Conclusion
Hand planes are indispensable tools in the world of woodworking. Understanding how to use them effectively opens up a world of possibilities for creating beautifully finished projects. By mastering the different types of hand planes, learning proper planing techniques, and exploring advanced applications, you’ll be well on your way to becoming a hand plane virtuoso. Remember to maintain and care for your hand planes to ensure they continue to serve you faithfully for years to come. Happy planing!
Key Takeaways: How is a Hand Plane Used?
- A hand plane is a woodworking tool used to shape and smooth wood surfaces.
- It is pushed across the wood, removing thin shavings to make the surface flat and smooth.
- Hand planes can be used to flatten boards, chamfer edges, and create decorative mouldings.
- Proper technique involves adjusting the plane’s blade depth and angle for desired results.
- Using a hand plane requires practice and patience to achieve optimal results.
Frequently Asked Questions
When it comes to using a hand plane, there are several important factors to consider. Whether you’re a beginner or have some experience with woodworking, these questions and answers will help you understand how to effectively use a hand plane to achieve smooth and precise results.
1. How can I prepare my hand plane for use?
Before using your hand plane, it’s important to ensure it is properly prepared. Start by sharpening the blade, known as the iron, using a sharpening stone or honing guide. This will ensure optimal performance and reduce the risk of tearout. Next, adjust the blade depth by turning the depth adjustment screw until the blade is protruding slightly from the sole of the plane. Finally, ensure the plane’s sole is clean and free from debris to prevent any interference during use.
2. What is the correct way to hold and position a hand plane?
When using a hand plane, it’s crucial to hold it correctly for optimal control and precision. Grip the tote, which is the handle on the rear of the plane, firmly with your dominant hand. Place your other hand on the front knob, also known as the adjusting nut, to help guide the plane. Stand squarely behind the plane with your feet shoulder-width apart, maintaining a stable stance. Position the plane so that it’s parallel to the wood’s grain, making sure the blade is positioned at the desired starting point.
3. How do I adjust the depth of cut on a hand plane?
Adjusting the depth of cut on a hand plane allows you to control how much material is being removed. To do this, start by loosening the depth adjustment screw or lever. Gradually turn the screw or move the lever clockwise to increase the depth of cut, or counterclockwise to decrease it. Make small adjustments at a time and test the plane on a scrap piece of wood until you achieve the desired shaving thickness. Remember, it’s better to take lighter passes and make multiple adjustments if necessary, rather than trying to remove too much material in one go.
4. What is the proper technique for planing wood with a hand plane?
To effectively plane wood with a hand plane, begin by aligning the plane’s blade with the wood’s surface, slightly extending the protrusion of the blade. Apply even, firm pressure to the front knob and tote as you push the plane forward. Keep a steady rhythm and maintain consistent pressure throughout each pass. As you near the end of the stroke, lift the plane slightly to prevent any potential gouging or unintended removal of material. Repeat the process, slightly overlapping each pass, until you achieve the desired smoothness and flatness.
5. How can I prevent tearout when using a hand plane?
Tearout, which refers to wood fibers tearing or splintering during planing, can be minimized with proper technique and preparation. To prevent tearout, always plane in the direction of the wood’s grain. Sharp blades are also crucial, as dull blades are more likely to cause tearout. Furthermore, adjusting the plane to take lighter cuts can reduce the risk. Additionally, using a low-angle plane or a plane equipped with a chipbreaker can help control tearout by breaking up the wood fibers as they are being cut. Lastly, planing with the grain can also minimize tearout, as working against the grain can cause the wood fibers to splinter more easily.
Why Use a Hand Plane?
Summary
Using a hand plane is a simple and effective way to smooth and shape wood surfaces. It works by removing thin layers of wood with a sharp blade. Hand planes come in different sizes and shapes for various tasks. To use a hand plane, you need to adjust the blade, hold the plane at the correct angle, and push it forward with steady pressure. Practice is key to mastering the technique and achieving smooth, even results. Remember to always be careful and use protective gear when using any woodworking tool. So, go ahead and give hand planes a try to transform your woodworking projects!