
Hey there! Have you ever wondered how long you have to clamp wood glue? Well, you’re in luck because I’ve got all the answers for you right here. So, let’s dive in and discover the optimal clamping time for your woodworking projects!
Wood glue is a fantastic adhesive that’s commonly used to join pieces of wood together. But here’s the thing: it needs time to dry and bond properly. The duration you should clamp your wood glue depends on various factors, such as the type of glue you’re using, the temperature, humidity, and the type of wood.
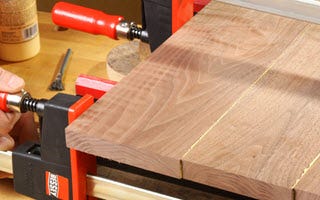
Now, you might be thinking, “Why is clamping important?” Well, clamping helps to ensure that the glued joint stays in place while the adhesive sets. It creates pressure that squeezes out excess glue and promotes a strong bond. But how long should you keep your clamp on? Let’s find out in the next section!
- Apply a thin layer of wood glue to the surfaces you want to join.
- Press the pieces together firmly.
- Wipe off any excess glue with a damp cloth.
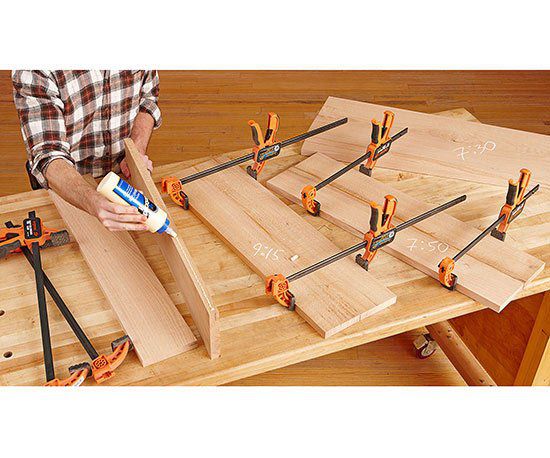
- Place clamps on the glued area, ensuring they’re evenly distributed.
- Tighten the clamps enough to hold the pieces together, but not too tight to squeeze out all the glue.
Allow the glue to dry completely before removing the clamps for the best results.
How Long Do I Have to Clamp Wood Glue?: A Comprehensive Guide
Woodworking is a skill that requires attention to detail and precision. One essential aspect of woodworking is gluing wood pieces together to create a strong bond. However, it is crucial to clamp wood glue properly to ensure a successful and durable joint. In this article, we will delve into the world of wood glue clamping and answer the question: “How long do I have to clamp wood glue?”
Understanding the Clamping Time of Wood Glue
When working with wood glue, it is essential to understand the concept of clamping time. Clamping time refers to the period during which the glued wood pieces need to be held together with clamps until the glue sets and forms a strong bond. The clamping time can vary depending on several factors, including the type of wood glue, ambient temperature, humidity levels, and the materials being glued together.
Factors Affecting Clamping Time
The clamping time of wood glue can be influenced by various factors. Firstly, different types of wood glue have different properties and require varying clamping times. For instance, some fast-drying wood glues may only need a few minutes of clamping, while others may require several hours.
Secondly, ambient temperature and humidity levels play a significant role in determining the clamping time. Higher temperatures and lower humidity levels generally shorten the clamping time, while lower temperatures and higher humidity levels may extend it. It is crucial to follow the manufacturer’s instructions regarding recommended clamping times based on these environmental factors.
Lastly, the materials being glued together can impact the clamping time. Thicker or heavier wood pieces may require more time to form a strong bond, compared to thinner or lighter ones. Additionally, highly absorbent or porous woods may also need a longer clamping time to ensure complete adhesion.
Recommended Clamping Times for Common Wood Glues
While the specific clamping times may vary between different brands and types of wood glue, here are some general guidelines for common wood glues:
1. PVA (Polyvinyl Acetate) Glue: PVA glue is one of the most commonly used wood glues. It has a moderate drying time and typically requires clamping for about 30 minutes to an hour. However, it is advisable to follow the manufacturer’s instructions for precise clamping times.
2. Polyurethane Glue: Polyurethane glue is known for its excellent bonding strength and versatility. It usually requires longer clamping times compared to PVA glue, ranging from one to six hours. Again, it is best to refer to the product instructions for specific recommendations.
3. Hide Glue: Hide glue is a traditional wood adhesive that is still used by some woodworking enthusiasts. The clamping time for hide glue can vary significantly, depending on the specific formulation and concentration. Typically, it may range from 30 minutes to several hours.
4. Epoxy Glue: Epoxy glue is renowned for its exceptional strength and durability. The clamping time for epoxy glue can vary greatly, depending on the specific product and application. It is advisable to consult the manufacturer’s instructions for precise clamping times.
Tips for Successful Wood Glue Clamping
To ensure a successful wood glue joint, here are some tips to keep in mind:
1. Prepare the wood surfaces: Before applying the glue and clamping the pieces together, ensure that the wood surfaces are clean, dry, and free from any contaminants.
2. Apply an even layer of glue: Use a brush or roller to apply an even layer of glue to both wood surfaces being joined. Avoid excessive glue application, as it can lead to weak bonds or messy clamping.
3. Use appropriate clamping pressure: Apply sufficient pressure with the clamps to ensure a tight bond. However, be cautious not to over-tighten the clamps, as it can squeeze out excess glue and weaken the joint.
4. Remove excess glue: After clamping, carefully remove any excess glue that squeezes out from the joint using a damp cloth or scraper. This will prevent dried glue from interfering with the wood finish.
5. Allow sufficient drying time: Once the clamping is done, leave the glued assembly undisturbed for the recommended drying time. Premature removal of clamps can result in weakened bonds and compromised joint strength.
In conclusion, the clamping time for wood glue depends on factors such as the type of glue, environmental conditions, and the materials being bonded. Following the manufacturer’s instructions and considering these factors will help ensure a strong and durable wood glue joint. Take your time, be patient, and enjoy the process of creating beautiful and sturdy woodworking projects.
Key Takeaways: How Long Do I Have to Clamp Wood Glue?
1. It’s recommended to clamp wood glue for at least 30 minutes to ensure a strong bond.
2. Follow the instructions on the wood glue bottle to know the specific recommended clamping time.
3. Some wood glues may require longer clamping times, so always check the label for guidance.
4. Applying pressure while clamping helps squeeze out excess glue and improves bonding.
5. Leave the clamped wood piece undisturbed until the glue has fully dried and cured, which can take several hours or even overnight.
Frequently Asked Questions
Are you wondering how long you need to clamp wood glue for optimal results? Find answers to your burning questions below!
1. Can I remove clamps immediately after applying wood glue?
While it’s tempting to remove the clamps right away, it’s generally recommended to leave them in place for at least 30 minutes to an hour. This gives the wood glue enough time to bond and set properly. Removing the clamps too soon can compromise the strength of the bond, leading to potential issues down the line.
For larger or more complex projects, it’s best to consult the specific instructions on the wood glue manufacturer’s packaging, as different types of glue may have different curing times. Following these guidelines will help ensure a strong and durable bond.
2. Can I leave clamps on overnight when using wood glue?
Yes, leaving clamps on overnight is generally a safe practice when working with wood glue. In fact, for certain projects or when using certain types of wood glue, an overnight clamping time may be recommended. This allows the glue to fully cure and create a strong bond between the pieces of wood.
However, it’s important to note that not all wood glues require such long clamping times. Some fast-drying wood glues may only require a few hours of clamping to achieve a secure bond. Always check the manufacturer’s instructions for the specific wood glue you’re using to determine the optimal clamping time.
3. What happens if I remove the clamps too soon?
If you remove the clamps too soon after applying wood glue, you risk disrupting the bond before it has had a chance to fully set. This can weaken the bond between the pieces of wood and potentially lead to joint failure or other structural issues.
To avoid this, it’s best to exercise patience and allow the recommended clamping time to pass before removing the clamps. This will ensure a strong and secure bond that can withstand the test of time.
4. Can I use alternative methods instead of clamping wood glue?
While clamping is the most common and effective method to ensure a strong bond when using wood glue, there are alternative methods you can explore if clamping is not possible or practical for your project. These include using weight, tape, or other types of temporary support to hold the pieces of wood in place while the glue sets.
However, it’s important to keep in mind that these alternative methods may not provide the same level of pressure and uniformity as clamping, which can impact the strength and durability of the bond. It’s always best to follow the manufacturer’s recommendations and use clamps whenever possible for the best results.
5. Can I speed up the drying time of wood glue to reduce clamping time?
While it can be tempting to speed up the drying time of wood glue to reduce clamping time, it’s generally not recommended. Wood glue is designed to go through a specific curing process to ensure a strong and lasting bond.
Attempting to rush this process by applying heat or other methods can lead to issues such as insufficient bond strength or premature failure. It’s best to follow the manufacturer’s instructions and allow the wood glue to dry and cure naturally for the recommended duration. Patience will pay off in the form of a secure and durable bond.
How long does wood glue take to cure.?!?!
Summary
To sum up, when using wood glue, it is important to clamp the pieces together for a sufficient amount of time to ensure a strong bond. The exact time needed for clamping will depend on a few factors, such as the type of wood glue being used and the temperature and humidity in the environment. Water-based glues usually require 30 minutes to an hour of clamping time, while polyurethane glues may need up to 24 hours. In any case, it’s always a good idea to check the instructions on the glue bottle for specific recommendations.
Remember, clamping too short can result in weaker bonds, while clamping too long may lead to a harder cleanup process. Patience is key in allowing the glue to fully dry and cure, as this will ensure the strongest possible joint. So, next time you’re working with wood glue, give it the time it needs to set and create a solid connection between your pieces. Happy woodworking!