If you’ve ever worked with wood glue, you might have wondered, “How long do I need to clamp wood glue?” It’s a common question among DIY enthusiasts and woodworking beginners alike. Well, get ready to find out! In this article, we’ll explore the ins and outs of clamping wood glue and give you all the information you need to ensure a successful bond.
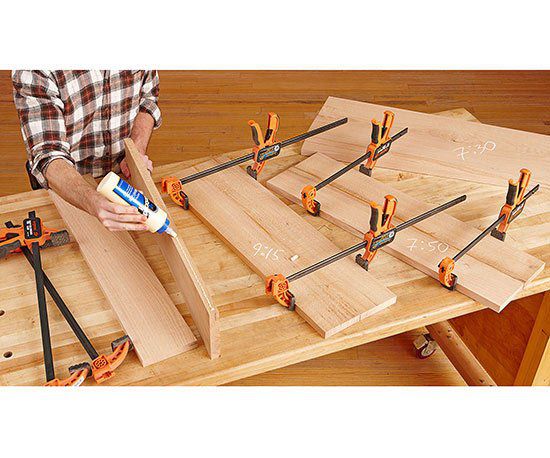
Wood glue is a fantastic adhesive that can create strong and durable bonds between pieces of wood. But here’s the catch: you typically need to apply pressure to the glued joints to achieve optimal results. That’s where clamps come into play. They hold the pieces together tightly until the glue dries, ensuring a secure bond.
So, how long do you need to keep those clamps in place? The answer depends on various factors, from the type of glue you’re using to environmental conditions. Stick around as we delve into the specifics and share some valuable tips for clamping wood glue effectively. Let’s get started!
When working with wood glue, the length of time you need to clamp it depends on the specific type of glue you’re using. In general, most wood glues require clamping for around 30 minutes to 1 hour. However, it’s always best to check the instructions provided by the manufacturer of the wood glue you’re using for accurate clamping times. Following the recommended clamping time ensures a strong and secure bond for your woodworking projects.
How Long Do I Need to Clamp Wood Glue?: A Comprehensive Guide
Woodworking projects often require the use of wood glue to ensure a strong and durable bond between pieces of wood. One common question that arises is how long to clamp the glue before it sets. The answer depends on several factors, including the type of wood glue being used and the environmental conditions. In this article, we will explore the different types of wood glue, their drying times, and provide some useful tips to ensure a successful glue-up.
The Importance of Clamping Wood Glue
When using wood glue, clamping is an essential step to achieve a strong bond between the pieces of wood. It applies pressure to the joint, forcing the glue into any gaps or irregularities and ensuring a tight fit. Without proper clamping, the glue might not bond properly, leading to weak joints or even complete failure of the project.
The amount of time required to clamp wood glue depends on the type of glue being used. Some wood glues have a longer open time, allowing for more flexible clamping times, while others set much faster, requiring immediate clamping. Understanding the characteristics of different wood glues will help you determine the appropriate clamping duration for your project.
It is important to note that excessive clamping pressure can also negatively affect the glue joint. Too much pressure can squeeze out too much glue, weaken the bond, or cause the wood to warp. Striking the right balance between adequate pressure and careful handling is crucial for a successful glue-up.
Types of Wood Glue and Their Drying Times
There are several types of wood glue available on the market, each with its own drying time and properties. Here are the three most common types:
1. PVA Wood Glue
PVA (Polyvinyl Acetate) wood glue is one of the most commonly used adhesives for woodworking projects. It provides a strong and durable bond and is easy to work with. PVA wood glues generally have a relatively short clamp time, usually around 30 minutes to 1 hour. However, it is recommended to leave the project clamped for at least 24 hours to ensure a complete cure. This extended clamping time allows the glue to fully dry and reach its maximum strength.
One advantage of PVA wood glue is its relatively fast initial tack, which means that you can start working on the clamped project sooner without fear of pieces shifting.
Tips:
- Ensure even pressure across the entire glued surface by using clamps or other suitable methods.
- Wipe off excess glue with a damp cloth before it dries to avoid unsightly glue lines.
- Avoid using excessive force when tightening the clamps to prevent damage to the wood.
2. Polyurethane Glue
Polyurethane glue, also known as PU glue, is a versatile adhesive that bonds well to a variety of materials, including wood. It has a longer open time compared to PVA glues, allowing for adjustments before the glue sets. The clamp time for polyurethane glue is generally around 1 to 2 hours. However, for maximum strength, it is recommended to keep the project clamped for 24 hours.
Polyurethane glue expands as it cures, filling any gaps in the wood, making it an excellent choice for projects where a tight fit is not possible. It is also waterproof and highly resistant to moisture, making it suitable for outdoor applications or projects exposed to water.
Tips:
- Apply the glue to both surfaces being joined, as the expansion of the glue will require extra space.
- Wear protective gloves when working with polyurethane glue, as it can be messy and difficult to remove from skin.
- Ensure the clamps are tightened enough to maintain consistent pressure, but avoid over-tightening.
3. Epoxy Adhesive
Epoxy adhesives are known for their exceptional strength and versatility. They consist of two components, a resin and a hardener, which must be mixed together before use. Epoxy generally has a longer open time compared to other glues, allowing for precise adjustments during assembly. The typical clamp time for epoxy adhesive is around 1 to 2 hours, and it requires 24 hours for full curing.
Epoxy provides an incredibly strong bond and is resistant to heat, moisture, and chemicals. It is often used in applications such as bonding large wood surfaces, filling gaps, or repairing damaged wood.
Tips:
- Follow the manufacturer’s instructions for mixing the epoxy components in the correct proportions.
- Clean the surfaces to be bonded thoroughly to ensure proper adhesion.
- Use clamps with padded jaws to prevent damage to the wood surfaces.
Factors Affecting Clamping Time
The drying time and optimal clamping duration for wood glue can be influenced by several factors:
1. Ambient Temperature and Humidity
The temperature and humidity of the environment in which you are working can significantly affect the drying time of wood glue. Higher temperatures and lower humidity levels generally speed up the drying process, while lower temperatures and higher humidity slow it down. It is essential to consider these factors and make adjustments to your clamping and drying times accordingly.
2. Type and Thickness of Wood
The type and thickness of the wood being glued can also impact the drying time. Denser woods or thicker pieces may require longer clamp times to allow the adhesive to set properly. Understanding the characteristics of the wood you are working with will help you determine the appropriate clamping duration.
3. Glue Application Technique
The way in which you apply the glue can also affect clamping time. Applying a thin and even layer of glue ensures a strong bond while allowing for faster drying. Excessive glue application can result in longer drying times and may affect the overall quality of the bond.
Tips for Successful Glue-Ups
Here are some additional tips to ensure successful glue-ups:
1. Practice Good Surface Preparation
Before applying glue, make sure the surfaces being joined are clean, dry, and free from any dust or debris. Proper surface preparation ensures better adhesion and improves the strength of the bond.
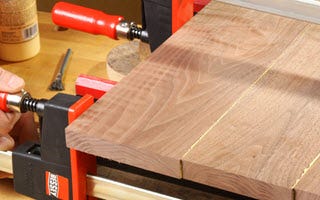
2. Use Clamps or Other Suitable Methods
Apply even pressure across the entire glued surface by using clamps or other suitable methods such as tape, straps, or weights. Ensure that the clamping pressure is evenly distributed to avoid any problems with the bond. If using clamps, be careful not to overtighten, as this can damage the wood or squeeze out excessive glue.
3. Allow Sufficient Drying Time
Follow the recommended drying times for the specific type of wood glue being used. While it may be tempting to rush the process, allowing sufficient drying time ensures a strong and durable bond. Remember to consider environmental factors such as temperature and humidity that can affect drying times.
By understanding the characteristics of different wood glues, considering the environmental factors, and following proper clamping and drying techniques, you can achieve successful glue-ups and create durable and beautiful woodworking projects.
Key Takeaways: How Long Do I Need to Clamp Wood Glue?
- Wood glue typically requires clamping for at least 30 minutes to 1 hour.
- However, for stronger and more secure bonds, it is recommended to leave the clamps on overnight.
- This allows the glue to fully dry and strengthen the wood joint.
- Always refer to the instructions on the specific wood glue you are using, as drying times can vary.
- It’s important to apply even pressure when clamping to ensure a tight bond between the wooden pieces.
Frequently Asked Questions
When it comes to woodworking and using wood glue, clamping is an essential step for a secure bond. Here are some common questions and answers regarding the duration for clamping wood glue.
1. Can I remove the clamps too soon after applying wood glue?
While it may be tempting to remove the clamps as soon as possible, it’s important to allow the wood glue sufficient time to dry and bond. As a general guideline, it is recommended to keep the clamps in place for at least 30 minutes to an hour. However, the specific drying time can vary depending on factors such as the type of wood, temperature, and humidity conditions. It’s always best to refer to the instructions provided by the wood glue manufacturer for the recommended clamping duration.
2. Is it necessary to keep the clamps on overnight?
In most cases, keeping the clamps on overnight is not necessary. Once the wood glue has had enough time to dry and bond, the clamped pieces can typically be released. However, it’s important to note that the drying time can vary depending on the type of wood glue used and the specific project requirements. If you are unsure, it’s always best to consult the manufacturer’s instructions or seek guidance from a woodworking professional.
3. Can I apply too much pressure when clamping wood glue?
While it is important to apply enough pressure when clamping wood glue to ensure a strong bond, it is possible to apply too much pressure. Excessive pressure can squeeze out the glue from the joint, resulting in a weaker bond. It is recommended to apply firm and even pressure using the clamps, ensuring that the glue is distributed evenly along the joint. If you notice excessive glue squeeze-out, you can use a damp cloth to remove the excess before it dries.
4. How can I determine if the wood glue is fully dried and cured?
The drying and curing time of wood glue can vary depending on the specific product used. As a general rule of thumb, it is important to allow the glue to dry for at least 24 hours before subjecting it to any stress or load. To ensure the glue is fully dried and cured, you can perform a simple test by pressing your fingernail into the glue joint. If the glue feels hard and there is no visible dent, it is likely fully cured. However, for more accurate information, always refer to the manufacturer’s instructions.
5. Can I remove the clamps before the wood glue dries completely?
Removing the clamps before the wood glue has completely dried can disrupt the bonding process and result in a weaker joint. It is important to allow the wood glue sufficient time to dry and cure according to the manufacturer’s instructions. Although the initial bond may feel secure, removing the clamps prematurely can lead to potential failure down the line. Patience is key when it comes to clamping wood glue, so it’s recommended to leave the clamps in place until the glue is fully dried and cured.
How long does wood glue take to cure.?!?!
Summary
So, how long do you need to clamp wood glue? Well, it depends on a few factors. First, read the instructions on the glue bottle, as different brands may have different recommendations. Generally, a good rule of thumb is to let the glue dry for at least 30 minutes to an hour. However, for stronger bond strength, you may want to leave it clamped for a longer period, like 24 hours. Remember, patience is key when it comes to woodworking!
Another important factor is the type of wood you are working with. Softwoods, like pine, may require less clamping time compared to hardwoods, such as oak. If you’re unsure, it’s always better to wait longer, as it’s better to be safe than sorry. Lastly, ensuring proper clamping pressure is essential. Too much pressure can squeeze out too much glue, while too little pressure may result in a weak bond. So, find a balance and be sure to wipe off any excess glue before it dries.
In conclusion tackle your woodworking projects with confidence, knowing how long to clamp wood glue is crucial for a strong and durable bond. Remember to follow the instructions, consider the type of wood, and ensure proper clamping pressure. With these tips, your glued joints will be solid and sturdy, giving you peace of mind and successful woodworking projects. Happy woodworking!