
Have you ever wondered how long you need to clamp wood glue? Well, you’re in the right place! Whether you’re a woodworking enthusiast or just getting started, understanding the clamping time for wood glue is crucial. In this guide, we’ll explore the ins and outs of this topic, providing you with the knowledge you need to tackle your woodworking projects like a pro.
Wood glue is a versatile adhesive used to join pieces of wood together, creating strong and durable bonds. But how long do you actually need to keep those clamps in place? The answer varies depending on several factors. Don’t worry, though, we’ll break it down for you step by step, making it easy to understand and apply in your own projects.
From curing times to different types of wood glue, we’ll cover it all. So grab your safety goggles, roll up your sleeves, and get ready to dive into the fascinating world of woodworking and clamping wood glue! Let’s get started!
How Long Do You Need to Clamp Wood Glue?
Woodworking projects often require the use of wood glue to bond pieces together. However, knowing how long to clamp the glued joints can be a bit confusing for beginners. It’s essential to understand the proper clamping time to ensure a strong and durable bond. In this article, we will explore the factors that affect clamping time, provide tips on achieving the best results, and discuss the benefits of proper clamping techniques.
Factors Affecting Clamping Time
Several factors influence the amount of time you need to clamp wood glue. The type of glue, environmental conditions, and the materials involved all play a role:
Type of Glue
The type of wood glue you use will dictate the recommended clamping time. There are different types of wood glue available, such as PVA (Polyvinyl Acetate) glue, epoxy, and polyurethane glue. Each type has its own curing time, which determines how long you should keep the clamps in place. Always refer to the instructions provided by the glue manufacturer for specific recommendations.
PVA glue is the most commonly used wood glue and usually requires clamping for at least 30 minutes to an hour. Epoxy glue, on the other hand, often requires several hours or overnight clamping for optimal results. Polyurethane glue may have a longer clamping time as well, depending on the brand.
Environmental Conditions
Both temperature and humidity can impact the drying time of wood glue. In general, warmer temperatures and lower humidity will accelerate the drying process, while cooler temperatures and higher humidity may slow it down. It’s important to work in a well-ventilated area with moderate temperature and humidity levels to ensure proper glue curing.
If you’re working in extreme conditions, such as very high or low temperatures, you may need to adjust the clamping time accordingly. Always refer to the glue manufacturer’s instructions for guidance on clamping in specific environmental conditions.
Materials Involved
The type of wood you’re working with can also affect the clamping time. Denser woods, such as hardwoods, generally take longer to fully cure compared to softer woods like pine. This is because the denser wood absorbs less moisture from the glue, slowing down the curing process. Additionally, if you’re working with materials other than wood, such as metal or plastic, you may need to consult the glue manufacturer for specific clamping recommendations.
It’s crucial to ensure a tight and even clamp pressure across the glued joint. Uneven pressure can lead to weak joints and compromises the overall strength of your project. Additionally, avoid over-clamping, as excessive pressure may squeeze out too much glue, resulting in weaker bonds.
Tips for Achieving the Best Results
When it comes to clamping wood glue, follow these tips to achieve the best results:
Choose the Right Glue
Selecting the appropriate glue for your project is key to achieving a strong bond. Consider the type of wood you’re using, the purpose of the project, and the environmental conditions in which it will be placed. Choose a glue that is suitable for the specific requirements of your project to ensure optimal results.
Prepare the Surface Properly
Before applying the glue, make sure the surface is clean and free of any dust, dirt, or finish. Sand the surfaces to be glued to remove any imperfections or hardened glue. This will help create a better bond between the wood pieces and ensure a strong joint.
Apply the Glue Evenly
Apply a thin and even layer of glue to both surfaces that you want to bond. Too much glue can result in excessive squeeze-out and weak joints. Spread the glue evenly using a brush, roller, or spreader, and eliminate any excess glue before clamping.
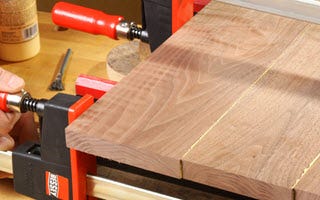
Use Adequate Clamp Pressure
Apply enough pressure with the clamps to ensure a tight bond, but be cautious not to overtighten and squeeze out excess glue. Use clamps that are suitable for the size and shape of your project to distribute pressure evenly across the glued joint.
Allow Sufficient Clamping Time
Refer to the manufacturer’s instructions to determine the recommended clamping time for the specific type of glue you are using. Resist the temptation to remove the clamps too early, as this can weaken the bond. If in doubt, it’s always better to err on the side of caution and allow for additional curing time.
Let the Glue Cure Completely
Once the clamps are removed, leave the glued joint undisturbed for the recommended drying time before subjecting it to stress or load. Make sure the environment is stable during this time to allow the glue to cure fully.
Inspect and Sand if Needed
After the glue has dried, inspect the joint for any imperfections or unevenness. If necessary, sand the surface to achieve a smooth and seamless finish.
Benefits of Proper Clamping Techniques
Proper clamping techniques are essential for achieving strong and durable bonds when working with wood glue. Here are some benefits of following correct clamping procedures:
Improved Bond Strength
Using the right amount of clamping pressure for the recommended duration allows the glue to penetrate the wood fibers fully. This results in a stronger bond that can withstand stress and load. Proper clamping ensures that the joint remains tight and secure, preventing any gaps or weak points.
Enhanced Aesthetics
Proper clamping techniques help create seamless joints with minimal visible glue lines. This enhances the overall appearance of the project, giving it a more professional and polished look.
Longer-lasting Projects
By ensuring a strong adhesive bond through proper clamping, your projects will be more resistant to warping, splitting, and other forms of damage. They will withstand the test of time and continue to look and function beautifully for years to come.
Easier Assembly and Finishing
Well-clamped joints align perfectly without any gaps, making assembly easier and more precise. Proper clamping also reduces the need for excessive sanding or filling, saving time and effort during the finishing process.
Additional Factors to Consider
Wood Moisture Content
The moisture content of the wood can affect the clamping time. If the wood is excessively moist, it may take longer for the glue to dry. Conversely, if the wood is very dry, it may absorb moisture from the glue faster, resulting in shorter clamping times. Ensure your wood has the appropriate moisture content for the project and follow the glue manufacturer’s recommendations accordingly.
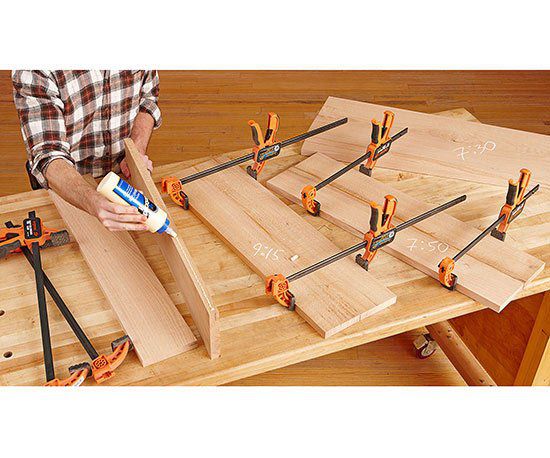
Additional Support Structures
For complex or large-scale woodworking projects, you may need to use additional support structures or jigs to ensure even clamping pressure across the entire joint. These structures can help distribute pressure evenly and prevent any bending or warping during the gluing process.
Using Clamping Cauls
Clamping cauls are wooden blocks or boards used to distribute pressure evenly across the glued joint. They help prevent bowing or twisting of the wood during clamping and result in a stronger bond. Consider using clamping cauls for projects that require extra support or have irregular shapes.
Conclusion
Proper clamping techniques are crucial for successful woodworking projects utilizing wood glue. Understanding the factors that affect clamping time, following recommended guidelines, and using the right tools will help you achieve strong and durable bonds. Remember to choose the appropriate glue, prepare the surfaces properly, apply the glue evenly, and use adequate clamp pressure. Allow sufficient clamping and drying time before proceeding with further assembly or finishing. By following these steps, you can ensure your projects are not only visually appealing but also stand the test of time.
Key Takeaways: How Long Do You Need to Clamp Wood Glue?
- Wood glue needs to be clamped for at least 30 minutes to ensure a strong bond.
- Consider the temperature and humidity of your working environment, as they can affect drying time.
- Follow the manufacturer’s instructions for the specific wood glue you are using.
- Keep the clamps in place until the glue is completely dry to avoid weakening the bond.
- Don’t rush the process – giving the glue ample time to cure will result in a stronger connection.
Frequently Asked Questions
Welcome to our FAQ section where we answer common questions about clamping wood glue. Below, you’ll find answers to some of the most frequently asked questions related to how long you need to clamp wood glue. Read on to find out more!
Q1: What is the purpose of clamping wood glue?
Clamping wood glue is essential to achieve a strong and secure bond between two pieces of wood. The purpose of clamping is to hold the pieces together firmly while the glue dries. This pressure helps eliminate gaps and ensures that the glue adheres evenly, creating a strong joint.
Without proper clamping, the pieces of wood may shift or separate, resulting in a weak bond. Clamping allows the glue to cure properly, creating a durable connection that can withstand the stress of everyday use.
Q2: How long should I keep wood glue clamped?
The duration for clamping wood glue depends on several factors, such as the type of wood, the type of glue used, and the ambient temperature. As a general guideline, most wood glues require clamping for at least 30 minutes to one hour.
However, it’s essential to refer to the specific instructions provided by the glue manufacturer. Some glues may require longer clamping times, especially for larger or more complex projects. Leaving the wood clamped for extra time helps ensure that the glue has fully cured and the bond is strong.
Q3: Can I remove the clamps before the glue is completely dry?
It is recommended to leave the clamps in place until the wood glue is completely dry and cured. Removing the clamps too early can weaken the bond and result in joint failure. The manufacturer’s instructions will provide the necessary drying time.
While some wood glues may appear dry on the surface within the recommended clamping time, the bond may not be fully cured underneath. To be safe, it’s best to wait until the glue is fully dry and hardened before removing the clamps.
Q4: Can I apply pressure to the clamped wood while the glue is drying?
It is generally not recommended to apply additional pressure or force to the clamped wood while the glue is drying. The clamping pressure should be sufficient to create a strong bond, and adding more pressure may cause the wood to shift or distort.
If you need to apply force or pressure to the wood, it’s best to do so before clamping or after the glue has fully dried. This ensures that the bond is not compromised during the drying process and prevents any potential damage to the joint.
Q5: Are there any alternatives to clamping wood glue?
While clamping is the most common method for ensuring a strong bond with wood glue, there are alternative techniques that can be used in certain situations. One option is to use specialized clamping tools, such as strap clamps or band clamps, which can provide even pressure across a larger surface area.
Additionally, some woodworkers use heavy objects or weights to hold the pieces together instead of traditional clamps. However, it’s important to note that these alternatives may not generate as much consistent pressure as clamps, so they should be used with caution and may not be suitable for every project.
How long does wood glue take to cure.?!?!
Summary
Wood glue needs to be clamped for at least 30 minutes, but longer clamping times are better. This allows the glue to fully dry and create a strong bond between the wood pieces. If you remove the clamps too early, the bond may not be strong enough.
It’s important to follow the instructions on the glue bottle and use the right amount of glue. Too much glue can create a messy and weak joint, while too little glue may not bond properly. Remember to apply pressure evenly when clamping and avoid over-tightening the clamps to prevent damaging the wood. Patience is key when working with wood glue!