Are you curious about how long you need to clamp wood glue? Well, let’s dive into this sticky topic and find out! Wood glue is a magical substance that helps hold pieces of wood together, but it needs a little help to work its magic. So, grab your toolbox and join me as we explore the world of wood glue clamping!
When it comes to the question of how long wood glue needs to be clamped, there’s no one-size-fits-all answer. It depends on several factors like the type of wood you’re working with, the ambient temperature, and even the specific brand of glue you’re using. But don’t worry, I’ve got some handy tips and tricks to help you get those clamps off at just the right time!
Now, you might be wondering why clamping is necessary in the first place. Well, when you apply wood glue, it needs some time to dry and create a strong bond between the pieces of wood. Clamping helps to keep the pieces tightly pressed together while the glue sets, ensuring a tight and secure joint. So, let’s get clamping and discover the perfect timing for your next woodworking project!

How Long Does Wood Glue Need to Be Clamped?
Wood glue is an essential adhesive for carpenters and DIY enthusiasts alike. When working with wood projects, one common question that arises is, “How long does wood glue need to be clamped?” The answer to this question depends on several factors, including the type of wood glue used, the temperature and humidity of the environment, and the size and complexity of the project. In this article, we will explore the recommended clamping times for different types of wood glue and provide helpful tips to ensure a successful glue bond.
The Importance of Clamping Time
Clamping is a critical step when using wood glue because it helps to create a strong and durable bond between the pieces of wood being joined. When pressure is applied through clamping, the glue spreads evenly across the wood surfaces, filling any gaps or imperfections. Additionally, clamping prevents the wood from moving or shifting during the curing process, ensuring a tight and secure joint. The clamping time refers to the amount of time required for the glue to reach its maximum bond strength. It is important to follow the recommended clamping time to achieve optimal results.
1. Clamping Time for PVA Wood Glue
One of the most commonly used wood glues is PVA (Polyvinyl Acetate) glue. PVA glue is easy to use, has a strong bond, and is suitable for a wide range of woodworking projects. The recommended clamping time for PVA glue is typically around 30 minutes to 1 hour. However, it is important to note that this can vary based on the specific brand of glue and the environmental conditions. It is always recommended to refer to the instructions provided by the glue manufacturer to determine the exact clamping time for your project.
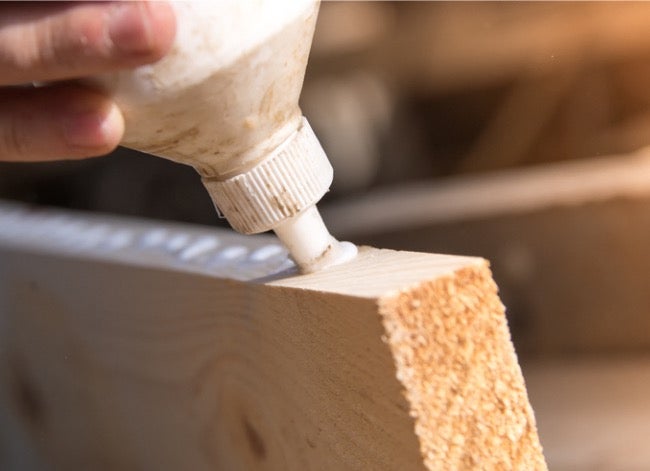
PVA glue requires moisture to cure properly, so it is important to ensure that the wood surfaces are clean, dry, and free from any oil or dust particles before applying the glue. Apply a thin and even layer of glue to one surface, then join the pieces together and firmly clamp them. Excess glue can be wiped away with a damp cloth before it dries. It is important to leave the clamped pieces undisturbed for the recommended clamping time to allow the glue to cure and achieve its maximum strength.
2. Clamping Time for Polyurethane Wood Glue
Polyurethane glue is another popular choice for woodworking projects. It is known for its excellent bonding strength and ability to bond different types of materials, including wood, metal, and plastic. The clamping time for polyurethane glue is typically longer compared to PVA glue and can range from 1 to 2 hours or more. As with PVA glue, it is important to follow the instructions provided by the manufacturer to determine the exact clamping time.
Polyurethane glue expands as it cures, so it is important to apply a thin layer to avoid excess foaming. Apply the glue to both surfaces being joined and press the pieces firmly together. It is recommended to clamp the pieces securely and leave them undisturbed for the recommended clamping time. Polyurethane glue can be messy, so be sure to wear gloves and have a damp cloth or mineral spirits on hand to clean up any excess glue before it dries.
3. Clamping Time for Epoxy Wood Glue
Epoxy wood glue is known for its exceptional strength and durability. It is often used for bonding heavy loads or joining different types of materials. The clamping time for epoxy glue can vary and is typically longer compared to other types of wood glue. It can range from a few hours to overnight, depending on the specific brand and the ambient temperature. It is crucial to follow the manufacturer’s instructions for the recommended clamping time.
Epoxy glue consists of two components – the resin and the hardener. These components must be mixed in the correct proportions according to the manufacturer’s instructions. Apply the mixed epoxy to the wood surfaces being joined and firmly press the pieces together. Epoxy glue requires time to cure fully, so it is essential to clamp the pieces together securely and leave them undisturbed for the recommended clamping time. Excess epoxy can be removed with a damp cloth or acetone before it hardens.
Additional Considerations for Clamping Wood Glue
1. Temperature and Humidity
The temperature and humidity of the environment can significantly affect the curing time of wood glue. Higher temperatures and lower humidity levels can accelerate the curing process, while cooler temperatures and higher humidity levels may slow it down. It is important to refer to the glue manufacturer’s instructions, which may provide specific guidelines for different temperature and humidity ranges. In some cases, using accelerators or moisture inhibitors may be necessary to achieve optimal results in challenging conditions.
2. Size and Complexity of the Project
The size and complexity of the woodworking project can also influence the clamping time for wood glue. Larger and more intricate projects may require longer clamping times to ensure that the glue cures thoroughly and forms a strong bond. It is essential to consider the specific requirements of your project and allocate enough time for proper clamping.
3. Quality of the Bond
While the recommended clamping times provide a general guideline, it is important to remember that the quality of the bond is ultimately more critical than the duration of clamping. Rushing the clamping process can result in a weak bond that may fail over time. Take the time to apply the glue properly, ensure even coverage, and clamp the pieces securely. If in doubt, it is always better to err on the side of caution and leave the pieces clamped for a longer duration to ensure a strong and durable bond.
In summary, the clamping time for wood glue depends on various factors such as the type of glue, temperature, humidity, and the size and complexity of the project. Always refer to the instructions provided by the glue manufacturer for the recommended clamping time. Taking the time to properly clamp your wood glue projects will result in strong and durable bonds that will stand the test of time. Remember to follow proper glue application techniques and consider environmental factors to achieve the best results.
Key Takeaways: How Long Does Wood Glue Need to Be Clamped?
- Wood glue typically needs to be clamped for at least 30 minutes to an hour.
- Some wood glues may require longer clamping times, up to 24 hours.
- Always check the specific instructions provided by the manufacturer for the recommended clamping time.
- Clamping helps ensure a strong and secure bond between the pieces of wood.
- Make sure to apply even pressure during clamping for the best results.
Frequently Asked Questions
Welcome to our FAQ section on wood glue clamping! If you’re wondering about the duration that wood glue needs to be clamped, you’re in the right place. Below, we’ve provided answers to some commonly asked questions to help you achieve the best results.
Q: Can I remove the clamps after the wood glue is dry?
A: It’s recommended to keep the clamps in place until the wood glue is fully cured, even if it feels dry to the touch. While the glue may appear dry, the curing process takes longer and can still be ongoing. Removing the clamps prematurely could result in weakened joints or parts coming loose.
As a general guideline, most wood glues need to be clamped for at least 30 minutes to 1 hour for a strong initial bond. However, depending on the type of glue and environmental factors, it’s advised to wait at least 24 hours before removing clamps for the glue to fully cure and achieve maximum strength.
Q: How tightly should I clamp the wood when using glue?
A: When applying clamps to wood glued joints, the pressure should be evenly distributed to avoid causing damage to the wood or squeezing out excess glue. The ideal level of tightness depends on various factors, such as the type of wood, the thickness of the glue joint, and the specific glue being used.
As a general rule, you should apply enough pressure to bring the joint tightly together without overdoing it. Over-clamping can cause the excess glue to squeeze out and potentially create a mess. It’s best to refer to the guidelines provided by the glue manufacturer for the recommended clamping pressure for their specific product.
Q: Is it necessary to use clamps when using wood glue?
A: While not always necessary, using clamps when applying wood glue is highly recommended. Clamping helps to ensure a strong and secure bond between the wood pieces, especially when working with larger or heavier parts that might have more stress on the joints.
Clamps also help to keep the wood pieces in position during the drying and curing process, preventing any movement or shifting that could result in misalignments. Even for smaller projects, using clamps can provide added stability and improve the overall quality of the bond.
Q: Can I speed up the drying time of wood glue by applying heat?
A: Although applying heat might seem like a logical way to accelerate the drying time of wood glue, it’s generally not recommended. Wood glue is designed to dry at room temperature, and adding heat can affect the curing process and potentially weaken the bond.
Rapid drying through heat can lead to shrinkage and degradation of the glue, compromising its strength. It’s best to allow the glue to dry naturally at room temperature, following the instructions provided by the glue manufacturer, to ensure optimal bonding results.
Q: What should I do if I accidentally clamp the wood together incorrectly?
A: Mistakes happen, and if you find that you’ve accidentally clamped the wood together incorrectly, it’s important not to panic. Wood glue typically allows for some repositioning and adjustment within the initial few minutes of application.
Gently loosen the clamps and carefully realign the wood pieces to the desired position. Wipe off any excess glue that may have squeezed out during the first clamping attempt, reapply the glue if necessary, and then reclamp the wood using the proper alignment. Double-check the positioning before leaving the piece to dry and cure according to the manufacturer’s recommendations.
How long does wood glue take to cure.?!?!
Summary
So, how long does wood glue need to be clamped? The answer depends on a few factors. Firstly, read the instructions on the wood glue bottle as it might have specific curing times. Secondly, consider the type of wood you are working with, as different woods require different clamping times. Lastly, make sure to apply even pressure while clamping and leave the glue to dry for at least 24 hours for the best results.
In conclusion, it is important to follow the instructions, consider the wood type, and allow enough time for the glue to dry when clamping wood. By doing so, you will ensure a strong and secure bond for your woodworking projects.