Have you ever wondered how long you should clamp wood glue? Well, you’re in luck! In this article, we’ll explore the optimal time for clamping wood glue and why it’s essential for your woodworking projects. So, let’s dive in and discover the secrets to successful wood gluing!
When it comes to woodworking, the right amount of time can make all the difference. So, how long should you keep wood glue clamped? The answer depends on various factors, including the type of wood, the type of glue used, and the specific project you’re working on. Don’t worry, though! We’ll break it down and give you some handy guidelines to follow.
Now, you might be thinking, “Why is clamping time important for wood glue?” Great question! Clamping ensures that the pieces of wood stay firmly together while the glue dries, creating a strong bond. By applying pressure with clamps, you’re helping to eliminate any gaps and ensuring maximum adhesion. So, let’s explore the optimal clamping times for different types of wood glue and gain a deeper understanding of this crucial woodworking step. Let’s get started!
1. Apply wood glue to the surfaces that need to be joined.
2. Align the pieces and clamp them together.
3. Leave the clamps in place for at least 30 minutes to 1 hour.
4. Check the glue’s instructions for any specific time recommendations.
5. Once the glue is dry, remove the clamps and enjoy your sturdy woodworking creation!
How Long Should You Clamp Wood Glue?
Woodworking projects often require the use of wood glue to bond pieces of wood together. However, many craftsmen wonder how long they should clamp the glued pieces until the bond sets. In this article, we will explore the factors that influence the drying time of wood glue and provide some tips on how long you should keep your clamps in place for a strong, secure bond.
1. Types of Wood Glue
There are various types of wood glue available, each with its own drying time. The most common types include PVA (polyvinyl acetate) glue, epoxy glue, and cyanoacrylate glue. PVA glue, also known as “yellow glue,” is the most widely used wood glue and typically requires around 30 minutes to 1 hour of clamp time to set. Epoxy glue, on the other hand, can take anywhere from 5 minutes to several hours to cure, depending on the specific product and application. Cyanoacrylate glue, commonly known as “super glue,” dries much faster, usually within seconds, and does not require clamping for most applications.
2. Factors Affecting Drying Time
Several factors can influence the drying time of wood glue. The environmental conditions, such as temperature and humidity, play a significant role. Higher temperatures can accelerate the drying process, while cooler temperatures can extend the drying time. Similarly, low humidity can speed up the drying time, whereas high humidity can slow it down. It is essential to ensure that the glue is applied and clamped under optimal conditions to achieve the best results.
Another factor to consider is the type of wood you are working with. Some species of wood, such as oak or maple, are denser and less porous, which can affect the absorption and drying time of the glue. Additionally, the thickness of the wood also plays a role. Thicker pieces may require more clamping time to ensure a strong bond.
3. Recommended Clamp Time
While the drying time can vary depending on the type of glue and the working conditions, a general rule of thumb for PVA glue is to leave the clamps in place for at least 30 minutes to 1 hour. This allows the glue to partially set and ensures a secure bond. For epoxy glue, follow the manufacturer’s instructions as the drying time can vary significantly. Some epoxy glues may require several hours of clamp time, while others may set faster. For cyanoacrylate glue, clamping is usually unnecessary, unless you are working with delicate or intricate pieces.
It is crucial to note that while the clamp time provides a guideline, it is advisable to wait longer before subjecting the glued pieces to stress or pressure. This additional waiting time allows the glue to fully cure and achieve maximum strength. Following the recommended clamp time and allowing for adequate drying and curing time will help ensure a long-lasting and reliable bond.
4. Tips for Clamping Wood Glue
To achieve the best results when clamping wood glue, consider the following tips:
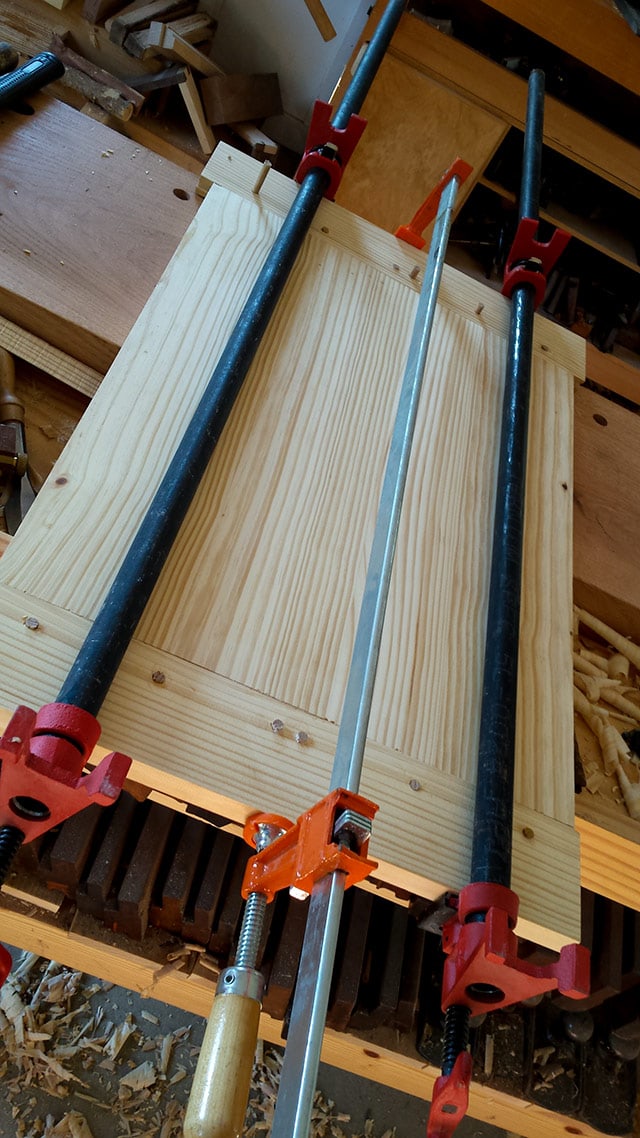
1. Apply even pressure: Ensure that the clamps distribute pressure evenly across the glued surfaces to prevent any gaps or weak spots in the bond.
2. Use enough clamps: Depending on the size of the project, use an adequate number of clamps to provide sufficient pressure on all sides and edges.
3. Clean excess glue: Wipe off any excess glue before clamping to avoid glue squeeze-out, which can create unsightly marks on the wood.
4. Remove clamps carefully: Once the recommended clamp time has passed, carefully remove the clamps without applying excessive force or twisting, as this can weaken the bond.
5. Allow for ample drying time: After removing the clamps, give the glued pieces enough time to dry and fully cure before putting any stress on the bond.
By following these tips and considering the various factors that affect drying time, you can achieve strong and durable bonds when using wood glue in your woodworking projects.
Choosing the Right Wood Glue
1. PVA Glue
PVA glue, or polyvinyl acetate glue, is the most commonly used wood glue for general woodworking projects. It is affordable, easy to use, and provides a strong bond. PVA glue is available in various types, including white glue and yellow glue.
2. Epoxy Glue
Epoxy glue is a versatile adhesive that provides a strong, durable bond. It consists of two components – resin and hardener – that must be mixed together before use. Epoxy glue is ideal for bonding different materials, including wood, metal, and plastic.
3. Cyanoacrylate Glue
Cyanoacrylate glue, commonly known as super glue or CA glue, is a quick-setting adhesive that bonds within seconds. It is ideal for small projects or for bonding delicate or intricate pieces of wood. CA glue is available in different viscosities, allowing for various applications.
Key Takeaways: How Long Should You Clamp Wood Glue?
When using wood glue, it’s important to clamp the pieces together to ensure a strong bond. Here are some key takeaways to keep in mind:
- Clamping time depends on the type of wood glue you’re using.
- Most wood glues require clamping for at least 30 minutes.
- Check the manufacturer’s instructions for specific drying times.
- For stronger bonds, consider clamping for longer periods, up to 24 hours.
- It’s best to leave the clamps undisturbed until the glue has fully dried.
Frequently Asked Questions
Here are some common questions related to using wood glue clamps effectively:
1. How do I determine the appropriate length for a wood glue clamp?
When choosing the length of a wood glue clamp, consider the width of the materials you need to glue together. A general rule of thumb is to select a clamp that is at least as long as the combined width of the materials. This ensures that the clamp can exert sufficient pressure and distribute it evenly across the glued area. Additionally, allow some extra length to accommodate any irregularities or variations in the material’s thickness.
Keep in mind that longer clamps offer greater versatility and can be used for a wider range of project sizes. If you often work with larger pieces of wood, investing in longer clamps may be beneficial. However, for smaller projects, shorter clamps may suffice.
2. What types of wood glue clamps are available?
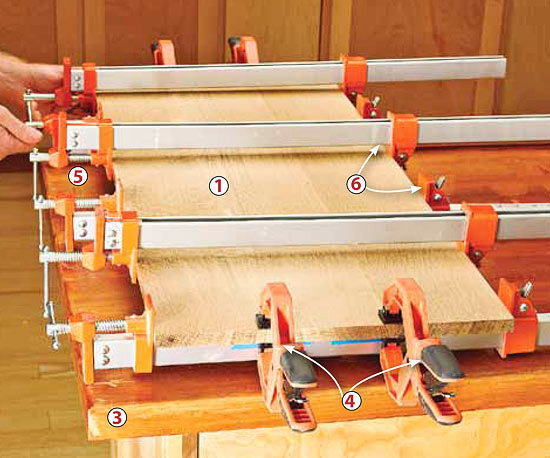
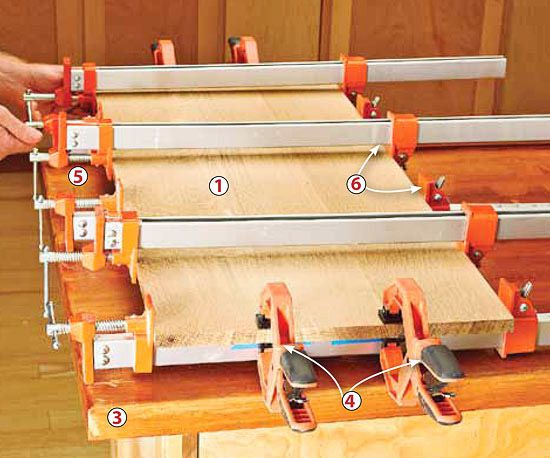
There are various types of wood glue clamps available, each designed for specific applications. The most common types include bar clamps, pipe clamps, and quick-release clamps. Bar clamps are versatile and suitable for a range of woodworking projects. Pipe clamps are commonly used for longer spans and larger projects. Quick-release clamps offer convenience and ease of use.
Additionally, there are specialty wood glue clamps, such as corner clamps, which are designed to hold corner joints securely, and band clamps, which are useful for applying even pressure on curved or irregular shapes. Consider the specific requirements of your project and choose the appropriate type of clamp accordingly.
3. Can I use multiple wood glue clamps for better results?
Absolutely! Using multiple wood glue clamps can help provide even pressure and ensure a strong bond. By using several clamps, you can distribute the clamping force more evenly across the glued area, minimizing the risk of uneven glue lines or weak joints. This can be particularly useful when working with wider or longer pieces of wood.
To use multiple clamps effectively, position them at regular intervals along the glued joint, ensuring they are spaced evenly. Tighten each clamp gradually and in a staggered manner to maintain consistent pressure. Double-check that the clamps are aligned and adjust if necessary. Remember, it’s better to have more clamps than not enough!
4. Is there a recommended drying time when using wood glue clamps?
The recommended drying time for wood glue varies depending on the type and brand you are using. Most wood glues require at least 24 hours of clamping time for the bond to cure properly. However, it’s crucial to read and follow the instructions provided by the glue manufacturer. Some brands may have different drying times or specific recommendations for optimal results.
Keep in mind that factors such as temperature and humidity can also affect the drying time. It’s best to allow the glued joint to dry undisturbed for the recommended time to ensure a strong bond. Avoid applying excessive force or stress to the joint until the glue has fully cured.
5. Can wood glue clamps be used for non-wood materials?
While wood glue clamps are primarily designed for woodworking projects, they can also be used for certain non-wood materials. However, it’s important to consider the specific characteristics of the material you are working with. For example, materials that are highly porous, smooth, or have low surface area may not bond well with wood glue.
If you plan to use wood glue clamps on non-wood materials, it’s advisable to test a small area first to assess the bond strength. Additionally, consider using specialized adhesives or clamps designed for the specific material you are working with to ensure optimal results. Always follow the manufacturer’s recommendations for the best adhesive choice and application methods.
Gluing Tips – Clamping Pressure
Summary
Wood glue takes about 30 minutes to dry enough for light handling, but a full 24 hours to completely set. Clamping the pieces together ensures a strong bond. If you don’t have clamps, apply pressure with heavy objects.
When using wood glue, remember to wipe off excess glue with a damp cloth before it dries. Always follow the instructions on the wood glue bottle for best results.