
So, you’ve got a claw hammer and you’re wondering how to use it? Well, you’ve come to the right place! In this handy guide, we’re going to show you everything you need to know about using a claw hammer like a pro. Whether you’re a DIY enthusiast or just starting out with your home repairs, we’ve got you covered. Let’s dive right in!
First things first, let’s talk about the basic anatomy of a claw hammer. It consists of a metal head, typically made of steel, with a flat face on one side and a curved claw on the other. The handle, which is usually made of wood or fiberglass, provides the grip and leverage you need to drive nails and remove them.
Now that you’re familiar with the parts of a claw hammer, let’s move on to actually using it. To drive a nail into a surface, position the flat face of the hammer against the head of the nail and firmly strike it with a controlled swing. Remember to aim for the center of the nail head to avoid bending it or damaging the surrounding surface.
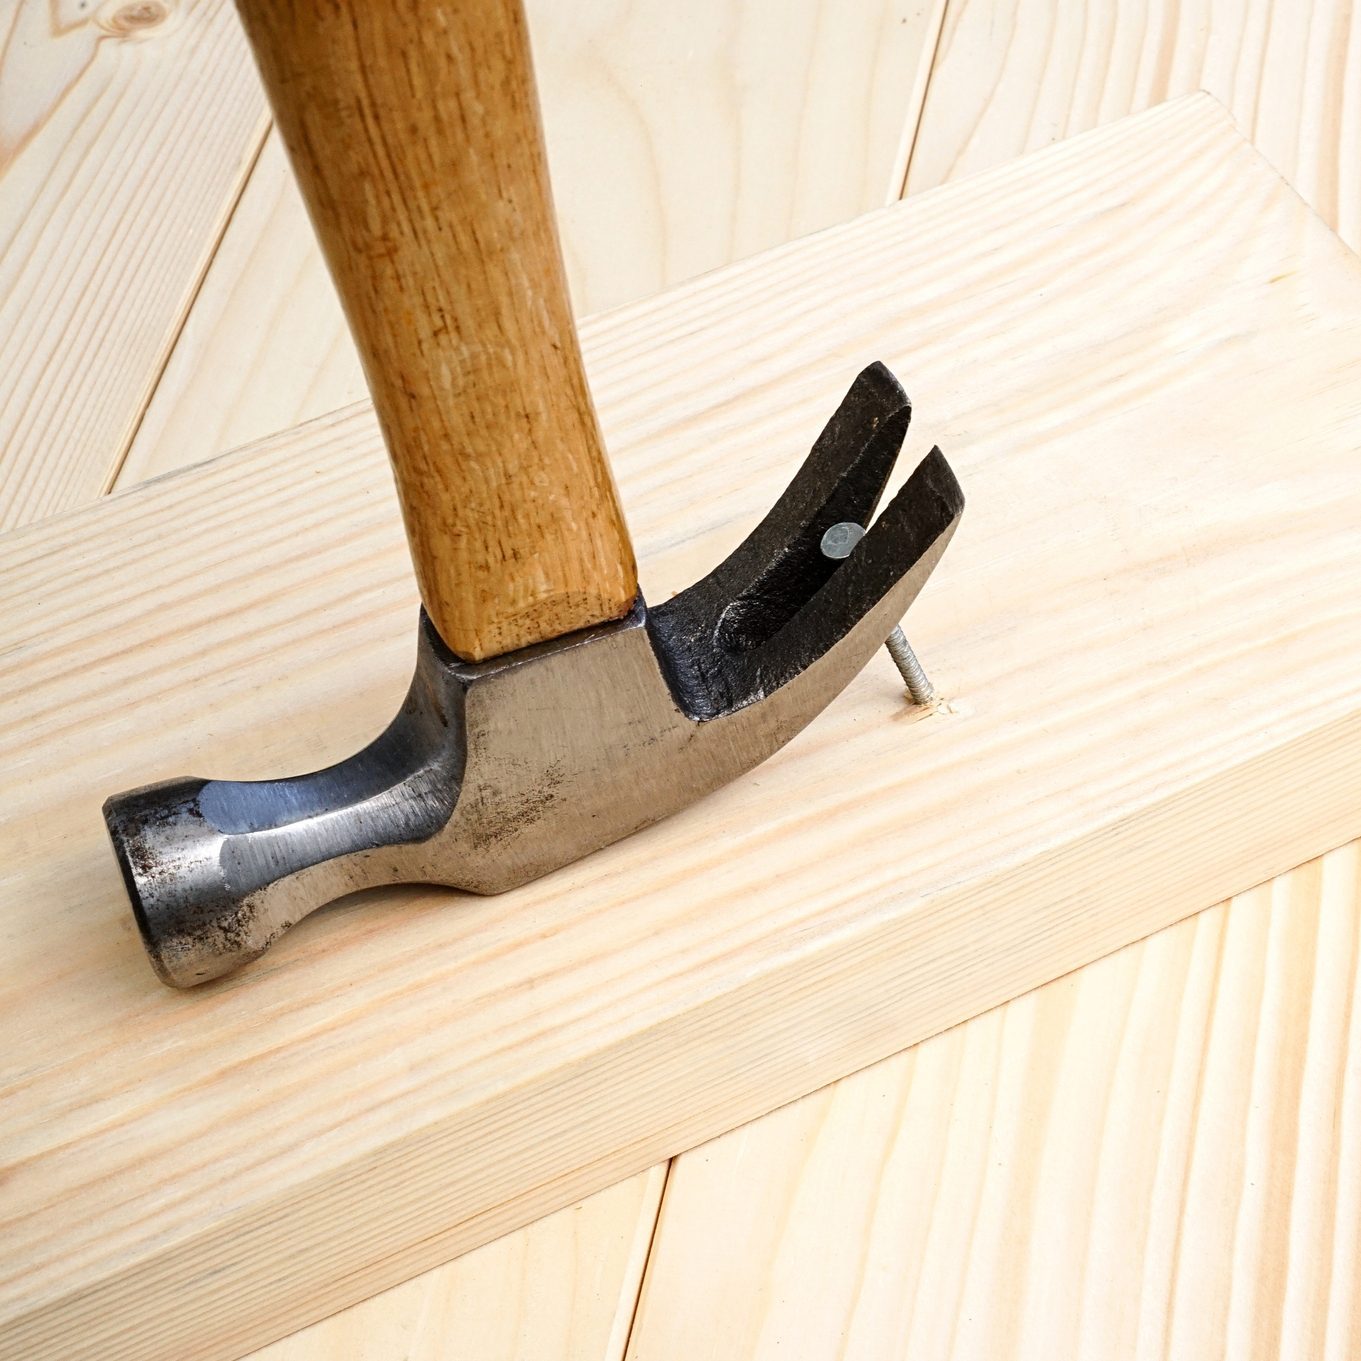
Next, let’s talk about removing nails with the claw side of the hammer. First, position the curved claw under the nail head and angle it slightly away from the surface. Apply pressure and gently rock the hammer back and forth to loosen the nail. Once it’s loose enough, use the leverage of the hammer’s handle to pull the nail out.
There you have it! That’s the basic rundown on how to use a claw hammer. With a little practice, you’ll soon become a master at driving nails and removing them like a pro. So go ahead, grab your hammer, and start tackling those home improvement projects with confidence!
1. Grip the handle of the claw hammer firmly in your dominant hand.
2. Position the curved claw end on the nail head.
3. Aim carefully and strike the nail with a controlled swing.
4. Once the nail is driven in, use the claw end to remove it if necessary.
5. Always wear safety goggles and work in a well-lit area. Remember to store your claw hammer in a secure location after use. Get started on your next DIY project confidently with these simple steps!
How to Use a Claw Hammer: The Complete Guide
A claw hammer is a versatile tool that is commonly used for various DIY projects and household repairs. Whether you’re hanging a picture frame or building a wooden structure, knowing how to use a claw hammer correctly is essential. In this comprehensive guide, we will walk you through the step-by-step process of using a claw hammer safely and effectively, along with some useful tips and tricks. So grab your hammer and let’s get started!
1. Understanding the Anatomy of a Claw Hammer
Before we delve into the technique of using a claw hammer, it’s important to understand its key components. A claw hammer consists of a metal head with two distinct ends. The flat side, also known as the face, is used for striking and pounding nails into various surfaces. On the other end, you have the curved claw, which is used for removing nails. The handle of the hammer provides a grip for better control and comfortable use. Familiarizing yourself with these parts will help you make the most out of your hammer.
When selecting a claw hammer, consider the weight of the head. Lighter hammers are suitable for delicate tasks that require precision, while heavier ones are better suited for heavy-duty jobs. Make sure the handle is securely attached to the head and fits comfortably in your hand for optimal control and reduced strain during use.
2. Choosing the Right Nail and Surface
When using a claw hammer, it’s important to use the right type of nail for the job. The length, thickness, and material of the nail should be appropriate for the surface you are working on. For example, if you’re repairing a wooden fence, use nails specifically designed for outdoor use and the thickness needed to securely hold the materials together. Thinner nails are suitable for lighter materials, while thicker ones are better for sturdier structures.
Also, consider the type of surface you are working with. Soft materials like wood require nails with blunt ends, while harder surfaces like metal may require pre-drilled holes to prevent splitting or damage. Taking the time to select the right nail and prepare the surface will ensure a successful task and minimize the risk of accidents or damage.
3. Proper Grip and Stance
Now that you’re ready to start using your claw hammer, it’s important to establish a proper grip and stance. Hold the hammer firmly but not too tightly, allowing for flexibility and control. Your hand position should be close to the end of the handle to maximize leverage.
When striking the nail, position yourself in a stable stance with your feet shoulder-width apart. Distribute your weight evenly for balance and stability. This will help you maintain control over the hammer and reduce the risk of injury.
4. Striking the Nail
The technique of striking the nail with a claw hammer requires precision and controlled force. Align the hammer face with the head of the nail, ensuring it’s centered to prevent bending or misplacement.
With your eyes focused on the target, raise the hammer to a comfortable height, allowing the weight of the hammer to generate the force needed. Bring the hammer down in a straight line, using your arm and wrist motion rather than just relying on your hand strength. Aim for a clean and direct strike on the nail, avoiding any glancing blows that may cause damage or accidents.
Repeat the striking motion until the nail is driven flush with the surface. If necessary, use a nail set to sink the nail slightly below the surface for a smooth finish. Always work in a controlled manner and take breaks if needed to maintain accuracy and avoid fatigue.
5. Removing Nails with the Claw
One of the unique features of a claw hammer is its ability to remove nails. To remove a nail, place the curved claw of the hammer under the nail head. Position it at an angle that provides leverage and stability.
Using controlled force, apply pressure against the surface you’re working on while pulling the handle of the hammer towards you. The curved design of the claw will grip the nail securely, allowing you to pry it out without damaging the surrounding materials. Repeat this motion until the nail is fully removed.
For stubborn or deeply embedded nails, you may need to use additional tools like a pry bar or pliers to aid in removal. Always exercise caution and wear protective gloves to avoid injury during this process.
6. Safety Precautions and Tips
As with any tool, it’s crucial to prioritize safety when using a claw hammer. Here are some essential safety precautions and tips to keep in mind:
- Wear protective goggles to shield your eyes from flying debris.
- Use a claw hammer on stable and secure surfaces to prevent accidents.
- Keep your fingers away from the striking zone to avoid accidental injuries.
- Avoid striking the hammer against hard surfaces without a protective block.
- Store your claw hammer in a safe and organized manner to prevent injuries from unintended contact.
- Regularly inspect the hammer for any signs of damage or wear and tear. Replace it if necessary.
7. Maintenance and Care
To ensure the longevity of your claw hammer and its optimal performance, regular maintenance and care are essential. Here are some tips to keep your hammer in top condition:
- Keep the hammer head clean and free from rust or debris by wiping it after each use.
- Store your hammer in a dry place to prevent moisture damage.
- Periodically lubricate the hinge between the handle and the hammer head with a few drops of oil.
- Replace worn or damaged handles promptly to maintain a secure grip.
Common Mistakes to Avoid
While using a claw hammer may seem straightforward, there are some common mistakes that beginners often make. By being aware of these errors, you can avoid them and ensure efficient and safe use of your claw hammer.
1. Holding the Hammer Incorrectly
One of the most common mistakes is holding the hammer incorrectly. Gripping the hammer too tightly or too loosely can result in poor control over the strike or even accidents. Remember to hold the hammer firmly but not too tightly, allowing for flexibility and control.
Additionally, make sure to position your hand closer to the end of the handle to maximize leverage and control. This will improve your accuracy and reduce the risk of injury.
2. Using the Wrong Type of Nail
Another mistake to avoid is using the wrong type of nail for your project. Using nails that are too long, too short, or too thin can result in weak connections or damage to the materials. Always take the time to choose the right type and size of nail for the task at hand.
Additionally, ensure that the material you are working on is compatible with the nail. Some surfaces may require pre-drilled holes or specialized nails to prevent splitting or damage.
3. Overstriking the Nail
Overstriking, or hitting the nail too hard, is a common mistake that can lead to accidents or damage. Applying excessive force can cause the nail to bend or break, or it may cause the hammer to lose control and slip off the target.
Instead, focus on using controlled force and letting the weight of the hammer do the work. Striking the nail accurately and with the right amount of force will result in a clean and secure connection.
4. Using the Claw Incorrectly
When it comes to removing nails, many beginners make the mistake of using the claw incorrectly. The claw should be positioned at an angle that provides leverage and stability when pulling the nail.
Avoid using excessive force or prying at awkward angles, as this can cause damage to the materials or result in injury. Take your time and use controlled force to extract the nail smoothly.
Tips for Using a Claw Hammer Efficiently
Now that we’ve covered the essential steps of using a claw hammer, let’s explore some additional tips to help you become more efficient and skilled in your hammering technique.
1. Use Pilot Holes for Hard Surfaces
When working with hard surfaces like metal or masonry, it’s important to use pilot holes. A pilot hole is a small hole drilled into the material that allows for easier insertion of the nail. This not only prevents damage to the surrounding area but also ensures a secure and tight connection.
2. Practice Accuracy and Control
Being accurate and in control of your strikes is crucial for successful hammering. Practice your aim by striking the nail accurately, ensuring it goes in straight and flush with the surface. As you gain more experience, you’ll develop better control and precision.
Remember to strike with controlled force, using your arm and wrist motion rather than just relying on hand strength. This will help you maintain accuracy and minimize the risk of accidents or damage.
3. Use Protective Equipment
When using a claw hammer, it’s important to prioritize safety. Wear protective goggles to protect your eyes from flying debris and use gloves to prevent injuries and improve grip. These simple precautions can make a significant difference in ensuring your safety while using the hammer.
4. Start with Simple Projects
If you’re new to using a claw hammer, it’s always a good idea to start with simple projects. Build your confidence and skills by practicing on smaller tasks before moving on to more complex projects. This will help you become familiar with the tool and improve your technique over time.
5. Keep Your Hammer Sharp
Ensure that the face of your hammer is smooth and free from dents or damage. This will help prevent the nail from slipping off and will improve your accuracy. If you notice any signs of wear, consider sharpening or replacing the face of your hammer.
Remember, practice makes perfect when it comes to using a claw hammer. The more you use it, the better you will become at wielding it with precision and control. So, keep these tips in mind, and enjoy your future DIY projects with confidence and efficiency!
Key Takeaways: How to Use a Claw Hammer
- Hold the claw hammer with a firm grip.
- Position the nail at the desired spot and hold it firmly.
- Use the striking end of the hammer to hit the nail with controlled force.
- To remove a nail, place the claw end under the nail head and apply leverage.
- Practice proper safety measures, such as wearing protective goggles.
Frequently Asked Questions
Here are some commonly asked questions about using a claw hammer:
1. What is a claw hammer and how is it different from other hammers?
A claw hammer is a versatile tool used for driving and removing nails. It has a flat face for pounding nails and a curved claw for removing them. What makes a claw hammer different from other hammers is its claw, which enables you to extract nails with ease, making it a useful tool for various woodworking and construction tasks.
When using a claw hammer, make sure to hold it near the end of the handle for better control and accuracy. Use the flat face to strike the nail, and when removing nails, position the claw under the nail head and apply force to pry it out.
2. What are the different parts of a claw hammer?
A claw hammer consists of several key parts. The head is the metal part of the hammer that strikes the nail. It typically has a flat face and a curved claw on the opposite side. The handle, usually made of wood or fiberglass, provides a grip for the user. The neck connects the head and the handle, ensuring stability and durability.
Some claw hammers also have a magnetic nail holder, which helps hold nails in place before striking. Understanding the different parts of a claw hammer is essential for proper usage and maintenance of the tool.
3. How do I choose the right size claw hammer?
Choosing the right size claw hammer depends on the task at hand and personal preference. For general use around the house, a 16-ounce claw hammer is often suitable. If you’re working on heavier-duty projects or need more driving power, consider a larger hammer, such as a 20-ounce or even 24-ounce model.
Remember that a heavier hammer will provide more force, but it may also be more tiring to use for extended periods. It’s best to try different sizes at a hardware store to see which one feels comfortable and balanced in your hand.
4. How should I hold a claw hammer for effective use?
To hold a claw hammer properly, grip the handle firmly with your dominant hand. Position your hand towards the end of the handle, this provides increased control and accuracy while striking or pulling nails. Keep a relaxed grip that allows you to flex your wrist and adjust the angle as needed.
It’s important to maintain a balanced grip to prevent the hammer from twisting or slipping during use. Practice your technique and find a grip that feels comfortable and natural for you.
5. How do I safely use a claw hammer?
When using a claw hammer, it’s crucial to prioritize safety. Always wear appropriate protective gear, such as safety glasses to protect your eyes from flying debris. Ensure you have a stable working surface and secure the material you’re working on to prevent accidents.
Make sure you have a clear swing path and be mindful of your surroundings to avoid accidental injuries. Additionally, when extracting nails, keep your other hand away from the claw to protect your fingers. With the right precautions, you can safely and effectively use a claw hammer for various projects.

How to use a claw hammer
Summary
So, to recap, a claw hammer is a useful tool for many different tasks. It has two parts: the flat end for hitting and the curved claws for pulling out nails. To use a claw hammer, hold it with a firm grip, aim carefully, and strike the target with controlled force. When removing nails, position the claws under the nail head and apply steady pressure to pull it out. Remember to always be cautious and wear safety goggles to protect your eyes. With practice and proper technique, you’ll become a master of using a claw hammer in no time!