
Are you curious about how to use an orbital sander? Well, you’ve come to the right place! Using an orbital sander can be a breeze once you know the proper techniques. In this article, we’ll walk you through the steps to help you become a pro at using this handy tool.
So, what exactly is an orbital sander? It’s a power tool that makes sanding wood surfaces quick and efficient. With its circular sanding pad that moves in an orbital motion, it helps you achieve a smooth and polished finish on your woodworking projects.
Now, let’s dive into the nitty-gritty of using an orbital sander. We’ll cover everything from choosing the right sandpaper grit to handling the tool with precision. By the end of this guide, you’ll be well-equipped to tackle any sanding task with confidence!
So, grab your safety goggles, put on your DIY hat, and let’s explore the exciting world of using an orbital sander! Whether you’re a budding woodworker or a curious DIY enthusiast, this article will equip you with the knowledge and skills to achieve impressive results. Let’s get started!
- Prepare the work surface by removing any obstacles or debris.
- Choose the appropriate sandpaper grit for your project.
- Secure the sandpaper onto the orbital sander’s pad.
- Hold the sander firmly and turn it on.
- Moving in a back-and-forth or circular motion, gently glide the sander over the surface.
- Continue sanding until you achieve the desired smoothness.
- Turn off the sander and clean up any residual dust.

How to Use an Orbital Sander: A Comprehensive Guide
Welcome to our comprehensive guide on how to use an orbital sander! Whether you are a DIY enthusiast or a professional woodworker, understanding how to effectively and safely use an orbital sander is essential. In this article, we will walk you through the steps, techniques, and tips to get the most out of your orbital sander and achieve smooth and flawless finishes on your woodworking projects.
Why Choose an Orbital Sander for Your Woodworking Projects?
If you are new to woodworking or unfamiliar with orbital sanders, you might be wondering why you should choose this tool for your projects. Well, there are several reasons why an orbital sander is a great addition to your toolkit:
- Efficiency: Orbital sanders are designed to remove materials quickly and effectively, saving you time and effort.
- Versatility: Orbital sanders are suitable for various surfaces, from rough stock removal to fine finishing.
- Smooth Finishes: With their unique sanding motion, orbital sanders minimize swirl marks and produce smooth finishes.
- User-Friendly: Even if you are a beginner, orbital sanders are easy to use, making them accessible to DIYers and professionals alike.
Choosing the Right Orbital Sander for Your Project
Before diving into the steps of using an orbital sander, it’s important to choose the right one for your specific project. Here are a few key factors to consider:
- The type of orbital sander: There are two main types of orbital sanders – random orbit sanders and sheet sanders. Determine which one suits your project requirements.
- Power source: Consider whether you prefer a corded or cordless orbital sander, based on the availability of power outlets and the mobility you require.
- Sanding speed: Look for orbital sanders with adjustable speed settings to cater to different materials and finish requirements.
- Ergonomics: Check the grip and overall ergonomics of the orbital sander to ensure comfortable handling during prolonged sanding sessions.
Step 1: Prepare Your Workspace
Before starting to use your orbital sander, it’s crucial to set up a proper workspace to ensure safety and efficiency. Here’s what you need to do:
- Clean the surface: Remove any dust, debris, or loose particles from the surface you will be sanding. This will prevent the sandpaper from getting clogged and ensure a smooth sanding process.
- Wear safety gear: Put on safety goggles, a dust mask, and ear protection to shield yourself from potential hazards and ensure your well-being throughout the sanding process.
- Secure your workpiece: Use clamps or a vice to secure your workpiece to a stable surface. This will prevent it from moving or vibrating during sanding.
Step 2: Choose the Right Sandpaper Grit
Now that your workspace is ready, it’s time to select the appropriate sandpaper grit for your project. The grit determines the coarseness of the sandpaper and affects the level of material removal. Here’s a general guideline:
- Coarse grit (80-120): Ideal for removing heavy layers of material or smoothing rough surfaces.
- Medium grit (150-180): Suitable for general sanding and preparing surfaces for final finishes.
- Fine grit (220+): Used for achieving smooth finishes and preparing surfaces for painting or staining.
Step 3: Start Sanding
With your orbital sander and sandpaper grit ready, it’s time to start sanding. Here’s how to do it effectively:
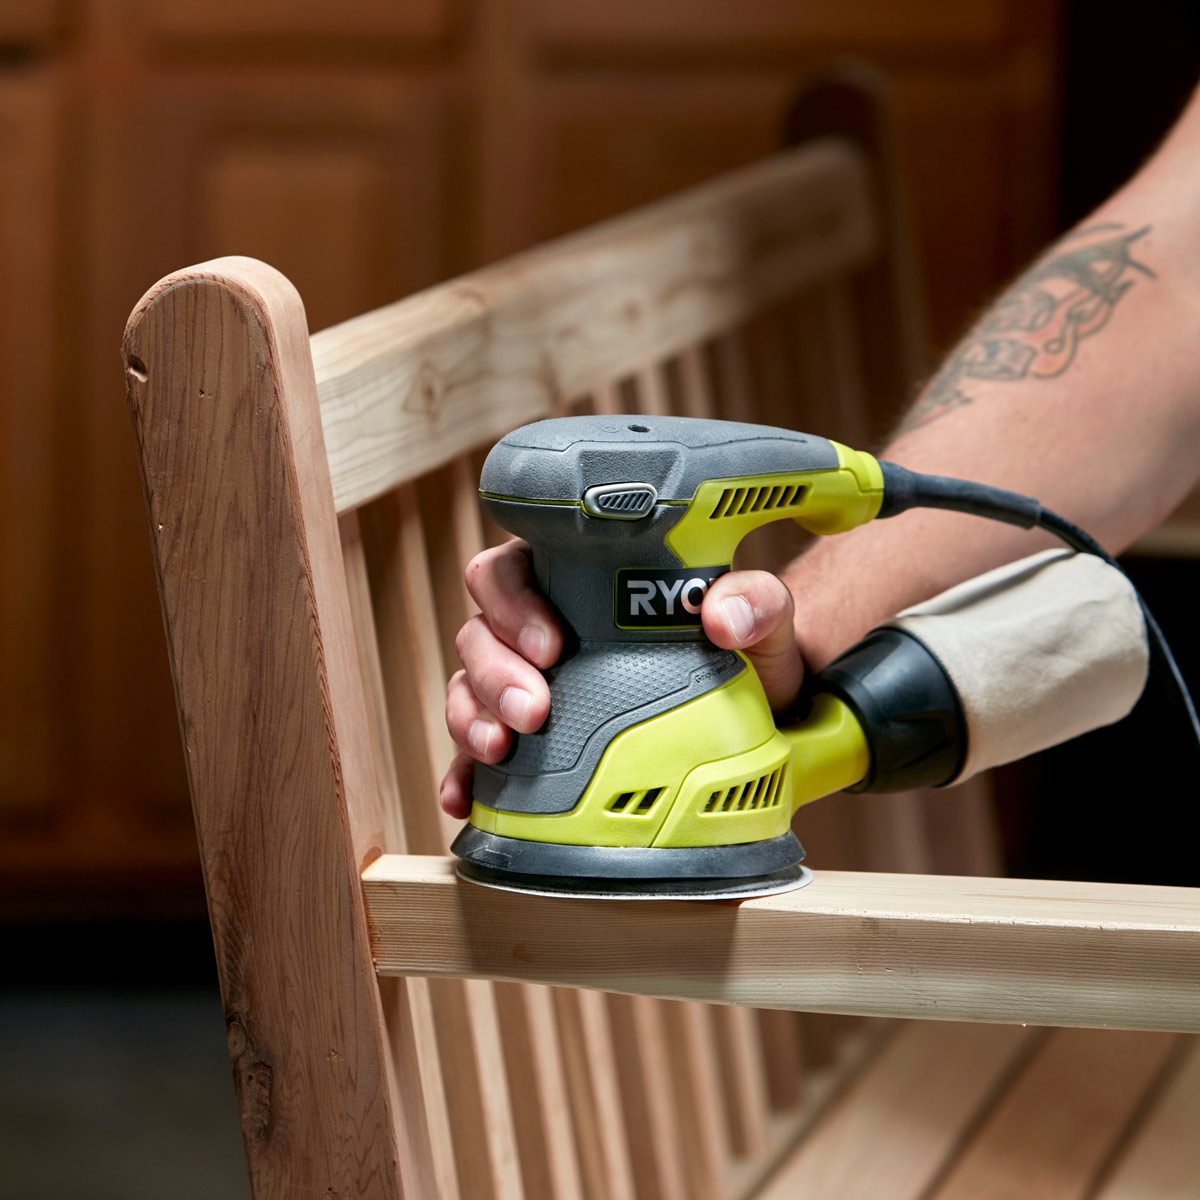
- Hold the sander correctly: Grip the sander firmly with both hands, placing one hand on the main handle and the other on the auxiliary handle for better control.
- Turn on the sander: Switch on the orbital sander and let it reach full speed before making contact with the workpiece.
- Move with the grain: Always sand with the grain of the wood to prevent scratches and achieve a more uniform finish. Apply even pressure and let the sander do the work.
- Overlap your passes: Move the sander in a back-and-forth or circular motion, slightly overlapping each pass to ensure consistent sanding across the entire surface.
- Periodically check the progress: Stop sanding occasionally to assess the surface and ensure you are achieving the desired smoothness. Adjust the sandpaper grit if necessary.
Step 4: Finish and Clean Up
Once you have completed the sanding process, there are a few final steps to achieve a polished result:
- Change the sandpaper if needed: If your sandpaper becomes worn out or clogged, replace it with a fresh sheet for optimal sanding performance.
- Clean the surface: Use a brush or vacuum cleaner to remove any sanding dust from the surface and prepare it for applying finishes or further treatment.
- Inspect your work: Take a close look at the sanded surface to ensure it is smooth and free of imperfections. Make any necessary touch-ups or additional sanding if required.
Common Mistakes to Avoid
While using an orbital sander is relatively straightforward, it’s important to be aware of common mistakes that can affect your results or safety. Here are a few mistakes to avoid:
1. Applying too much pressure:
Let the orbital sander do the work, as excessive pressure can lead to uneven sanding, swirl marks, or damage to the workpiece.
2. Neglecting dust collection:
Regularly clean the dust collection bag or connect your sander to a vacuum system to prevent dust from accumulating and affecting the sander’s performance.
3. Using incorrect sandpaper grit:
Using the wrong grit can result in ineffective sanding, either leaving the surface too rough or not removing enough material. Choose the appropriate grit for optimal results.
4. Forgetting to wear safety gear:
Always protect yourself by wearing safety goggles, a dust mask, and ear protection. Wood dust can be harmful, and loud noises can damage your hearing.
5. Not sanding with the grain:
Sanding against the grain can cause unsightly scratches and imperfections. Always sand in the direction of the wood grain for a smoother and more professional-looking finish.
Conclusion
Using an orbital sander is a skill that every woodworker should master. By following the steps and tips outlined in this guide, you’ll be able to achieve stunning finishes on your woodworking projects. Remember to select the right orbital sander for your needs, prepare your workspace, choose the appropriate grit, and use proper techniques during sanding. Avoid common mistakes and prioritize safety throughout the process. Happy sanding!
Key Takeaways: How to Use an Orbital Sander
1. Start by selecting the right sandpaper grit for your project.
2. Securely attach the sandpaper to the orbital sander’s pad.
3. Hold the sander with a firm grip, keeping it flat against the surface you’re sanding.
4. Turn on the sander and begin sanding in a back-and-forth or circular motion.
5. Apply light pressure and let the sander do the work, gradually smoothing the surface.
Frequently Asked Questions
Are you new to using an orbital sander? Not sure how to get started? Don’t worry, we’ve got you covered! Check out these frequently asked questions to learn more about using an orbital sander effectively.
How do I choose the right sandpaper for my orbital sander?
When selecting sandpaper for your orbital sander, consider the grit level and the type of material you’re working with. Lower grit numbers like 60 or 80 are best for heavy-duty sanding, while higher grit numbers like 120 or 220 are ideal for finishing. Match the sandpaper grit to the desired smoothness of your project. It’s also important to get sandpaper specifically designed for orbital sanders to ensure a proper fit and optimal performance.
Furthermore, consider the material you’ll be sanding. For rough surfaces or heavy material removal, choose sandpaper with a more aggressive grit. For delicate projects or finishing touches, opt for a finer grit to achieve a smoother result. Remember to always follow the manufacturer’s recommendations for your specific orbital sander model.
What safety precautions should I take when using an orbital sander?
Safety should always be a top priority when using power tools like an orbital sander. Start by wearing protective gear such as safety glasses, a dust mask, and ear protection to safeguard your eyes, lungs, and hearing. Additionally, secure your workpiece firmly in place to prevent any movement or slipping during sanding.
It’s also important to keep the sander flat and level on the surface, avoiding excessive pressure that can lead to uneven sanding or even damage to the material. Finally, always unplug the sander before changing sandpaper or making any adjustments to ensure your safety.
How do I sand curved or intricate surfaces with an orbital sander?
Sanding curved or intricate surfaces can be a bit challenging with an orbital sander, but it’s not impossible. One technique is to use a smaller sanding pad that matches the contour of the surface you’re working on. This allows for better maneuverability and more precise sanding.
Another option is to use sanding accessories such as flexible sanding pads or sanding sponges that can conform to the shape of the surface. These tools provide better control and flexibility when sanding intricate areas. Remember to take your time and use light, even pressure to avoid removing too much material at once.
How can I reduce the amount of dust generated when using an orbital sander?
Orbital sanders can generate a significant amount of dust, but there are ways to minimize it. One effective method is to connect your sander to a dust collection system, such as a shop vac or a dust extractor. These devices can help capture most of the dust particles, keeping your work area cleaner and reducing your exposure to airborne particles.
If you don’t have access to a dust collection system, you can use a sanding block with holes and hook-and-loop sandpaper. These sanding blocks have built-in dust extraction channels that help collect the dust as you sand. Another option is to work outdoors or in a well-ventilated area to allow the dust to disperse more easily.
How do I maintain and clean my orbital sander?
To keep your orbital sander in good working condition, regular maintenance is essential. After each use, unplug the sander and remove any remaining sandpaper. Use a brush or compressed air to remove dust and debris from the sander’s pad, vents, and other nooks and crannies.
If the sandpaper holes become clogged with dust, gently tap the sander on a hard surface to dislodge the debris. You can also use a cleaning solution or mild detergent to wipe down the sander’s exterior and remove any stubborn residue. Remember to always consult your sander’s manual for specific maintenance instructions recommended by the manufacturer.
Orbital Sander Basics | Beginner Tool
Summary
Using an orbital sander is a simple and effective way to get smooth and polished surfaces. Orbital sanders are easy to handle, even for beginners. They work by spinning a sanding pad in small circles, which helps prevent swirl marks on your project. It’s important to choose the right grit sandpaper, starting with a coarser one to remove imperfections and then moving to a finer grit for a smooth finish. Remember to keep the sander in motion and avoid pressing too hard, as this can damage the surface. Clean up properly after sanding, removing dust and debris, so your project looks its best. With practice and patience, you’ll become a pro at using an orbital sander in no time!
In conclusion, using an orbital sander is a handy skill to have for any DIY enthusiast or woodworking project. Following the right techniques, such as selecting the correct sandpaper, keeping the sander in motion, and cleaning up, will ensure that your surfaces are smooth and professional-looking. So don’t be afraid to give it a try – you’ll be amazed at the difference an orbital sander can make!