Welcome to the wonderful world of carpentry! If you’ve ever wondered, “What are the basics of carpentry?” then this is the perfect place to start. Carpentry is an incredibly valuable skill that allows you to create and build things with your own two hands. So, whether you’re a DIY enthusiast or just curious about the craft, let’s dive in and explore the fundamentals of carpentry together.
Imagine being able to build your own bookshelf, repair furniture, or even construct a treehouse. With carpentry, the possibilities are endless! In this article, we’ll break down the essentials of carpentry and lay the foundation for your woodworking journey. From understanding different tools and materials to mastering basic woodworking techniques, you’ll soon be well-equipped to tackle your very own carpentry projects.
So, if you’re ready to unleash your creativity and join the ranks of skilled carpenters, let’s get started on this exciting adventure! Whether you’re a future master craftsman or just looking to develop a new hobby, learning about the basics of carpentry will open up a whole new world of possibilities. So grab your hard hat and hammer, because we’re about to embark on an unforgettable carpentry expedition! Let’s dive in and explore the wonderful world of woodworking, one sawdust-filled step at a time.
:max_bytes(150000):strip_icc()/wood-joinery-types-3536631-v3-5b9827b84cedfd002536486c.png)
Discovering the Basics of Carpentry
Learn about the fundamentals of carpentry and gain valuable insights into this timeless craft. Whether you’re a beginner looking to embark on a new hobby or someone interested in pursuing a career in woodworking, understanding the basics of carpentry is essential. This article will delve into the various aspects of carpentry, from essential tools and techniques to different types of wood and project ideas. Get ready to unleash your creativity and build something extraordinary!
Essential Tools for Carpentry
Before you embark on any carpentry project, it’s important to familiarize yourself with the essential tools. These tools are the building blocks of any carpenter’s arsenal:
- Measuring tape: A measuring tape is crucial for ensuring accurate dimensions when cutting wood or building structures.
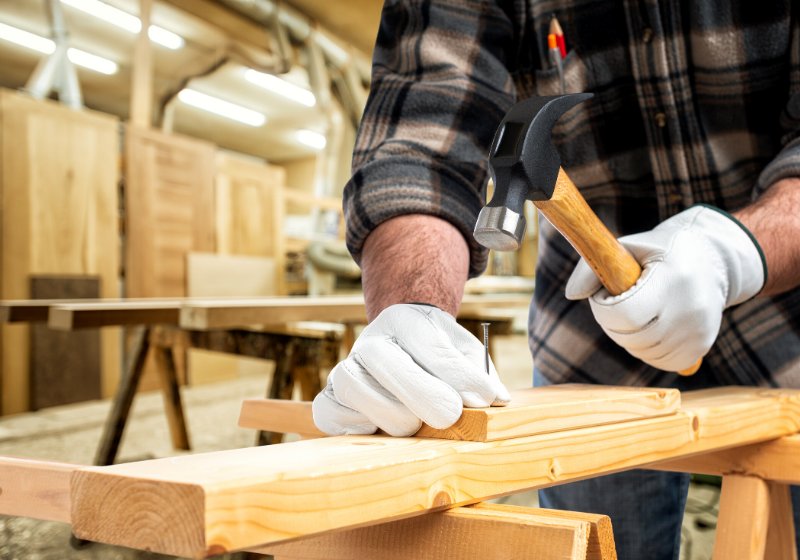
- Hammer: A hammer is essential for driving nails and securing pieces together.
- Saw: A saw is used for cutting wood, and there are various types available, such as a handsaw, circular saw, or miter saw.
- Screwdriver: Screwdrivers come in different sizes and are necessary for tightening screws or removing them.
- Chisel: Chisels are used for shaping and carving wood to achieve specific designs or joinery.
- Power drill: A power drill is a versatile tool that allows you to drill holes, drive screws, and more.
- Router: Routers are used for shaping edges and creating intricate designs in wood.
These are just a few examples of the many tools available to carpenters. As you gain experience and tackle more complex projects, you may choose to expand your collection.
Understanding Different Carpentry Techniques
Carpentry involves a wide range of techniques that are used to shape, join, and finish wood. Let’s explore some of the most common techniques:
1. Measuring and Marking
Precision is key in carpentry, and accurate measurements are essential for successful projects. Learning how to use a measuring tape, speed square, and other measuring tools will ensure your cuts and joinery are precise.
To mark measurements on wood, use a pencil or a marking knife to create clear and visible lines. These lines will guide your cuts and help you achieve the desired outcome.
Always double-check your measurements before making any cuts to avoid wasting material or compromising the integrity of your project.
2. Cutting and Shaping
Once you have accurate measurements and markings, it’s time to cut and shape the wood. This can be done using various tools, such as saws, chisels, or routers.
It’s essential to use the appropriate tool for the specific task at hand. For example, a handsaw is great for rough cuts, while a miter saw provides precise crosscuts or angled cuts.
When shaping wood, chisels allow you to create intricate designs or carve out specific areas. Routers, on the other hand, are perfect for creating decorative edges or patterns.
3. Joinery
Joinery refers to the art of connecting two or more pieces of wood to create a sturdy structure. There are numerous types of joinery techniques, including:
- Dovetail joinery: Dovetails are interlocking joints often used in drawer construction, providing strength and durability.
- Mortise and tenon joints: This technique involves creating a cavity (mortise) and a corresponding projection (tenon) to create a strong connection between two pieces of wood.
- Biscuit joints: Biscuit joinery involves inserting small, oval-shaped wooden biscuits into slots created in the joining pieces, resulting in a strong bond.
Mastering different joinery techniques will allow you to create beautiful and long-lasting structures with seamless connections.
4. Finishing and Sanding
After assembling and shaping the wood, it’s time to give your project a smooth and polished finish. Sanding is a crucial step that involves using sandpaper or sanding blocks to achieve a silky-smooth surface.
Once the wood is sanded, you can apply various finishes, such as paint, stain, or a protective coating like lacquer or polyurethane. These finishes not only enhance the appearance of the wood but also protect it from moisture and wear.
Remember to follow safety precautions, such as wearing protective gear and working in a well-ventilated area when applying finishes.
Choosing the Right Wood for Your Carpentry Projects
One of the essential aspects of carpentry is choosing the right type of wood for your projects. Different wood species have unique characteristics that can significantly impact the final result. Here are some popular wood choices:
1. Hardwood
Hardwood comes from deciduous trees and is known for its durability and strength. Oak, walnut, maple, and cherry are common examples of hardwood. These woods are often used for furniture, cabinets, and flooring due to their exceptional quality and longevity.
2. Softwood
Softwood, as the name suggests, comes from coniferous trees and is generally easier to work with than hardwood. It’s widely used in construction, framing, and outdoor projects. Pine, cedar, and spruce are common types of softwood.
3. Plywood
Plywood is a versatile and cost-effective wood product made by gluing together multiple layers of thin veneers. It’s known for its strength and stability and is often used for sheathing, furniture, and cabinetry.
Project Ideas for Aspiring Carpenters
Now that you have a solid understanding of the basics of carpentry, it’s time to unleash your creativity and start building! Here are some project ideas to get you started:
1. Wooden Shelves
Create custom wooden shelves for your home. Whether you want to display books, plants, or decorative items, shelves are a versatile and practical addition to any room.
Consider using floating shelf brackets for a sleek and modern look, or opt for traditional brackets for a more rustic feel.
2. Picture Frames
Put your woodworking skills to use by crafting unique and personalized picture frames. Get creative with different wood types, joinery techniques, and finishes to match your personal style.
Picture frames make excellent gifts for loved ones or stunning additions to your own home decor.
3. Outdoor Bench
Build an outdoor bench to enjoy your backyard or garden. With the right measurements and joinery techniques, you can create a durable and comfortable seating option for outdoor gatherings.
Consider using weather-resistant wood, such as cedar or teak, and add cushions or pillows for extra comfort.
The Joy of Carpentry
Now that you’ve explored the basics of carpentry, you’re equipped with the knowledge and tools to start your woodworking journey. Remember to start with small projects and gradually build your skills and confidence.
Carpentry is a fulfilling craft that allows you to bring your imagination to life while creating functional and beautiful objects. Enjoy the process, embrace the learning curve, and don’t be afraid to make mistakes. With time and practice, you’ll become a skilled carpenter capable of crafting extraordinary creations.
Key Takeaways: What are the Basics of Carpentry?
- Carpentry is the skill of working with wood to build or repair structures.
- The basic tools used in carpentry include hammers, saws, drills, and screwdrivers.
- Measuring and marking accurately is crucial in carpentry to ensure precise cuts and fits.
- Understanding different types of wood and their characteristics is important for selecting the right materials.
- Learning basic joinery techniques like cutting joints and using fasteners is essential for building sturdy structures.
Frequently Asked Questions
Welcome to our Frequently Asked Questions section where we’ll cover the basics of carpentry. If you’re new to this field or looking to brush up on your knowledge, you’re in the right place. Below, you’ll find answers to some common questions related to carpentry. Let’s dive in!
Q: What tools do I need to start carpentry?
To start carpentry, you’ll need a few essential tools. These include a tape measure, a combination square, a hammer, a saw, a chisel, and screwdrivers. These basic tools will allow you to measure, cut, shape, and connect wood for various projects. As you progress, you may want to expand your tool collection to include more specialized or advanced equipment.
When choosing tools, it’s important to prioritize quality. Investing in durable and well-made tools will not only make your work easier but also ensure your safety during carpentry projects. Look for tools that are comfortable to hold and easy to use, as this will make your learning experience more enjoyable.
Q: How can I learn carpentry as a beginner?
If you’re new to carpentry, there are several ways you can start learning the basics. One option is to enroll in a local trade school or community college that offers carpentry courses. These classes will provide you with hands-on experience and instruction from knowledgeable instructors.
Another option is to seek out apprenticeships or mentorships with experienced carpenters. This allows you to learn directly from someone with practical expertise. Additionally, there are numerous online resources, tutorials, and DIY websites that provide step-by-step instructions and videos on carpentry techniques and projects. These can be a great way to learn at your own pace and gain practical skills.
Q: What are some important safety precautions in carpentry?
Safety should always be a top priority in carpentry. Here are a few important safety precautions to keep in mind:
1. Wear appropriate protective gear, such as safety glasses, gloves, and a dust mask, to protect yourself from potential hazards.
2. Ensure your tools are in good working order and use them correctly to prevent accidents.
3. Keep your work area clean and organized to minimize the risk of tripping or falling.
4. Use clamps or vises to secure your workpieces when cutting or shaping them.
5. Always follow proper lifting techniques to prevent strain or injury.
Remember, carpentry involves working with sharp tools and heavy materials, so being mindful of safety precautions is crucial.
Q: How do I choose the right type of wood for my carpentry project?
Choosing the right type of wood for your carpentry project depends on several factors:
1. Functionality: Consider the purpose of your project. Will it be exposed to the elements? Is it for indoor or outdoor use? Different types of wood have varying levels of durability and weather resistance.
2. Appearance: Think about the aesthetic appeal you’re aiming for. Different wood species have distinct colors, grains, and textures. Choose one that aligns with your desired look.
3. Workability: Consider how easy or difficult the wood is to work with. Softer woods are generally easier to shape and cut, while harder woods may require more effort and specialized tools.
4. Budget: Lastly, take into account the cost of the wood. Some wood species are more expensive than others. Set a budget and choose a wood that fits within your financial means.
Q: What are some common carpentry joints and their uses?
Carpentry joints are essential for connecting pieces of wood together. Here are a few common types:
1. Butt Joint: This joint is used to join two pieces of wood at their ends. It’s straightforward and often reinforced with screws, nails, or dowels.
2. Miter Joint: This joint is created by cutting two pieces of wood at an angle and joining them together to form a 90-degree corner. It’s commonly used in trim work and framing.
3. Dovetail Joint: A dovetail joint is known for its strength and decorative appeal. It’s created by interlocking fan-shaped pins on one piece with tails on the other.
4. Mortise and Tenon Joint: This joint involves fitting a protrusion (tenon) from one piece into a matching hole (mortise) on another. It’s widely used in furniture-making and construction.
These are just a few examples of the diverse range of carpentry joints available. The joint you choose will depend on the specific project and the level of strength and aesthetics required.
Summary
So, here’s what we learned about the basics of carpentry. Carpentry is all about building things out of wood. First, you need to have the right tools, like a hammer and saw. Then, you measure and cut your wood, making sure everything is the right size. After that, you put the pieces together using nails or screws. Finally, you can finish your project by sanding the wood and adding paint or stain. Remember, carpentry takes practice, so don’t get discouraged if things don’t look perfect right away. With time and patience, you can become a skilled carpenter!