Are you wondering what grit sandpaper to use when flattening a hand plane? You’ve come to the right place! Choosing the right sandpaper grit is essential for achieving a smooth, flat surface on your hand plane. In this article, we’ll explore the different grit options and help you determine the best one to get the job done efficiently and effectively. So, let’s dive in and discover the perfect grit for your hand plane flattening needs!
When it comes to sanding a hand plane, the grit of the sandpaper plays a crucial role. You want to start with a coarser grit to remove any imperfections, such as nicks or high spots, on the plane’s sole. This initial sanding step helps to establish a level surface. As you progress, moving to finer grits will refine the surface and create a smoother finish. By the end, you’ll have a perfectly flat hand plane ready for action!
So, what grit sandpaper should you use? Well, it depends on the condition of your hand plane. If you’re starting with a plane that’s heavily worn or has significant imperfections, begin with a lower grit sandpaper, such as 80 or 100. This grit will make quick work of removing material and leveling the sole. As you progress to finer grits, like 120 or 150, you’ll notice the surface becoming smoother and more refined. Remember, the key is to work your way up gradually, allowing each grit to do its job before moving on.
Now that you know the importance of choosing the right grit sandpaper when flattening a hand plane, you’re well-equipped to get the job done. Embrace the process, sanding from coarser to finer grits, and watch your hand plane transform into a precision masterpiece. So, grab your sandpaper, put on your safety goggles, and let’s give that hand plane the love and attention it deserves!

What Grit Sandpaper to Flatten a Hand Plane: A Comprehensive Guide
Welcome to our comprehensive guide on selecting the right grit sandpaper to flatten a hand plane. If you’re a woodworking enthusiast, you understand the importance of having a smooth and flat hand plane to achieve precise and effortless cuts. In this article, we’ll delve into the details of choosing the optimal grit sandpaper to flatten your hand plane effectively. So, let’s dive in!
What is a Hand Plane?
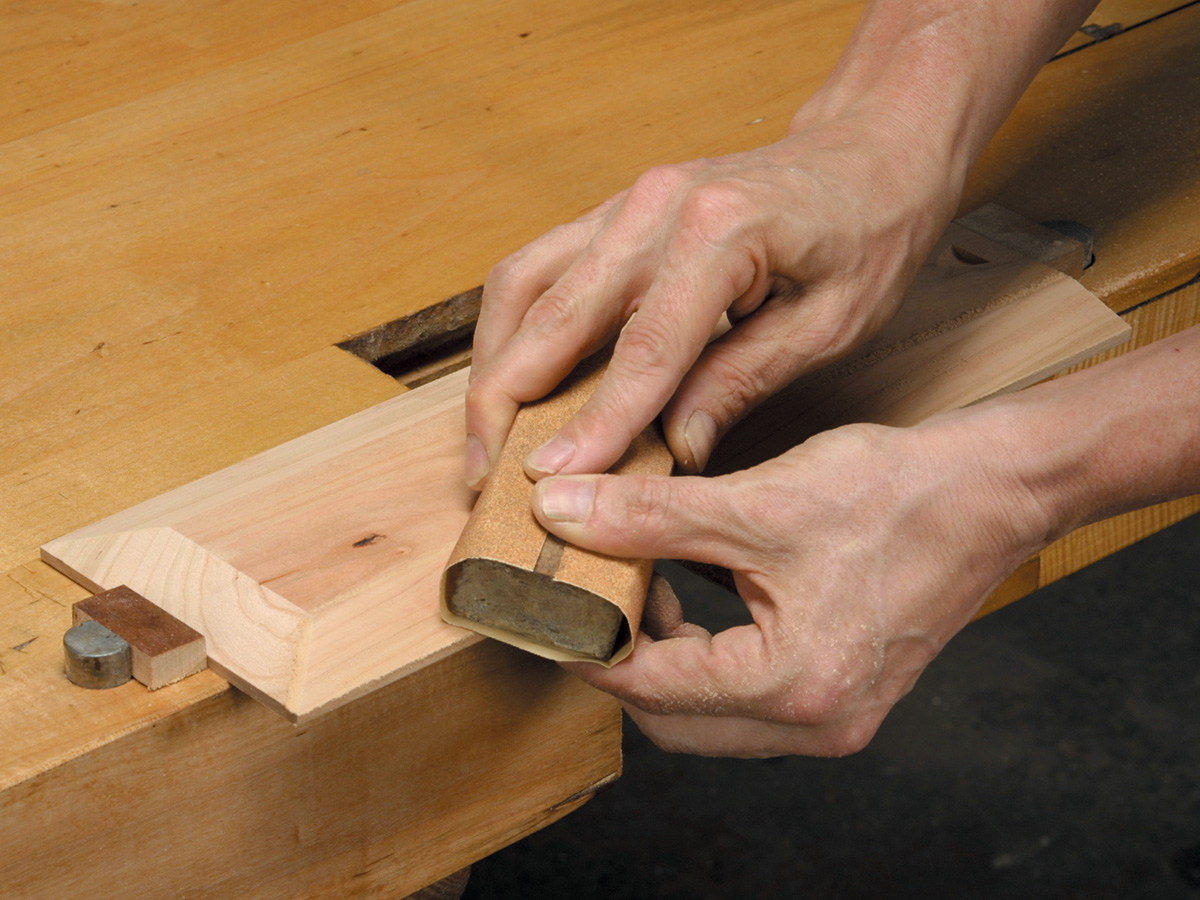
Before we discuss the grit sandpaper, let’s take a moment to understand what a hand plane is. A hand plane is a woodworking tool used to shape, flatten, or smooth out wood surfaces. It consists of a sharp blade or iron, also known as the plane iron, mounted in a bed or sole. The process of flattening a hand plane involves removing any imperfections or warps from the sole to ensure a level and consistent contact with the wood. Now, let’s explore the different grit sandpapers that can help you achieve a flat hand plane.
The Role of Grit in Sandpaper
Grit refers to the size of the abrasive particles on a sandpaper. It determines the level of coarseness or fineness of the sandpaper. Lower grit numbers indicate coarser abrasives, while higher grit numbers indicate finer abrasives. The grit you choose for flattening a hand plane depends on the current condition of the plane’s sole and the level of smoothness you desire.
Coarse Grit Sandpaper (80-120 Grit): If your hand plane has significant imperfections or requires substantial flattening, starting with a coarse grit sandpaper, such as 80 or 120 grit, is recommended. Coarse grit sandpaper removes material quickly and efficiently, making it ideal for removing deep scratches, dents, or warps.
Medium Grit Sandpaper (150-220 Grit): Once you have flattened the sole of your hand plane with coarse grit sandpaper, you can move on to medium grit sandpaper, usually ranging from 150 to 220 grit. This grit range helps to refine the surface and remove any remaining imperfections or scratches left behind by the coarse grit sandpaper. It is an essential step in achieving a smooth and flat sole.
Fine Grit Sandpaper (320-600 Grit): The next stage in the hand plane flattening process involves using fine grit sandpaper, typically ranging from 320 to 600 grit. This grit range further refines the surface of the hand plane sole, smoothing out any visible scratches or marks left by the previous grits. It is crucial for achieving a polished and flawless finish.
| Grit Range | Recommended Use |
|---|---|
| 80-120 | Removes deep scratches and imperfections |
| 150-220 | Refines surface and removes remaining imperfections |
| 320-600 | Polishes and achieves a smooth, flawless finish |
Extra Fine Grit Sandpaper (800-2000 Grit) for Finishing Touches
For those who desire an exceptionally smooth and refined finish on their hand plane, extra fine grit sandpaper can be used for the final touches. This grit range typically falls between 800 and 2000 grit and is ideal for achieving a mirror-like surface. However, it is important to note that the extra fine grit sandpaper is not necessary for functionality but is more for aesthetic purposes.
When using extra fine grit sandpaper, it’s essential to keep in mind that achieving a perfectly flat and level surface highly depends on your technique. Consistent pressure and even strokes are key to avoiding any unevenness on the sole of your hand plane.
Tips for Flattening a Hand Plane
Now that we’ve covered the different grit sandpapers, let’s take a look at some helpful tips for successfully flattening a hand plane:
- Start with a coarse grit sandpaper to remove major imperfections evenly.
- Work systematically from one end of the sole to the other to ensure consistent flattening.
- Take breaks and check the progress frequently to avoid removing more material than necessary.
- Transition to finer grits gradually, ensuring each grit removes the scratches left by the previous one.
- Use a sanding block or attach the sandpaper to a flat surface to ensure consistent pressure and avoid uneven sanding.
- Finish with extra fine grit sandpaper for a polished look, if desired.
- Regularly clean the hand plane during the flattening process to remove any debris or buildup.
Choosing the Right Grit Sandpaper for a Perfectly Flat Hand Plane
Now that you have a comprehensive understanding of the different grit sandpapers and their respective uses for flattening a hand plane, it’s time to choose the right grit for your specific needs. Assess the current condition of your hand plane’s sole and determine the level of smoothness you aim to achieve. Remember, starting with a coarse grit and gradually moving to finer grits is the key to success.
By following the tips provided and using the appropriate grit sandpaper, you’ll be able to flatten your hand plane effectively and efficiently. Enjoy the process and the satisfaction of working with a perfectly flat and smooth hand plane!
Key Takeaways: What Grit Sandpaper to Flatten Hand Plane?
- Start with a coarser grit, around 80 to 100, to remove any imperfections or high spots on the hand plane’s sole.
- Move on to a medium grit, around 150 to 180, to further smooth out the surface and prepare it for finer grits.
- Use a fine grit, around 220 to 320, to achieve a smoother finish and remove any remaining scratches or marks.
- If desired, you can progress to even finer grits, such as 400 to 600, for an extra smooth surface.
- Remember to always progress from coarser to finer grits for optimal results when flattening a hand plane.
Frequently Asked Questions
Below are five questions and answers related to sandpaper grits for flattening a hand plane:
1. What are the different grits of sandpaper I can use to flatten a hand plane?
When flattening a hand plane, it’s best to start with a coarser grit, such as 80 or 100. This allows you to remove any major imperfections or high spots quickly. Once you’ve achieved a relatively flat surface, you can then transition to a finer grit, such as 220 or 320, to refine the flatness further and smoothen out the surface. Finally, you may use an extra-fine grit, like 400 or 600, to achieve a polished finish.
Keep in mind that the specific grits you choose may vary depending on the condition of your hand plane and personal preferences. The key is to progressively move from coarser grits to finer ones for optimal results.
2. Can I skip the coarser grits and start with a finer grit?
While it may be tempting to skip the coarser grits and start with a finer grit to save time, it is not recommended. Coarser grits are essential for removing large imperfections and quickly shaping the surface. If you start with a finer grit, you’ll find it takes longer to achieve a smooth, flat result, as the finer grits are not designed for heavy material removal.
By starting with a coarser grit, you efficiently tackle the initial leveling, making it easier to transition to finer grits for a better finish. Skipping the coarser grits may result in inconsistent flattening and a longer sanding process overall.
3. How do I know when to switch to a finer grit?
You’ll know it’s time to switch to a finer grit when you’ve successfully removed the major imperfections and achieved a relatively flat surface with the grit you’re currently using. To test for flatness, you can shine a light across the surface to see if there are any significant gaps or bumps. If the surface appears relatively flat, you can move on to a finer grit to further refine and smoothen the surface.
Remember that each grit removes the scratches left by the previous one, so transitioning to a finer grit gradually helps achieve a smoother, more polished surface. It’s important to be patient and not rush the process, as this will yield better results in the end.
4. Can I use sandpaper alone to flatten a hand plane?
While sandpaper can be effective in flattening a hand plane, it’s often more efficient to combine it with other tools, such as a hand plane flattening jig or a precision flat surface. These tools help ensure a more even and accurate flattening process, especially for larger hand planes.
Using sandpaper alone can be time-consuming, as it requires consistent hand movements and pressure to maintain an even surface. A combination of sandpaper and additional tools provides more stability and control, leading to better results in less time.
5. Is there a specific sandpaper brand I should look for?
There are many reputable sandpaper brands available, each with its own advantages. It’s often recommended to choose sandpaper from well-known brands, as they tend to have consistent quality and offer a wide range of grit options.
Some popular sandpaper brands include 3M, Norton, and Mirka. When selecting sandpaper, be sure to consider its grit range, durability, and compatibility with your hand plane’s material. Reading reviews and checking recommendations from experienced woodworkers can also provide helpful insights into the best brands for flattening hand planes.

Summary
So, when it comes to flattening a hand plane, you need to start with a coarse grit sandpaper, like 80 or 100. This helps remove the high spots and imperfections. Then, move on to a medium grit, like 150 or 180, to further smooth out the surface. Finally, finish off with a fine grit sandpaper, around 220 or higher, for a polished and smooth result. By following these steps, you can ensure your hand plane is ready to use for all your woodworking projects.
In conclusion, the key to flattening a hand plane is to use progressively finer grits of sandpaper. Start with a coarse grit to remove imperfections, then move to a medium grit for smoothing, and finish with a fine grit for a polished surface. With this knowledge, you’ll be able to keep your hand plane in top shape and achieve excellent woodworking results.