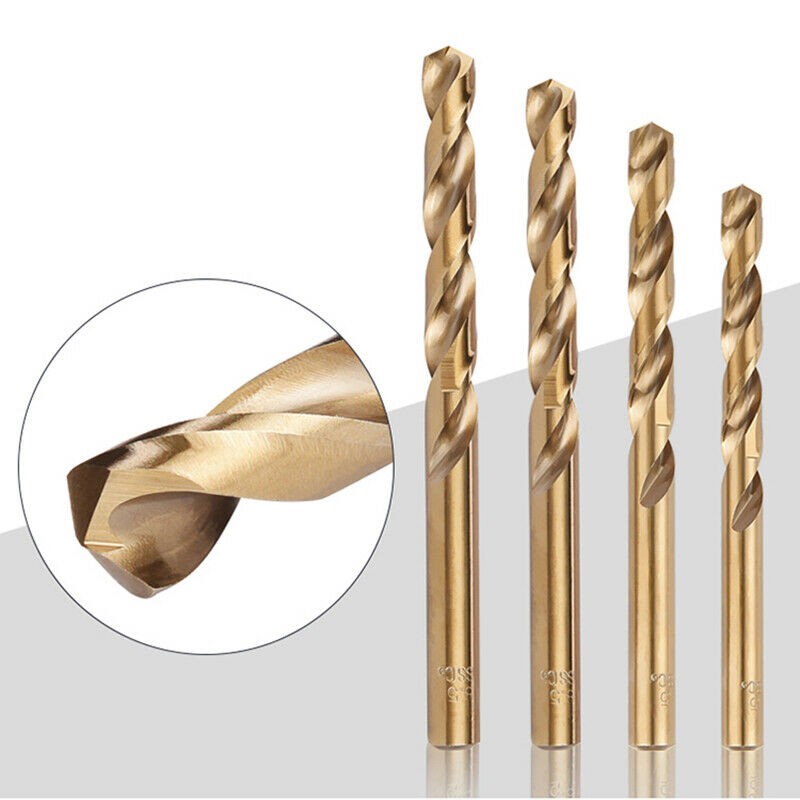
When it comes to drilling, one question that often arises is, “What should be used to remove the swarf from the drill bits?” Swarf refers to the chips or shavings that accumulate on the drill bit during the drilling process. In this article, we’ll explore different options for effectively getting rid of swarf and keeping your drill bits in top shape.
As you might imagine, leaving swarf on your drill bits can impact their performance, causing them to become less effective over time. That’s why it’s important to know how to properly remove the swarf to ensure your drill bits stay sharp and efficient. So, let’s dive in and discover the best methods for swarf removal!
From using a brush or compressed air to employing specialized cleaning solutions, we’ll explore a range of strategies to help you maintain your drill bits and maximize their lifespan. Whether you’re a hobbyist or a professional, understanding how to remove swarf effectively will elevate your drilling experience. So, without further ado, let’s uncover the secrets to keeping your drill bits free from swarf buildup!

What Should Be Used to Remove the Swarf from Drill Bits?
Whether you are a professional carpenter or a DIY enthusiast, keeping your drill bits clean and free from swarf is crucial for optimal performance and durability. Swarf, which consists of metal shavings and debris, can accumulate on drill bits during use and compromise their cutting ability. In this article, we will explore various methods and tools that can be used to effectively remove swarf from drill bits. So, let’s dive in and learn how to keep your drill bits in top shape!
Why is it Important to Remove Swarf from Drill Bits?
Before we delve into the methods of removing swarf from drill bits, let’s first understand why it is important to do so. Swarf buildup can lead to several issues that can affect the efficiency and lifespan of your drill bits. Firstly, swarf can clog the flutes of the drill bits, preventing them from effectively removing material during drilling. This can result in slower drilling speeds, less accurate holes, and increased strain on the drill motor. Additionally, the accumulation of swarf can cause heat buildup, leading to premature wear and potentially damaging the cutting edges of the drill bits. By regularly removing swarf from your drill bits, you can ensure smooth and efficient drilling operations, prolong the lifespan of your drill bits, and maintain the quality of your work.
Method 1: Brushing off Swarf with a Wire Brush
One of the simplest and most effective methods to remove swarf from drill bits is by using a wire brush. Start by gripping the shank of the drill bit firmly with one hand. Take a wire brush, preferably one with fine bristles, and brush off the swarf from the cutting edges and flutes of the drill bit. Make sure to work the brush in both clockwise and counterclockwise directions to dislodge any stubborn swarf. You can also use a toothbrush or a small wire brush attachment on a power drill for added convenience and efficiency. After brushing off the swarf, wipe the drill bits clean with a rag or paper towel to remove any remaining debris.
Benefits of Using a Wire Brush
Using a wire brush to remove swarf offers several benefits. Firstly, wire brushes are easily accessible and affordable, making them a cost-effective solution for keeping your drill bits clean. They are also portable and can be carried in your toolbox, allowing you to clean your drill bits on the go. Additionally, wire brushes come in different sizes and bristle types, allowing you to choose the one that best suits your needs. Whether you are working with small drill bits or larger ones, a wire brush can effectively remove swarf and prolong the lifespan of your tools.
Method 2: Soaking in a Solvent
Another effective method to remove swarf from drill bits is by soaking them in a solvent. Start by filling a container with a suitable solvent such as mineral spirits or a degreaser. Place the drill bits into the solvent and let them soak for a few minutes. The solvent will help break down the swarf and loosen it from the drill bits. After soaking, use a wire brush or a toothbrush to gently scrub away the loosened swarf. Rinse the drill bits with water and dry them thoroughly before storing or using them.
Benefits of Soaking in a Solvent
Soaking drill bits in a solvent can provide several advantages. Solvents are excellent at dissolving grease, oil, and other stubborn materials that may be mixed in with the swarf. By soaking the drill bits in a solvent, you can ensure a more thorough cleaning and remove any contaminants that may affect the performance of the drill bits. Additionally, solvents can also help remove rust and prevent corrosion, further extending the lifespan of your drill bits.
Method 3: Using a Ultrasonic Cleaner
For those looking for a more advanced and efficient method of removing swarf from drill bits, using an ultrasonic cleaner can be a great option. Ultrasonic cleaners use high-frequency sound waves and a cleaning solution to create microscopic bubbles that gently remove swarf and other contaminants from the drill bits. Simply place the drill bits in the cleaning basket, fill the ultrasonic cleaner with the recommended cleaning solution, and turn it on. The ultrasonic waves will do the work, leaving your drill bits clean and free from swarf in a matter of minutes.
Benefits of Using an Ultrasonic Cleaner
Ultrasonic cleaners offer several benefits for cleaning drill bits. Firstly, they provide a hands-off cleaning experience, allowing you to save time and effort. You can simply place the drill bits in the cleaner, set it up, and let it do its job. Ultrasonic cleaners are also highly efficient, capable of removing swarf from all the nooks and crannies of the drill bits. They can reach areas that are difficult to clean manually, ensuring a thorough and effective cleaning process. Additionally, ultrasonic cleaning is gentle on the drill bits, reducing the risk of damage or wear compared to more abrasive cleaning methods.
By utilizing these methods and tools, you can easily remove swarf from your drill bits and maintain their performance and longevity. Remember to clean your drill bits regularly to ensure optimal results and prevent issues caused by swarf buildup. With proper care and maintenance, your drill bits will continue to provide you with precise and efficient drilling for years to come. Happy drilling!
Removing Swarf from Drill Bits: What Should You Use?
- Swirl the drill bit in a container of water to remove swarf.
- Use a small brush or toothbrush to gently scrub off the swarf from the drill bit.
- Compressed air can be used to blow the debris away from the drill bit.
- A vacuum cleaner with a small nozzle attachment can effectively suck up the swarf.
- Soaking the drill bits in a cleaning solution can help dissolve and remove the swarf.
Frequently Asked Questions
Are you wondering how to effectively remove swarf from your drill bits? Look no further! We’ve got the answers to your questions right here.
Q: What is the best way to remove swarf from drill bits?
A: The best way to remove swarf from drill bits is by using a brush specifically designed for this purpose. These brushes usually have stiff bristles that easily remove the metal shavings from the grooves of the drill bits. Simply place the brush on the drill bit and rotate it in a clockwise motion, applying light pressure. This will help loosen and remove the swarf effectively.
If you don’t have a brush, an alternative method is to use compressed air. By blowing air directly onto the drill bit, you can dislodge the swarf and blow it away. Remember to wear safety goggles while doing this to protect your eyes from flying debris. Additionally, you can also use a vacuum cleaner with a small nozzle attachment to suck up the swarf. This method is especially useful for removing swarf from hard-to-reach areas.
Q: Can I use water to remove swarf from drill bits?
A: It is generally not recommended to use water to remove swarf from drill bits, especially if the drill bits are made of steel. Water can cause the drill bits to rust, leading to corrosion and affecting their performance. However, certain types of drill bits, such as those made of high-speed steel or carbide, can withstand water without rusting. In such cases, you can use water to rinse off the swarf, making sure to thoroughly dry the drill bits afterwards to prevent any moisture-related damage.
If you need to remove stubborn swarf, you can dip the drill bits in a rust remover solution for a short period. This will help dissolve the swarf and make it easier to brush or wipe off. Remember to follow the instructions carefully and use protective gloves when handling any chemicals.
Q: Is it necessary to remove swarf from drill bits after each use?
A: Yes, it is important to remove swarf from drill bits after each use. When drill bits accumulate swarf, it can affect their performance and longevity. The swarf can clog the flutes of the drill bits, making them less effective at cutting and potentially causing overheating. In addition, the accumulated swarf can also increase the risk of the drill bit slipping, leading to accidents or injuries. Therefore, it is best practice to clean the drill bits thoroughly after each use to ensure their optimal performance and safety.
Regularly removing swarf will also help prolong the life of your drill bits. By keeping them clean and free from debris, you can prevent premature wear and breakage, saving you money in the long run. So make it a habit to clean your drill bits after every use for best results!
Q: Can I use a wire brush to remove swarf from drill bits?
A: While wire brushes can help remove swarf from drill bits, they may not be the best option. Wire brushes can be too abrasive and can potentially damage the cutting edges of the drill bits. This can result in reduced cutting performance and may even cause the drill bits to break. It is generally recommended to use a brush with softer bristles specifically designed for removing swarf from drill bits. These brushes are gentle enough to clean the grooves without causing any damage.
If you choose to use a wire brush, make sure to be extra careful and use light pressure. It’s important to avoid excessive force that could lead to damage. Alternatively, you can opt for non-abrasive nylon brushes that are specifically designed for cleaning delicate surfaces, including drill bits.
Q: How often should I clean my drill bits to remove swarf?
A: The frequency of cleaning your drill bits to remove swarf depends on how frequently you use them and the materials you’re drilling. As a general rule of thumb, it’s a good practice to clean your drill bits after every use. This ensures that any swarf accumulated is promptly removed, preventing any negative impact on their performance.
In cases where you’re drilling through particularly tough materials or encountering excessive swarf buildup, you may need to clean your drill bits more frequently. It’s always better to err on the side of caution and clean them as needed to maintain optimal cutting performance. Keep an eye out for any signs of reduced efficiency or clogging, and clean your drill bits accordingly to keep them in top shape.

Summary
So, when it comes to removing swarf from drill bits, there are a few key options to consider. One option is using a brush to manually clean the bits. Another option is using compressed air to blow away the swarf. And finally, there’s the option of using dedicated cleaning tools, like a swarf removal device or a vacuum attachment. Depending on your preference and the level of convenience you’re looking for, any of these methods can be effective in keeping your drill bits clean and ready for use. It’s all about finding the method that works best for you!