When it comes to using a table saw, it’s essential to know which side should be facing down. So, which side down on a table saw? Let’s dive right into it and find out!
Now, picture this: You’ve got your wood or material ready to be cut, and you’re about to make some magic happen with your table saw. But wait, which side should be facing down? It’s a valid question, and we’ve got the answer for you.
Understanding the proper orientation of the material on a table saw is crucial for safety and achieving clean and accurate cuts. So, without further ado, let’s unravel the mystery of which side should be down on a table saw!
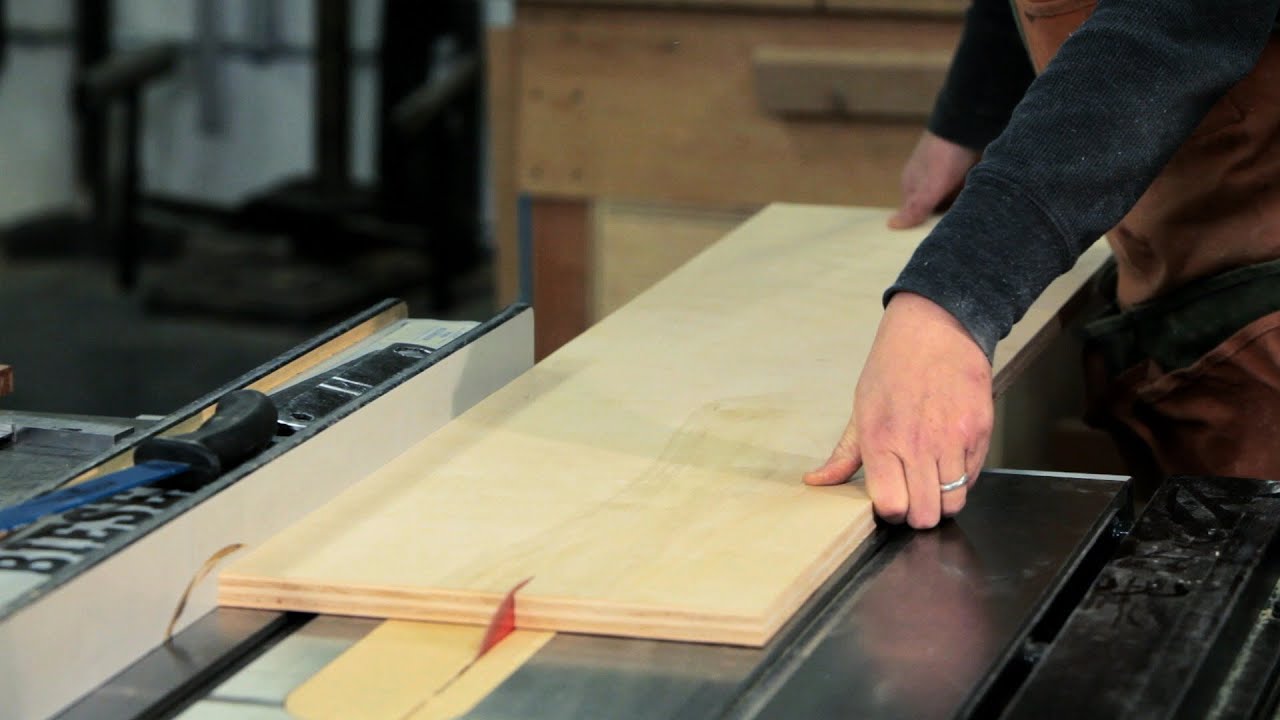
When using a table saw, it’s important to know which side should be facing down. To ensure accurate and safe cuts, place the material with the best side facing up. This allows for cleaner and smoother cuts, reducing the risk of splintering or tear-out. Remember to always check for any imperfections or defects on the material before making your cuts. By paying attention to this simple detail, you’ll achieve professional-looking results with your table saw.

Which Side Down on Table Saw? Exploring the Optimal Placement
Table saws are powerful tools used for cutting and shaping wood. When using a table saw, one of the commonly debated questions is which side should be placed down on the saw bed. In this article, we will dive deep into this topic, exploring the factors to consider and providing expert advice to help you make the best decision. Whether you are a beginner or an experienced woodworker, understanding the optimal placement can greatly improve the safety and efficiency of your work. So let’s get started!
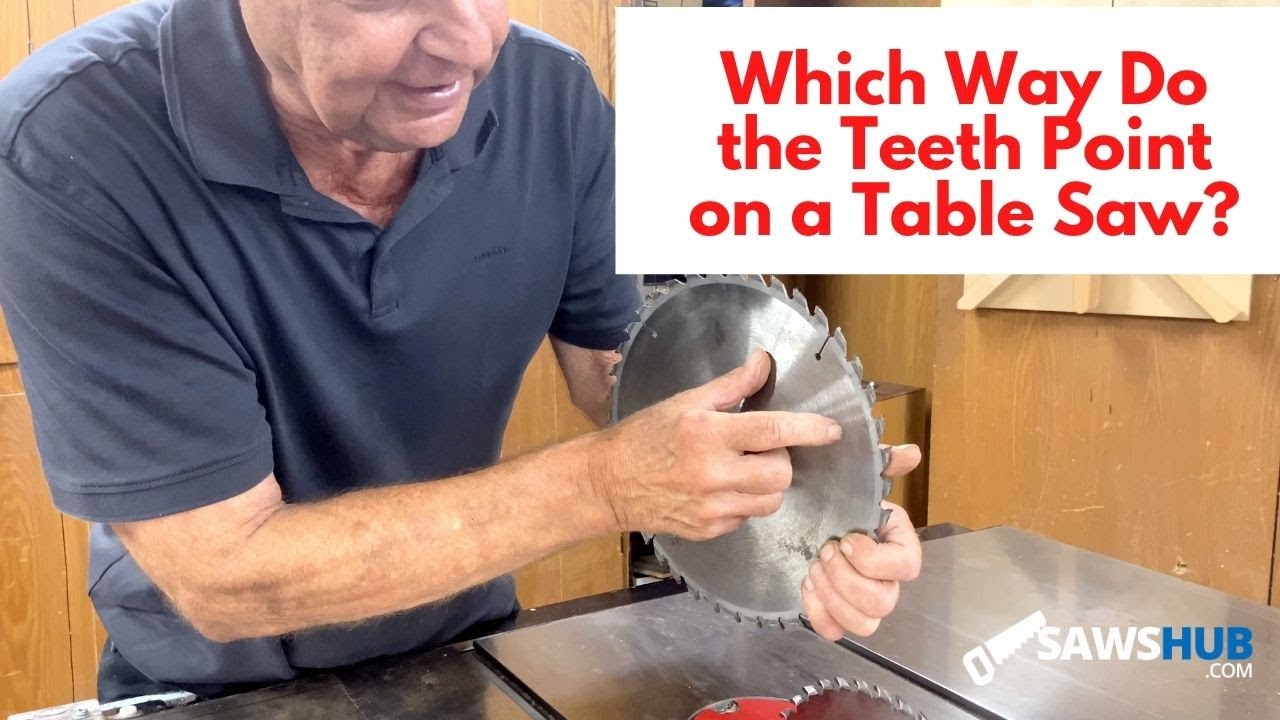
The Importance of Blade Orientation
When considering which side to place down on a table saw, it is essential to understand the importance of blade orientation. The blade of a table saw rotates in a specific direction, usually towards the user. For safety reasons, it is crucial to align the wood in the right way to ensure a smooth and controlled cut. Placing the wood with the wrong side down can lead to kickbacks, binding, or even severe accidents. Therefore, it is vital to pay close attention to the alignment and orientation of the wood to prevent any mishaps.
Factors to Consider
When determining which side to place down on a table saw, several factors come into play. Here are some key considerations to keep in mind:
1. Material Type: Different materials have varying grain patterns and densities, which can affect how they interact with the blade. For example, with hardwood, it is generally recommended to place the side with the grain facing up to minimize tearout.
2. Cut Type: The type of cut you are making also influences the orientation of the wood. For crosscuts, it is advisable to have the good side facing up. In contrast, for rip cuts, the good side should be facing down.
3. Blade Teeth Configuration: The configuration of the table saw blade’s teeth is another important aspect to consider. Some blades have a combination of flat-top teeth and alternate top bevel teeth. Placing the wood with the good side down can help reduce tearout when using these types of blades.
By taking these factors into account, you can make an informed decision about which side to place down on a table saw, ensuring better results and a safer working environment.
The Upside and Downside of Placing Your Wood
Now that we have discussed the importance of blade orientation and the factors to consider, let’s explore the upside and downside of placing your wood in different ways on a table saw.
Upside – Placing the Good Side Down
Placing the good side of the wood down on a table saw bed offers several advantages. Firstly, it helps minimize tearout, especially when working with delicate or easily splintered materials. This is because the blade cuts into the wood fibers in a downward motion, which reduces the risk of tearout along the grain.
Secondly, placing the good side down can provide better stability and control during the cutting process. The smooth surface of the wood contacts the saw bed, offering a secure grip and preventing any slipping or movement while cutting. This can result in cleaner, straighter cuts.
Downside – Placing the Good Side Up
On the other hand, placing the good side of the wood up on a table saw bed also has its benefits. One significant advantage is the visibility it provides, allowing you to clearly see the grain and make precise cuts. This is particularly helpful when working with intricate designs or when accuracy is paramount.
However, placing the good side up can increase the risk of tearout, especially when cutting through denser materials or against the grain. It requires extra caution and skill to control the feed rate and prevent any swirling or splintering of the wood fibers.
Ultimately, the choice between placing the good side up or down depends on the specific project, material, and personal preference. It is essential to consider the pros and cons of each approach and adjust accordingly to achieve the desired outcome.
Tips for Optimal Placement on a Table Saw
While the decision of which side to place down on a table saw ultimately depends on various factors, here are some helpful tips to ensure optimal placement:
1. Understand your material: Study the characteristics of the material you are working with, such as its grain pattern, density, and vulnerability to tearout. This knowledge will guide your decision on how to position the wood for the best results.
2. Test on scrap pieces: Before making cuts on your actual project workpiece, it is wise to test different orientations and feed rates on scrap pieces of the same material. This will give you a better understanding of how the wood will react, allowing you to make any necessary adjustments.
3. Use a zero-clearance insert: A zero-clearance insert is a removable throat plate that provides support for the wood right up to the blade. It helps reduce tearout and prevents small offcuts from falling into the blade opening. Using a zero-clearance insert can greatly enhance the quality of your cuts.
4. Maintain a sharp blade: A dull blade can result in more tearout and a rougher cut surface. Regularly inspect and sharpen your table saw blade to ensure optimal performance. A sharp blade will minimize tearout and produce cleaner cuts.
5. Use a miter gauge or sled: When making crosscuts or angled cuts, using a miter gauge or sled can improve accuracy and safety. These accessories provide a sturdy and controlled guiding system, helping you maintain consistent placement and achieve precise cuts.
Conclusion:
As you can see, the decision of which side to place down on a table saw is not set in stone. It depends on several factors, including the material type, cut type, and blade teeth configuration. Each approach has its advantages and disadvantages, and it ultimately comes down to personal preference and the specifics of your project. By considering these factors and implementing the tips provided, you can enhance the safety, efficiency, and quality of your table saw work. Remember to always prioritize safety and experiment with different techniques to find what works best for you. Happy woodworking!
Key Takeaways: Which Side Down on Table Saw?
- Always ensure the rough or unfinished side of the wood is facing down on the table saw.
- This helps prevent tear-out and splintering on the visible side of the wood.
- Using a sacrificial backing board can further reduce tear-out and provide added support.
- For cutting laminated materials, lightly score the finish side and cut with the unfinished side down.
- Remember to always follow safety guidelines and use appropriate protective equipment while using the table saw.
Frequently Asked Questions
Welcome to our frequently asked questions section, where we answer common queries about using a table saw. If you’ve ever wondered about which side should be facing down when using a table saw, you’ve come to the right place. Keep reading to find out more!
1. What should be the position of the material on a table saw?
When using a table saw, the material you’re cutting should be placed with the good face up and the bad face down. The good face refers to the side of the material that will be visible or used in your final project. This positioning allows the blade to make a clean cut on the visible side, reducing the risk of tear-out or splintering.
By placing the bad face down, you also ensure that any imperfections, such as rough edges or marks, will be on the side that won’t be seen in the final product. Additionally, positioning the material in this way can help prevent the blade from causing any damage to the visible side of the project.
2. What happens if you put the material with the bad face up?
If you accidentally place the material with the bad face up on a table saw, you may end up with a rough or splintered edge on the side that will be visible in your final project. This occurs because the blade cuts into the material from the bottom, so any tear-out or splintering will happen on the exposed side.
Placing the bad face up can also increase the risk of the blade catching the material and causing a kickback, which can be extremely dangerous. Kickback occurs when the saw grabs the material and throws it back towards the operator. To ensure clean cuts and your safety, it’s important to always position the material with the good face up and the bad face down when using a table saw.
3. Is there an exception to the rule of placing the good face up?
Yes, there can be exceptions to the rule of placing the good face up on a table saw. Some woodworkers may choose to place the bad face up for certain situations. For example, when making adjustments or performing tests, it may be more convenient to view the bad face to check for any necessary modifications.
However, it’s important to note that when it comes to making the final cuts for a project, it’s advisable to follow the standard practice of placing the good face up. This ensures a cleaner finish and minimizes the chance of encountering any issues or imperfections on the visible side of your workpiece.
4. Does the direction of the grain affect the positioning on the table saw?
Yes, the direction of the grain can play a role in how you position the material on a table saw. If the grain of the wood runs in a specific direction, it’s generally best to position the material in a way that allows the blade to cut against the grain. This helps minimize tear-out and splintering, resulting in a smoother finish.
However, if the material has alternating grain directions, it may be necessary to make adjustments based on each specific section. In these cases, it’s a good practice to evaluate the direction of the grain and adjust the positioning accordingly to achieve the best results.
5. Are there any precautions to take when using a table saw?
When using a table saw, it’s crucial to prioritize safety. Always wear appropriate personal protective equipment, such as safety glasses and hearing protection. Familiarize yourself with the table saw’s safety features, such as blade guards and anti-kickback pawls, and ensure they are properly functioning before use.
Additionally, maintain a safe work area by keeping it clean and free from debris that could interfere with the material feeding smoothly. Keep your hands at a safe distance from the blade and use push sticks or other push devices to guide the material through the cut. Following proper safety practices will help prevent accidents and ensure a successful and enjoyable woodworking experience.
Which Way Do the Blade Teeth Go on a Table Saw?
Summary
Okay, so here’s what you need to know about which side to put down on a table saw.
The side you want facing up is the one that you want to keep nice and smooth. The side you want facing down is the one that you’re not too worried about. So, if you want a neat and clean cut, put the good side up!