
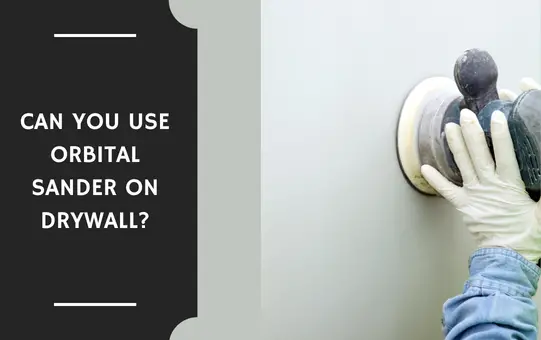
If you’ve ever wondered, “Will an orbital sander work on drywall?” you’ve come to the right place! In this article, we’ll explore whether this versatile tool is suitable for tackling drywall projects. Whether you’re a DIY enthusiast or just starting out, you’ll find valuable insights here.
Now, you might be thinking, “Why should I even consider using an orbital sander on drywall?” Well, let me tell you, it can be a game-changer! The orbital sander’s unique motion helps to smooth out imperfections, leaving you with a flawless finish. But does it really work? Let’s dive in and find out!
Before we get into the nitty-gritty, let me assure you that we’ll cover all the essentials. We’ll discuss the effectiveness of an orbital sander on drywall, the key considerations to keep in mind, and any alternative options you might want to explore. So, buckle up and get ready to uncover the secrets of drywall sanding with an orbital sander!
Will an Orbital Sander Work on Drywall?
Drywall is a commonly used material for constructing interior walls and ceilings in homes and buildings. When it comes to finishing drywall, one common question that arises is whether an orbital sander can be used for this task. In this article, we will explore the capabilities of an orbital sander for working on drywall and provide you with all the information you need to know.
Can an Orbital Sander be Used on Drywall?
The answer to this question is yes, you can use an orbital sander on drywall. However, there are certain considerations to keep in mind. Drywall is a delicate material compared to other surfaces like wood or metal, and excessive sanding can result in damage. An orbital sander operates by moving the sanding pad in small circular motions, which can be suitable for smoothing out imperfections on drywall surfaces. Its random orbital motion helps to minimize the risk of leaving visible swirl marks or scratches on the drywall.
When using an orbital sander on drywall, it is essential to choose the right sandpaper grit. For initial sanding or removing a layer of joint compound, a coarser grit, such as 80 or 100, can be used. As you progress to finer sanding, switch to a 120 or 150 grit to achieve a smooth finish. Additionally, using a sanding block or a vibrating hand sander with a fine grit sandpaper can help to achieve better control and prevent over-sanding.
Benefits of Using an Orbital Sander on Drywall
Using an orbital sander on drywall offers several benefits. One of the main advantages is the speed and efficiency it provides. The orbital motion of the sander allows for quick and consistent sanding, making it easier to cover larger areas in less time compared to sanding by hand. It also helps to achieve a more even and uniform finish, especially when dealing with uneven joints or seams on the drywall.
Another benefit is the reduced effort required. Sanding drywall manually can be a strenuous task, particularly for larger projects. An orbital sander eliminates much of the physical exertion, reducing fatigue and providing more comfort during the sanding process. This is especially useful for individuals with limited strength or mobility.
Additionally, an orbital sander can help achieve smoother results than hand sanding alone. The random orbital motion and consistent sanding patterns minimize the risk of uneven surfaces and visible sanding marks. With the right technique and care, you can achieve a professional-looking finish on your drywall using an orbital sander.
How to Use an Orbital Sander on Drywall
Using an orbital sander on drywall requires proper technique and precautions to ensure the best results. Here’s a step-by-step guide on how to use an orbital sander for drywall:
1. Prepare the work area: Remove any furniture, cover the floors, and protect nearby surfaces from dust using plastic sheets or drop cloths.
2. Choose the right sandpaper: Select the appropriate grit for your desired level of sanding. Start with a coarser grit for initial sanding and progress to finer grits for a smoother finish.
3. Attach the sandpaper: Secure the sandpaper onto the sanding pad of the orbital sander. Make sure it is centered and firmly attached.
4. Turn on the sander: Start the orbital sander and allow it to reach full speed before placing it on the drywall surface.
5. Begin sanding: Hold the sander with a light grip and move it in smooth, circular motions across the drywall. Avoid applying excessive pressure or staying in one spot for too long to prevent over-sanding.
6. Work in sections: Divide the drywall into manageable sections and focus on one area at a time. Overlapping each pass slightly will help achieve a consistent finish.
7. Check your progress: Periodically stop and inspect the sanded area to ensure evenness and smoothness. Make any necessary adjustments and continue sanding until you achieve the desired results.
8. Clean up: Once you have finished sanding, turn off the orbital sander and clean up the work area. Use a vacuum or a damp cloth to remove any dust or debris.
Remember to wear appropriate safety gear, including goggles and a dust mask, to protect yourself from the fine particles of dust generated during the sanding process.
Tips for Using an Orbital Sander on Drywall
Here are some additional tips to keep in mind when using an orbital sander on drywall:
1. Practice on a scrap piece first: If you are new to using an orbital sander on drywall, it may be helpful to practice on a scrap piece of drywall before sanding large surfaces. This will help you get a feel for the sander’s movement and the pressure required.
2. Use a lightweight sander: Opt for a lightweight orbital sander to reduce fatigue during extended sanding sessions. This will make the process more comfortable and manageable.
3. Take breaks: Sanding can be a repetitive task, so it’s essential to take breaks to rest your hands and prevent strain. This will also give you a chance to evaluate your progress and make adjustments if necessary.
4. Maintain a steady pace: Avoid rushing or sanding too quickly. Maintain a steady pace to ensure smooth and even results. Let the sander do the work, and resist the temptation to push down or apply excessive pressure.
5. Clean the sander frequently: Dust and debris can accumulate on the sandpaper and reduce its effectiveness. Regularly clean the sandpaper or replace it as needed to maintain optimal performance.
By following these tips and techniques, you can achieve excellent results when using an orbital sander on drywall. Remember to take your time, be patient, and practice proper sanding techniques for the best outcome.
Orbital Sander vs. Other Drywall Sanding Methods
When it comes to sanding drywall, there are alternative methods available besides using an orbital sander. Let’s explore the advantages and disadvantages of orbital sanders compared to other drywall sanding methods.
Orbital Sander vs. Hand Sanding
Hand sanding is a common method for sanding drywall, particularly for small projects or detailed areas. It involves using sandpaper and manually sanding the surface by hand. Here’s how an orbital sander compares to hand sanding:
Advantages of an Orbital Sander:
– Faster and more efficient
– Provides a more consistent finish
– Less physical effort required
– Minimizes the risk of visible sanding marks
Advantages of Hand Sanding:
– Greater control over sanding pressure and technique
– Ideal for small, intricate areas
– Less expensive (no need to purchase a power tool)
Ultimately, the choice between an orbital sander and hand sanding depends on the size of the project, personal preference, and the desired outcome. For larger areas or the need for a faster result, an orbital sander is generally more effective. However, for small touch-ups or delicate sections, hand sanding may be the better option.
Orbital Sander vs. Pole Sander
A pole sander is another tool commonly used for sanding drywall. It consists of a sanding head attached to the end of an extendable pole. Let’s compare the advantages and disadvantages of orbital sanders and pole sanders:
Advantages of an Orbital Sander:
– Faster and easier to maneuver compared to a pole sander
– Provides a more even and uniform finish
– Offers better control and reduces the risk of over-sanding
Advantages of a Pole Sander:
– Can reach high areas without the need for a ladder or scaffolding
– Ideal for large, flat surfaces
– Allows for longer sanding strokes
Choosing between an orbital sander and a pole sander depends on the complexity of the project, the accessibility of the surface, and personal preference. For most drywall sanding tasks, an orbital sander is often the more versatile and user-friendly option.
Best Practices for Drywall Sanding
Regardless of the method you choose for sanding drywall, there are some best practices to keep in mind:
1. Prepare the work area: Remove furniture, cover floors, and seal off adjacent rooms to prevent dust from spreading.
2. Wear protective gear: Use safety goggles, a dust mask, and ear protection to protect yourself from dust and debris.
3. Start with minimal pressure: Apply light pressure initially and gradually increase as needed. Avoid pressing too hard, which can result in uneven surfaces or damage.
4. Sand in multiple directions: Sand in different directions (vertical, horizontal, and diagonal) to ensure a more even finish.
5. Keep the surface clean: Regularly clean the sanded surface with a damp cloth or vacuum to remove dust and debris.
6. Finish with a finer grit: Use a finer grit sandpaper for the final sanding to achieve a smooth and polished finish.
By following these best practices, you can achieve professional-looking results when sanding drywall, regardless of the method you choose.
Common Mistakes to Avoid When Sanding Drywall
Sanding drywall can be a delicate process that requires precision and attention to detail. Here are some common mistakes to avoid to ensure a successful drywall sanding experience:
1. Over-sanding
Over-sanding can result in uneven surfaces, visible scratches, or even holes in the drywall. It’s important to sand gradually and carefully, checking the progress frequently. Avoid applying too much pressure or sanding in one spot for an extended period.
2. Neglecting Safety Precautions
Drywall sanding generates fine particles of dust that can irritate the respiratory system and cause other health issues. Always wear proper safety gear, including goggles, a dust mask, and ear protection, to protect yourself from these hazards.
3. Skipping the Initial Preparation
Proper preparation is key to achieving a smooth and professional finish. Take the time to prepare the work area, including removing furniture, covering floors, and protecting adjacent surfaces from dust. Failing to do so can result in a messy and time-consuming cleanup process.
4. Using the Wrong Sandpaper Grit
Using the wrong sandpaper grit can lead to unsatisfactory results. Start with a coarser grit for initial sanding and progress to finer grits as you go. Choosing the appropriate grit for each stage of the sanding process will help achieve a smooth and polished finish.
5. Not Cleaning the Surface Properly
Before applying any finishing products such as paint or primer, it is crucial to clean the sanded surface thoroughly. Dust and debris left behind can affect the adhesion of these products and result in an uneven finish. Use a vacuum or a damp cloth to remove any residue before proceeding.
6. Rushing the Sanding Process
Drywall sanding requires patience and attention to detail. Rushing through the process can result in subpar results. Take your time, work in sections, and regularly check your progress to ensure an even and smooth finish.
By avoiding these common mistakes, you can achieve professional-looking results when sanding drywall. Remember to take your time, practice proper technique, and prioritize safety throughout the entire process.
Conclusion
Sanding drywall with an orbital sander can be a practical and efficient way to achieve a smooth and polished finish. The orbital motion of the sander helps to minimize the risk of visible sanding marks, while its speed and efficiency make it a valuable tool for larger projects. By following proper technique, using the right sandpaper grit, and taking safety precautions, you can achieve professional-looking results when sanding drywall. Whether you choose an orbital sander, hand sanding, or a pole sander, remember to practice patience, attention to detail, and proper preparation for the best outcome.
Key Takeaways: Will an orbital sander work on drywall?
- Yes, an orbital sander can be used on drywall.
- It is important to use a fine-grit sandpaper for smooth results.
- Be careful not to apply too much pressure to avoid damaging the drywall surface.
- An orbital sander can help to remove imperfections and prepare the drywall for painting or finishing.
- Remember to wear safety goggles and a dust mask when using an orbital sander on drywall.
Frequently Asked Questions
When it comes to drywall projects, finding the right tools can make all the difference. One common question is whether an orbital sander can be used on drywall. Let’s explore some frequently asked questions on this topic.
Can I use an orbital sander on drywall?
Yes, an orbital sander can be used on drywall. However, it is important to choose the right sandpaper grit and use the sander correctly to achieve the best results. When sanding drywall, it is recommended to use a fine-grit sandpaper, such as 120-grit or higher. This will help to smooth out imperfections without causing excessive damage to the surface.
Additionally, when using an orbital sander on drywall, it’s advised to use a vacuum attachment to minimize dust and keep the area clean. Take care not to apply too much pressure while sanding, as this can lead to over-sanding and create uneven or damaged areas on the drywall surface.
What are the benefits of using an orbital sander on drywall?
Using an orbital sander on drywall offers several benefits. Firstly, it helps to achieve a smooth and even finish by removing excess joint compound, paint, or texture. It can also help to blend joint seams and feather edges for a seamless appearance. Furthermore, an orbital sander is efficient and easy to use, making the sanding process quicker and more manageable.
With its unique orbital motion, this type of sander minimizes swirl marks and ensures a consistent sanding pattern. This can be particularly useful when working on larger drywall surfaces. Overall, using an orbital sander on drywall can save you time and effort, while providing a professional-looking result.
Are there any precautions I should take when using an orbital sander on drywall?
Yes, there are a few precautions to keep in mind when using an orbital sander on drywall. Firstly, always wear a dust mask and safety goggles to protect yourself from airborne dust particles. It’s also important to work in a well-ventilated area or use a dust collection system to minimize exposure to dust.
Before starting, make sure the surface is clear of loose debris or nails that could damage the sander or create scratches on the drywall. Additionally, be cautious not to oversand a specific area, as this can create uneven spots or damage the drywall surface. Finally, always follow the manufacturer’s instructions for your specific orbital sander model to ensure safe and proper usage.
Can I use an orbital sander to remove texture from drywall?
While an orbital sander can be used to remove texture from drywall, it may not always be the most efficient method. Textured drywall often requires more aggressive sanding techniques, and an orbital sander may not have the power or aggressiveness needed to remove thick or heavy textures.
For heavily textured surfaces, it is often recommended to use a different type of sander, such as a power drywall sander or a sanding sponge. These tools are specifically designed for tackling textured surfaces and can provide better results. If you’re unsure about which tool to use or how to proceed, it’s always a good idea to consult a professional or seek advice from a knowledgeable expert.
Are there any alternatives to using an orbital sander on drywall?
Yes, there are alternative tools that can be used for sanding drywall. One common alternative is a sanding sponge, which is a handheld sponge with an abrasive side for sanding. Sanding sponges are easy to use, offer good control, and can be effective for small touch-ups or detail work on drywall surfaces. They can also be used in conjunction with an orbital sander for areas that require extra attention.
Another alternative is a power drywall sander, which is a larger tool that allows for more aggressive sanding of larger surfaces. Power drywall sanders are typically equipped with a long handle and a sanding pad or rotating disc, making them efficient for sanding larger areas or removing heavy textures. However, they can be more challenging to maneuver and require proper technique to avoid gouging or damaging the drywall.
Summary
Can you use an orbital sander on drywall? Yes, you can! An orbital sander can be a handy tool for smoothing and preparing drywall surfaces. It is important to choose the right sandpaper grit, start with a gentle touch, and be mindful of creating dust. Proper technique and safety precautions are essential for achieving a smooth finish on your drywall.
Remember, an orbital sander is not recommended for major drywall repairs. It is best suited for smaller areas that require light sanding or finishing touches. By following these guidelines, you can confidently use an orbital sander on drywall and achieve professional-looking results for your home projects.