Hey there, curious minds! Today, let’s dive into the fascinating world of woodworking and explore a question that might have popped into your head: can a lathe be sanded? Well, hold on tight as we embark on this woodworking adventure!
If you’ve ever wondered if a lathe, that incredible machine used for shaping wood, can be sanded, you’re in the right place. In this article, we’ll explore whether sanding is a viable option for lathes, and if so, how it can be done. So, let’s get our creative gears turning and discover the exciting possibilities!
So, my young woodworking enthusiasts, get ready for an informative and engaging journey where we unravel the mysteries behind sanding a lathe. From the tools needed to the techniques employed, we’ll leave no wood shavings unturned in our quest to answer the burning question, can a lathe be sanded? Let the adventure begin!
Wondering if you can sand a lathe? Although sanding a lathe may seem counterintuitive, it is possible. However, it’s important to proceed with caution. Start by removing any loose debris from the lathe and use fine-grit sandpaper or sanding pads to gently sand the surface. Be sure to keep the lathe clean and well-lubricated to prevent damage. Remember, it’s always best to consult the manufacturer’s guidelines before attempting any modifications on your lathe.

Can Lathe Be Sanded?
Introduction: Lathe is a versatile tool used in woodworking and metalworking to shape and turn objects with precision. But what if you want to give your lathe a fresh look or remove imperfections? Can you sand a lathe? In this article, we will explore the concept of sanding a lathe, its benefits, and the best practices to achieve a smooth and polished finish. Let’s dive in!
The Process of Sanding a Lathe
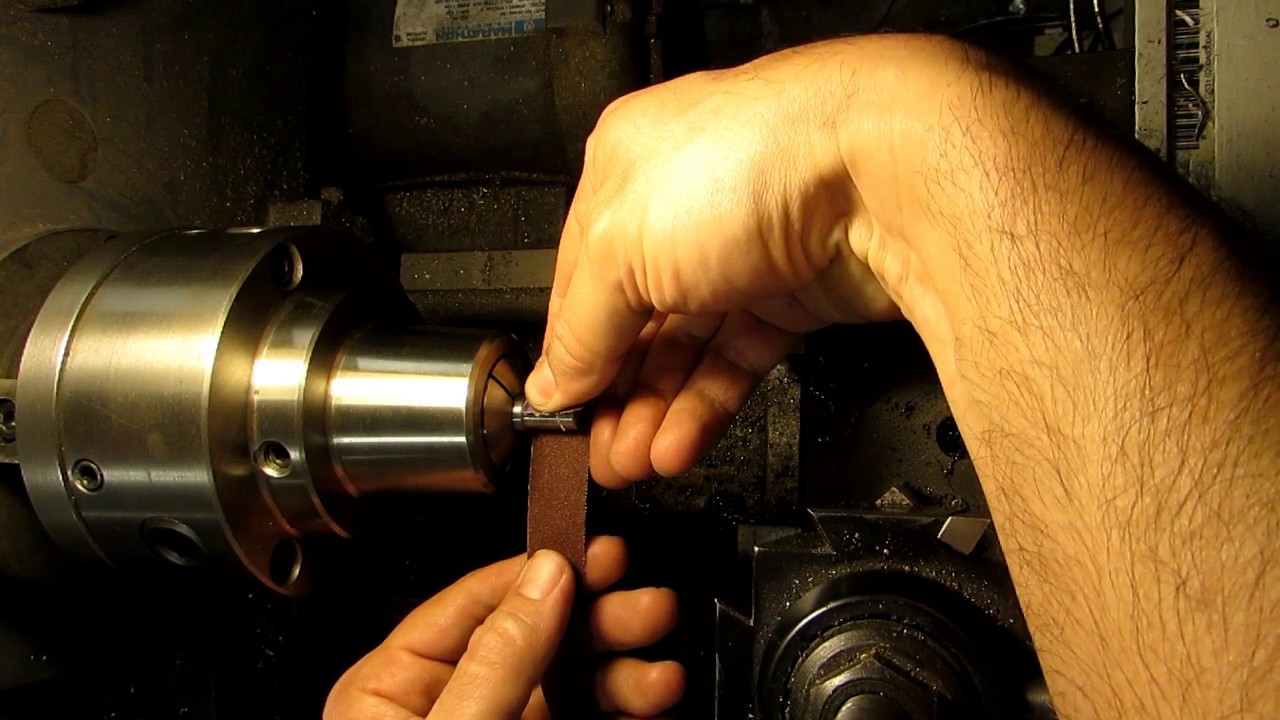
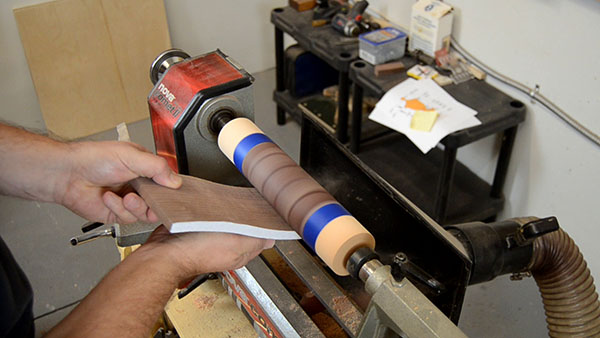
When it comes to sanding a lathe, it’s important to understand that you don’t directly sand the lathe itself. Instead, you sand the workpieces that you turn on the lathe. These workpieces can be wooden bowls, spindles, or even metal components. The sanding process involves using sandpaper to gradually smooth the surface of the workpiece, removing any tool marks, scratches, or roughness.
To sand a workpiece on the lathe, start with a coarse-grit sandpaper and gradually work your way up to a finer grit. This helps achieve a smoother finish with each sanding stage. It’s important to maintain a consistent speed and apply even pressure while sanding to avoid creating uneven surfaces or removing too much material. Once you’ve reached your desired level of smoothness, you can proceed with applying finishes such as varnish or wax to protect and enhance the workpiece.
Sanding a lathe requires careful attention to detail and patience. By following the proper sanding techniques, you can achieve professional-quality results and take your lathe projects to the next level.
The Benefits of Sanding a Lathe Workpiece
1. Smooth Finish: Sanding a lathe workpiece helps achieve a smooth surface, eliminating any imperfections or roughness left by the turning process. This results in a professional-looking end product that’s pleasing to the eye and touch.
2. Enhanced Grain Definition: When sanding wood on a lathe, it exposes the natural wood grain, highlighting its unique patterns and colors. By using progressively finer grits of sandpaper, you can bring out the beauty of the wood and create a stunning visual appeal.
3. Better Adhesion of Finishes: Sanding a workpiece before applying finishes like varnish or wax ensures better adhesion. The smooth surface allows the finish to penetrate evenly and create a durable protective layer that enhances the appearance and longevity of the workpiece.
The Right Sandpaper Grits for Lathe Sanding
When sanding a lathe workpiece, it’s crucial to choose the right sandpaper grits to achieve the desired level of smoothness. The grit refers to the coarseness of the sandpaper, with lower numbers indicating coarse grits and higher numbers representing finer grits.
1. Coarse grits (80-120): These grits are used for initial sanding to remove tool marks, imperfections, and rough surfaces. They are ideal for shaping the workpiece and eliminating any prominent irregularities.
2. Medium grits (150-220): Once the initial sanding is done, medium grits are used to further refine the surface and prepare it for finer grits. They help remove any scratches left by the coarse grits and create a smoother base.
3. Fine grits (240-400+): The final sanding stages involve using fine grits to achieve a polished and smooth finish. These grits are capable of removing the tiny scratches left by the previous grits and create a surface ready for finishing touches.
Tips for Effective Lathe Sanding
1. Safety First: Always wear appropriate safety gear, including goggles and a dust mask, to protect yourself from flying debris and inhalation of fine dust particles.
2. Secure the Workpiece: Ensure that the workpiece is securely mounted on the lathe using the appropriate holding mechanisms. This prevents it from shifting or becoming loose while sanding.
3. Move with the Grain: When sanding wood on a lathe, it’s important to move your sandpaper in the direction of the wood grain. This helps prevent tear-out and produces a smoother finish.
4. Keep the Sandpaper Moving: Avoid dwelling on one spot for too long as it can cause uneven sanding or even burn the wood. Keep the sandpaper moving in a smooth and continuous motion to maintain consistent results.
5. Clean Regularly: During the sanding process, dust and debris can accumulate on the workpiece and sandpaper. Regularly clean both to prevent clogging and ensure optimal performance.
6. Use a Sanding Sealer: Applying a sanding sealer before sanding a workpiece can help seal the wood pores and minimize the occurrence of tear-out and splintering during sanding.
Common Mistakes to Avoid in Lathe Sanding
While sanding a lathe workpiece, there are a few common mistakes that beginners should avoid to achieve the best results:
1. Using Too Much Pressure:
Applying excessive pressure while sanding can lead to uneven surfaces, damage to the workpiece, or even accidents. It’s important to let the sandpaper do the work and apply gentle, even pressure for consistent results.
2. Skipping Grits:
Skipping grits, especially finer ones, can leave behind noticeable scratches and ruin the smoothness of the final finish. Make sure to follow the proper grit progression to achieve best results.
3. Neglecting Dust Collection:
Sanding generates a significant amount of dust that can be harmful to your health and affect the quality of the finish. Use a dust collection system or wear a dust mask to minimize inhalation and keep your work area clean.
Can Lathe Be Sanded? Yes, with the Right Techniques!
In conclusion, sanding a lathe workpiece can greatly enhance its appearance and quality. By following the proper sanding techniques, using the right sandpaper grits, and avoiding common mistakes, you can achieve professional results that truly showcase your craftsmanship. So, the next time you’re working on a lathe project, don’t hesitate to give it a smooth and polished finish through sanding. Happy turning!
Key Takeaways: Can Lathe be Sanded?
- Yes, a lathe can be sanded to refine and smooth the surface of the wood.
- Sanding a lathe is an effective way to remove imperfections and achieve a polished finish.
- Start with a coarse grit sandpaper and gradually work your way up to finer grits for a smooth result.
- Always sand in the direction of the wood grain to prevent damage or splintering.
- After sanding, remember to clean the lathe thoroughly to remove any dust or debris.
Frequently Asked Questions
When it comes to woodworking, many people wonder if it’s possible to sand a lathe. Here are the answers to some commonly asked questions about sanding a lathe.
Can you sand a lathe without damaging it?
Yes, you can safely sand a lathe without causing any damage if you follow a few important steps. Firstly, make sure the lathe is turned off and unplugged before you start. Use a high-grit sandpaper, such as 220 or above, to gently sand the wood on the lathe. Avoid applying excessive pressure as it may cause damage. Sand in the direction of the wood grain, moving the sandpaper smoothly and evenly. Once you achieve the desired smoothness, wipe away any dust with a clean cloth. Remember to always wear protective goggles and a dust mask to keep yourself safe during the sanding process.
It’s essential to proceed with caution when sanding a lathe to avoid damaging its delicate components. By using the right techniques, appropriate sandpaper, and protective gear, you can achieve a smooth finish without causing any harm to the lathe.
What type of sandpaper should I use to sand a lathe?
When sanding a lathe, it’s best to use high-grit sandpaper, preferably above 220. The higher the grit number, the finer and smoother the sandpaper. Finer sandpaper ensures a more polished finish, giving your lathe a professional look. It’s recommended to start with a 220-grit sandpaper and gradually move to higher grits, such as 320 or 400, for a smoother result.
Remember to always sand in the direction of the wood grain, as sanding against the grain can leave visible scratches on the lathe’s surface. Additionally, make sure to change the sandpaper regularly to maintain its effectiveness and prevent clogging from accumulated dust and debris.
What are some tips for sanding a lathe for a smooth finish?
To achieve a smooth finish when sanding a lathe, there are a few tips you can follow. Firstly, make sure the lathe is clean before you begin sanding. Any debris or sharp objects can cause scratches or damage to the wood. Next, start with a coarser grit sandpaper and gradually move to finer grits for a smoother result.
While sanding, ensure that you apply even pressure and avoid pressing too hard, as it can cause irregularities in the finished surface. Sand in the direction of the wood grain and use long, smooth strokes for optimal results. Additionally, take breaks in between sanding to clean the lathe surface and remove any dust or debris. Finally, wipe the lathe with a clean cloth to remove any remaining particles before applying a finish or polish.
Should I sand my lathe before or after applying a finish?
It’s generally recommended to sand a lathe before applying a finish. Sanding before applying a finish allows you to smooth out any imperfections in the wood and create a clean surface for the finish to adhere to. The sanding process helps to remove rough spots, unevenness, or scratches, resulting in a more polished and professional-looking final product.
After sanding, it’s important to wipe away any dust with a clean cloth or use compressed air to ensure the surface is thoroughly clean. Once the lathe is clean, you can then proceed to apply the desired finish, whether it’s a stain, varnish, or paint. Sanding before applying a finish ensures that the final result is smooth, even, and free from any blemishes.
Can I use a power sander to sand a lathe?
While it may be tempting to use a power sander to speed up the sanding process, it’s generally not recommended for sanding a lathe. Power sanders, such as belt sanders or random orbital sanders, can be too aggressive and may cause damage to the delicate wood on the lathe.
Hand sanding with a sandpaper designed for woodworking allows for more control and precision, ensuring a smooth and consistent result. The gentle pressure applied during hand sanding also helps prevent the risk of damaging the lathe’s components. So, while it may take a bit longer, hand sanding is the safer and more reliable method for sanding a lathe.
Woodturning | Sanding and Finishing From Start To Finish
Summary
Here’s what we learned about sanding a lathe:
You can sand your lathe to remove imperfections and create a smooth finish. However, you need to be careful not to damage the lathe or alter its shape by sanding too aggressively. It’s important to use the right grit sandpaper and sand in a gentle, controlled manner. Remember to clean your lathe thoroughly after sanding to remove any dust or debris. With patience and proper technique, sanding can help improve the appearance of your lathe projects.