When it comes to woodworking, there are many tools that can help you create precise and accurate cuts. One such tool is the try square. But what exactly is a try square used for in woodwork? Well, let me break it down for you!
A try square is a handy tool that helps woodworkers ensure their cuts are perfectly square or at right angles. It consists of a metal blade and a wooden or plastic handle, making it comfortable to hold and easy to maneuver.
So, why is a try square so important? Well, imagine you’re working on a project, and you want to make sure your corners are perfectly square. By using a try square, you can easily check if your cuts are accurate, helping you achieve that professional and polished finish. It’s a tool that every woodworker should have in their arsenal!
Now that you know what a try square is used for, let’s dive deeper into its features and how to use it effectively in woodwork projects. Are you ready? Let’s get started!

What is a Try Square Used for in Woodwork?
Welcome to this comprehensive guide on the uses of a try square in woodwork. In the world of woodworking, precision and accuracy are paramount, and the try square is a tool that helps achieve just that. This versatile tool has been a staple in woodworking workshops for centuries, enabling craftsmen to ensure their work is square, straight, and true. In this article, we will explore the various applications and benefits of using a try square, as well as provide some essential tips for its proper usage.
The Anatomy of a Try Square
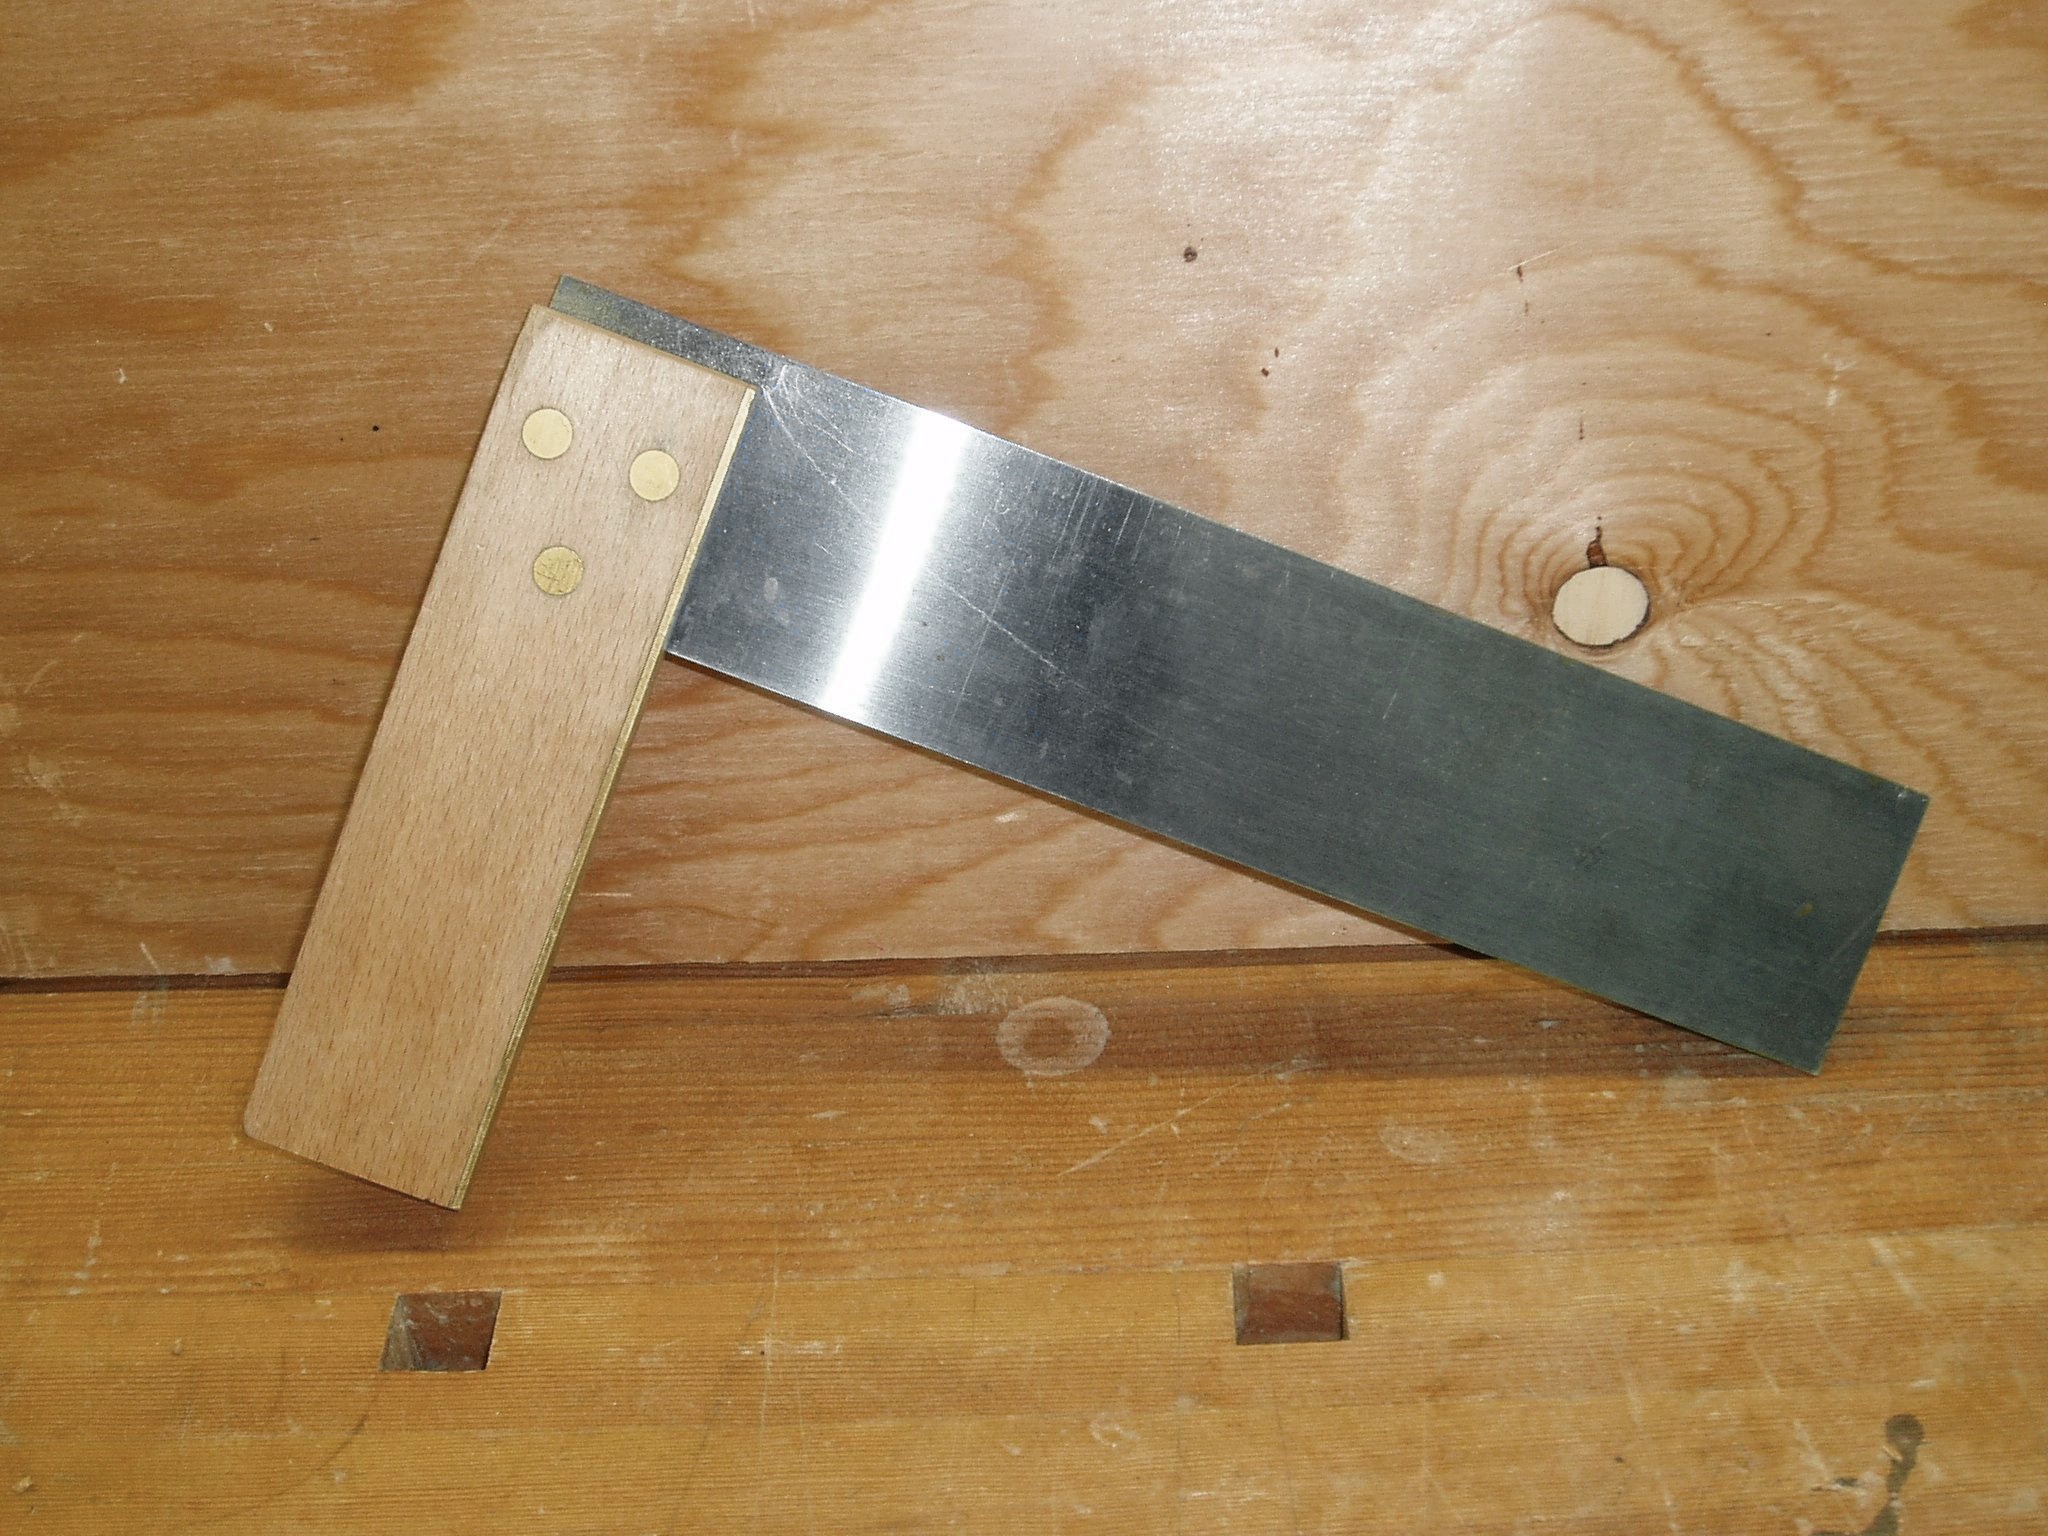
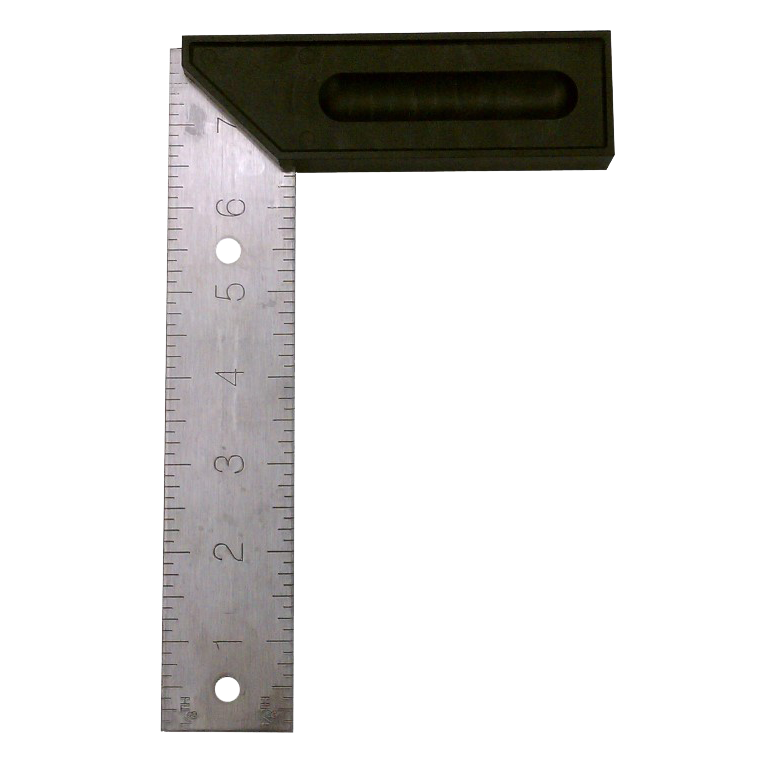
Before diving into the practical uses of a try square, it’s important to familiarize ourselves with its anatomy. A try square consists of two main components: a steel blade and a wooden or plastic handle. The blade is typically a straight piece of steel, ranging in length from 6 to 12 inches. It is attached to the handle at a 90-degree angle, forming an L-shape. The handle is designed to provide a comfortable grip while allowing for precise control of the blade. Some try squares also feature additional features, such as built-in spirit levels or marking gauges, to enhance their functionality.
1. Checking for Squareness
One of the primary uses of a try square in woodworking is to check for squareness. Whether you are working on a furniture project or constructing a wooden frame, ensuring that your corners and edges are perfectly square is crucial for achieving a professional finish. A try square allows you to verify the squareness of your workpieces quickly and accurately. Simply place the blade of the try square against the edge or corner of your workpiece and check if it lines up perfectly. If there is any deviation, adjustments can be made accordingly to ensure squareness.
Moreover, a try square can also be used to verify the squareness of machinery fences, such as table saw blades or miter gauges. Ensuring that these components are perfectly square can greatly enhance the accuracy of your cuts and improve overall project outcomes. By using a try square to check for squareness at various points along your machinery fences, you can identify any misalignments and make the necessary adjustments for precise and reliable cuts.
2. Marking and Measuring
Another practical application of a try square is in marking and measuring. Its straight blade and 90-degree angle make it an ideal tool for transferring and marking straight lines across wood surfaces. By aligning the blade of the try square with an edge or reference line, you can create accurate markings for cuts, joinery, or measurements.
Furthermore, the blade of a try square is often marked with measurement increments, making it a convenient tool for taking measurements and checking dimensions. Whether you need to measure the width of a board or determine the squareness of an assembly, a try square can provide reliable measurements in a quick and straightforward manner.
3. Setting Up Machinery
A try square is an invaluable tool when it comes to setting up woodworking machinery. From table saws to drill presses, ensuring that the various components of your machinery are properly aligned is crucial for safe and accurate operation. By using a try square, you can verify the squareness of fences, guide rails, and other components to ensure they are aligned at 90 degrees relative to the work surface.
Additionally, a try square can be used to align the blades or bits of your machinery. For example, to ensure that a table saw blade is perfectly parallel to the miter gauge slot, simply position the blade at its highest point and place the try square against it. This allows for quick visual confirmation of alignment, preventing any potential issues with inaccurate cuts or unsafe operation.
4. Building and Installing Cabinets
In cabinet making and installation, precision is key. A try square is an invaluable tool for ensuring the accuracy of cabinet components, such as panels, doors, and shelves. By using a try square to verify the squareness and alignment of these elements during construction and installation, you can achieve seamless fits and professional results.
When assembling cabinets, a try square can be used to check the squareness of the cabinet frames, ensuring that they are perfectly aligned before attaching the panels and doors. Additionally, when installing cabinets, a try square can help ensure that they are level and square with the surrounding walls. This is crucial for creating a visually pleasing and functional final product.
5. Carpentry and Joinery
In carpentry and joinery, a try square is a fundamental tool for achieving precise and accurate cuts and joints. Whether you are constructing a wooden staircase, fitting a door frame, or creating intricate joinery, a try square can provide the necessary guidance and verification for achieving quality results.
For example, when cutting and fitting tenons or mortises, a try square can help ensure that the joint components are perfectly perpendicular and square. By checking the squareness of the joint at various stages of the process, you can make any necessary adjustments to achieve a tight and secure fit. Similarly, when constructing wooden frames or structures, a try square can assist in maintaining squareness and straightness, resulting in sturdier and more stable finished products.
6. Masonry and DIY Projects
While the primary application of a try square is in woodworking, its uses extend beyond this realm. The accuracy and versatility of a try square make it a valuable tool for masonry and DIY projects as well. Whether you are laying bricks, tiles, or laminate flooring, a try square can help ensure that your surfaces are square and aligned.
Furthermore, in various DIY projects where precision is required, a try square can be a helpful companion. From building shelves to installing window frames, having a try square on hand allows you to verify angles, alignments, and squareness, resulting in better-finished products and more satisfying DIY experiences.
7. Woodworking Layout and Design
Lastly, a try square plays a crucial role in the initial layout and design stages of woodworking projects. When marking and planning your cuts, a try square allows you to create precise guidelines and reference points. This ensures accurate cuts and helps visualize the final result before any construction begins.
Whether you are creating intricate patterns or simple designs, a try square can assist in transferring measurements, marking angles, and maintaining squareness throughout the layout process. This attention to detail in the initial stages of a project sets the foundation for successful woodworking outcomes.
The Importance of Using a Try Square Properly
Now that we have explored the various uses of a try square in woodworking, it’s essential to understand the significance of using this tool properly. To ensure accurate results and maintain the integrity of your work, follow these essential tips:
1. Choose a High-Quality Try Square
Investing in a high-quality try square is crucial for accurate and reliable results. Look for a try square with a straight blade, securely attached handle, and clear markings. Cheap or poorly constructed try squares can introduce errors and compromise the precision of your work.
2. Maintain Clean and Sharp Edges
Before each use, ensure that the blade of your try square is clean and free from particles or debris that could affect its accuracy. Additionally, periodically check and sharpen the blade to maintain optimal performance. A dull or damaged blade can lead to inaccuracies and compromise the functionality of the try square.
3. Store Properly
When not in use, store your try square in a protective case or dedicated storage area. This helps prevent damage to the blade or handle, ensuring its longevity and accuracy over time.
4. Double-Check with Multiple References
When using a try square to check for squareness or make measurements, it’s always a good idea to double-check your results using multiple reference points. This helps reduce the potential for human error and provides more confidence in the accuracy of your work.
5. Regularly Calibrate Machinery
If you rely on a try square for setting up machinery, such as table saws or drill presses, it’s essential to regularly calibrate and align these tools. Set aside time for routine maintenance and calibration to ensure ongoing accuracy in your woodworking projects.
By following these tips and utilizing a try square correctly in your woodworking endeavors, you can enhance the precision, quality, and overall enjoyment of your woodworking experience. Whether you are a beginner or an experienced craftsman, the try square is a tool that should not be overlooked in your workshop.
Common Woodworking Mistakes That a Try Square Can Help Avoid
While the try square is an incredibly useful tool, it is also important to be aware of common woodworking mistakes that can occur without proper measurement and squareness verification. By understanding these potential pitfalls, you can proactively use a try square to avoid them and achieve better overall results. Here are some common woodworking mistakes that a try square can help you avoid:
1. Crooked Cuts and Joinery
One of the most noticeable and common mistakes in woodworking is crooked cuts or joinery. Whether it’s a skewed miter joint or an unevenly cut board, these errors can significantly compromise the structural integrity and aesthetic appeal of your project. Using a try square to check the squareness and alignment of your workpieces can help you catch and rectify these mistakes before they become more pronounced.
2. Misaligned Assemblies
When constructing furniture or cabinets, misaligned assemblies can be a frustrating setback. Doors may not close properly, drawers may not slide smoothly, and overall stability may be compromised. A try square can aid in ensuring that your assemblies are square and aligned, resulting in seamless fits and solid constructions.
3. Uneven Tabletops and Surfaces
An uneven tabletop or surface can not only be visually displeasing but also affect the functionality of the piece. Using a try square to check the flatness and squareness of your surfaces can help you identify and correct any discrepancies, resulting in a smoother and more level final product.
4. Inaccurate Measurements
Inaccurate measurements are a common pitfall in woodworking projects. Whether it’s a slight deviation in length or an incorrect angle, these errors can accumulate and lead to ill-fitting joints and misaligned components. By utilizing a try square for marking and measuring, you can ensure the accuracy of your dimensions and minimize the margin of error.
5. Unlevel or Unstable Furniture
Wobbly or unlevel furniture is a clear sign of poor craftsmanship. A try square can help you verify the squareness of your joints, ensuring that they are perpendicular and secure. Additionally, by using a try square to check for levelness, you can prevent any potential wobbling or instability in your finished furniture pieces.
Conclusion
A try square is a versatile and indispensable tool in woodworking. Its ability to check for squareness, mark and measure accurately, and aid in machinery setup is invaluable to woodworkers of all skill levels. By using a try square properly and avoiding common woodworking mistakes, you can achieve precise and professional results in your projects. Make sure to invest in a high-quality try square, keep it clean and sharp, and double-check your measurements for optimal accuracy. With the help of a try square, your woodworking journey is bound to be a fulfilling and successful one.
Key Takeaways: What is a try square used for in woodwork?
- In woodwork, a try square is used to check and mark right angles accurately.
- It consists of a long blade or stock and a shorter handle, forming a 90-degree angle.
- A try square is essential for ensuring precise measurements and square corners in woodworking projects.
- Woodworkers use a try square to align and verify the straightness of boards and other components.
- This tool helps maintain accuracy and symmetry in woodworking projects, ensuring they are well-constructed.
Frequently Asked Questions
Welcome to our FAQ section, where we answer some common questions about the use of try squares in woodworking. If you’re new to woodworking or simply curious about this essential tool, you’ve come to the right place. Read on to learn more!
1. How does a try square help in woodworking?
A try square is a versatile tool used in woodworking for several purposes. It is primarily used to ensure accuracy when marking or measuring right angles. With its fixed 90-degree angle, woodworkers can align it against an edge or surface to check if it is perfectly square.
Additionally, the try square can be used to mark straight lines, make precise cuts, and determine the squareness of corners or edges. It’s an indispensable tool for achieving precision and symmetry in various woodworking projects.
2. Can a try square be used for measuring angles other than 90 degrees?
While a try square is primarily designed for measuring and marking right angles, it can still be helpful for other angle measurements. For example, you can use it to create 45-degree angles by aligning the try square’s blade with your workpiece and marking the desired angle.
However, for more acute or obtuse angles, a bevel gauge or protractor would be a more accurate tool. These specialized measuring tools allow for precise angle measurements beyond the capabilities of a traditional try square.
3. What are the different parts of a try square?
A typical try square consists of two main parts: the blade and the stock. The blade is usually made of metal and has a fixed 90-degree angle. It acts as the reference surface when checking squareness or marking right angles.
The stock, on the other hand, is a wooden or plastic handle attached to the blade. It provides stability and allows for a comfortable grip. Some try squares also have additional features, such as a spirit level or a notch for marking or testing 45-degree angles.
4. How do you maintain a try square for accurate measurements?
To maintain the accuracy of your try square, it’s important to keep it clean and free from any debris or buildup. Wipe the blade and stock with a soft cloth after each use to remove any sawdust, dirt, or moisture that may affect its precision.
Additionally, store your try square in a dry place to prevent rust or corrosion. If the blade becomes dull or damaged, you may need to sharpen or replace it. Regular maintenance and care will ensure that your try square remains a reliable tool for accurate measurements in your woodworking projects.
5. Can a try square be used by beginners?
Absolutely! A try square is an excellent tool for beginners in woodworking. Its simplicity and versatility make it easy to understand and use. Whether you’re measuring right angles, marking straight lines, or checking the squareness of corners, a try square can be your trusted companion in various woodworking projects.
By mastering the use of a try square, beginners can develop a sense of precision and accuracy in their woodworking skills. It’s a fundamental tool that lays the foundation for more complex woodworking techniques and ensures the quality of your finished projects.
Summary
A try square is a handy tool used in woodwork to measure and mark right angles. It has a long, straight edge called a blade and a shorter, perpendicular edge called a stock. When working on projects like building furniture or fitting corners, a try square can help ensure everything is straight and level. It’s great for making precise cuts and checking if something is square, helping woodworkers create accurate and professional-looking pieces. So, if you’re interested in woodworking, a try square is definitely a tool worth having in your toolbox!