
Do you ever wonder why your drill bits keep stripping? It can be frustrating when you’re in the middle of a project and your drill bits just won’t cooperate. But fear not, because I’m here to shed some light on this common problem and help you find a solution.
You’re not alone in facing this issue. Many DIY enthusiasts and professionals alike have encountered the same dilemma. So, let’s dive into the reasons behind this pesky problem and explore some practical tips to prevent it from happening again.
In this article, we’ll explore the reasons behind drill bits stripping, from using the wrong speed or pressure to dull or low-quality drill bits. By understanding the root causes, you’ll be better equipped to tackle this issue and elevate your drilling game. So, let’s get started and put an end to those stripped drill bits once and for all!
Are your drill bits constantly stripping? There are several reasons why this may be happening. One possible cause is using the wrong type of drill bit for the material you’re working with. Another reason could be applying too much pressure or drilling at the wrong angle. Additionally, your drill bits may be dull or worn out. To prevent stripping, make sure to choose the appropriate drill bit, use the correct technique, and regularly inspect and replace worn-out bits for optimal performance.

Why Do My Drill Bits Keep Stripping? Understanding the Common Issue
Drilling is an essential task for many DIY enthusiasts and professionals alike. However, it can be frustrating when your drill bits keep stripping. This article will delve into the reasons behind this common issue, explore the potential solutions, and provide you with tips to prevent your drill bits from stripping in the future.
The Importance of Using the Right Drill Bit
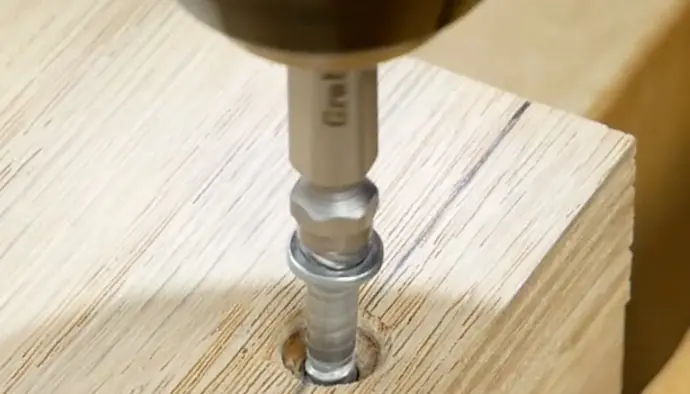
One of the main reasons why your drill bits may be stripping is because you are not using the right type of bit for the material you are drilling into. Different materials require different drill bit types, such as wood drill bits for woodworking projects, masonry drill bits for concrete and brick, and metal drill bits for metal surfaces. Using the wrong type of drill bit can cause excessive heat and friction, leading to the stripping of the bit.
Another aspect to consider is the quality of the drill bit. Cheaper, low-quality drill bits are more susceptible to stripping due to their inferior construction and materials. Investing in high-quality drill bits made from durable materials, such as cobalt or carbide, can significantly reduce the likelihood of stripping.
Furthermore, the size of the drill bit also plays a crucial role. Using a drill bit that is too small for the job can cause the bit to slip and strip. Conversely, using a drill bit that is too large can put excessive pressure on the bit, leading to stripping. Therefore, it is important to select the appropriate size of drill bit for the task at hand.
Improper Drill Technique: The Culprit Behind Stripped Bits
While the selection of the right drill bit is essential, improper drilling techniques can also contribute to a stripped bit. Applying excessive pressure while drilling can cause the bit to overheat and lose its gripping power, resulting in stripping. It is important to allow the drill to do the work and avoid putting unnecessary force on the bit.
Additionally, drilling at high speeds can generate excessive heat, leading to bit stripping. The use of a lower speed setting can help prevent overheating and prolong the life of your drill bits. Consulting the manufacturer’s guidelines for the recommended drilling speed for different materials can also be helpful.
Inadequate bit maintenance and care can also contribute to stripping. Dull or damaged bits are more likely to slip and strip. Regularly inspecting your drill bits for signs of wear and tear and replacing them as needed can prevent this issue. Properly storing your drill bits in a protective case and avoiding exposure to moisture can also prolong their lifespan and prevent stripping.
Key Factors to Prevent Drill Bit Stripping
Prevention is always better than a cure when it comes to drill bit stripping. Here are some key factors to consider to prevent this issue:
- Use the appropriate drill bit for the material you are drilling into.
- Invest in high-quality drill bits made from durable materials.
- Select the correct size of drill bit for the task.
- Apply consistent, moderate pressure while drilling.
- Use the recommended drilling speed for the specific material.
- Maintain and care for your drill bits properly.
- Regularly inspect your drill bits for signs of wear and tear.
Common Mistakes That Lead to Stripped Drill Bits
In addition to the reasons discussed above, there are several common mistakes that DIY enthusiasts and professionals make, which often result in the stripping of drill bits:
Mistake 1: Using the Wrong Speed Setting
Using the wrong speed setting on your drill can generate excessive heat and friction, causing the bit to strip. It is important to adjust the drilling speed based on the material, with higher speed settings for softer materials and lower speed settings for harder materials.
Solution: Consult the manufacturer’s guidelines for the recommended speed settings for different materials, and adjust your drill accordingly to prevent bit stripping.
Mistake 2: Not Using Proper Lubrication
Failure to use proper lubrication while drilling can increase friction and heat, leading to stripped bits. Lubricants, such as cutting oil or lubricating wax, can help reduce heat and prolong the life of your drill bits.
Solution: Apply a suitable lubricant to the drill bit before drilling, especially when working with metal or dense materials.
Mistake 3: Overloading the Drill
Overloading the drill with excessive force or torque can put undue stress on the drill bit, causing it to strip. This often occurs when drilling at an angle or when maneuvering the drill in tight spaces.
Solution: Use controlled and steady pressure while drilling, avoiding excessive force or torque. If drilling at an angle, ensure that the bit is properly aligned to prevent stripping.
Mistake 4: Ignoring the Drill Bit’s Wear and Tear
Continuing to use a drill bit that shows signs of wear and tear, such as chipped edges or dullness, increases the likelihood of stripping. Damaged bits have reduced gripping power, making them more prone to slipping and stripping.
Solution: Regularly inspect your drill bits for any signs of wear and tear. Replace damaged or worn-out bits promptly to prevent stripping and ensure optimal drilling performance.
Key Takeaways: Why Do My Drill Bits Keep Stripping?
- 1. Check the drill bit material – using low-quality or worn-out bits can cause stripping.
- 2. Apply appropriate drilling pressure – too much force can strip the bit, while too little force can cause overheating.
- 3. Use the correct drill bit size – using the wrong size can lead to stripping and damage to the drill or the material being drilled.
- 4. Avoid excessive speed – drilling at high speeds can cause the bit to heat up and wear down faster.
- 5. Keep the drill bits clean and well-maintained – dirt and debris can affect the performance and lifespan of the bits.
Frequently Asked Questions
Do you find that your drill bits keep stripping? Don’t worry, you’re not alone. Here are some common questions and answers to help you understand why this happens and how to prevent it in the future.
1. Why do my drill bits keep stripping?
The main reason why drill bits keep stripping is due to excessive heat and friction generated during drilling. When the bit becomes too hot, it can soften the metal and cause it to strip or wear out. Additionally, using the incorrect drill bit for the material being drilled can also result in stripping. It’s important to choose the right bit for the job to avoid this issue.
To prevent stripping, make sure to apply consistent pressure and use a low drilling speed. It’s also crucial to keep the bit cool by regularly applying cutting oil or coolant. Furthermore, using sharp and high-quality drill bits can significantly reduce the chances of stripping, so invest in good tools that will last.
2. Are there any mistakes I might be making when drilling that causes the bits to strip?
A common mistake that can lead to stripped drill bits is applying too much pressure while drilling. When you forcefully push down on the drill, it creates additional friction and heat, causing the bit to wear down quickly. Remember, drilling should be a controlled process that doesn’t require excessive force.
Another mistake is not using the correct drill bit for the material you’re working with. Different materials, such as wood and metal, require different types of drill bits. Using the wrong bit can cause it to overheat or become dull, resulting in stripping. Always check the manufacturer’s guidelines to ensure you’re using the right bit for the job.
3. Can a dull drill bit cause stripping?
Absolutely! Dull drill bits are more prone to stripping. When the cutting edges of the bit are worn or dull, they can’t effectively penetrate the material, leading to increased friction and heat. This can cause the bit to wear out quickly or even break.
To avoid stripping due to a dull drill bit, it’s important to regularly check and sharpen your bits. Use a bit sharpener or replace them if they’ve become too worn. Also, consider investing in high-quality drill bits that stay sharp for longer periods of time.
4. How can I prevent my drill bits from overheating and stripping?
To prevent your drill bits from overheating and stripping, there are a few key steps you can take. First, make sure to apply cutting oil or coolant to the drilling area. This helps to keep the bit cool and reduce friction during the drilling process.
Additionally, using a low drilling speed and applying consistent pressure will help control the temperature and prevent overheating. Take breaks during drilling to allow the bit to cool down if necessary. Lastly, ensuring you’re using the correct drill bit for the material being drilled will also contribute to preventing overheating and stripping.
5. What are some signs that my drill bit is beginning to strip?
There are a few signs that indicate your drill bit may be starting to strip. One common sign is a decrease in drilling efficiency. If the bit is struggling to penetrate the material or the drilling process becomes slower and more difficult, it’s likely that the bit is stripping.
Another sign is the appearance of metal shavings or flakes around the drill site. This indicates that the bit is wearing down and the metal is being stripped away. Lastly, if you notice any visible damage or wear on the drill bit itself, such as rounded edges or chipped tips, it’s time to replace the bit to prevent further stripping.
Summary
Your drill bits might be stripping because you’re applying too much pressure or using the wrong speed. To prevent this, make sure to use the correct drill bit for the material you’re working on and let the drill do the work without exerting too much force.
Additionally, dull or damaged drill bits can also cause stripping. Regularly check your drill bits and replace any that are worn out or damaged. Remember to use the correct size drill bit for your project to avoid stripping and ensure optimal performance.