
Have you ever wondered if you can use an orbital sander on drywall? Well, you’ve come to the right place! In this article, we’ll explore the possibilities and considerations when it comes to using this handy tool for your drywall projects.
Now, you might be thinking, “Why would I want to use an orbital sander on drywall?” Well, it can be a great option for smoothing out rough surfaces, removing imperfections, or even preparing your walls for painting or wallpapering. But before you dive in, let’s dig into the details and find out if an orbital sander is the right tool for the job.
When it comes to using an orbital sander on drywall, there are a few things you should keep in mind. From the type of sander to the grit of sandpaper, we’ll cover all the essential factors to ensure a successful outcome. So, let’s get started and uncover the truth about using an orbital sander on drywall!
An orbital sander is not recommended for drywall as it can be too aggressive and cause damage. Instead, it is best to use a drywall sander or a sanding block specifically designed for drywall surfaces. These tools are equipped with features that allow for smoother and more precise sanding, ensuring a professional finish. So, while an orbital sander is great for other projects, it’s important to choose the right tool for the job when it comes to drywall.

Can You Use an Orbital Sander on Drywall? Exploring the Possibilities
Can you use an orbital sander on drywall? This is a common question among DIY enthusiasts and homeowners looking to tackle their own home improvement projects. In this article, we will delve into the topic and provide you with all the information you need to know about using an orbital sander on drywall. From the benefits to the techniques and tips, we’ve got you covered.
The Basics of an Orbital Sander
An orbital sander is a versatile power tool that is commonly used for sanding wood surfaces. It works by delivering a random orbital motion that allows for a smooth finish without leaving noticeable swirl marks. The machine is equipped with a sanding pad that oscillates in both a circular and random motion, resulting in an efficient and balanced sanding process. While the primary use of an orbital sander is for working with wood, many people wonder if it can also be used on other surfaces such as drywall.
Using an Orbital Sander on Drywall: Pros and Cons
So, can you use an orbital sander on drywall? The answer is yes, but it comes with both pros and cons. Let’s start with the benefits. Firstly, an orbital sander can efficiently remove imperfections on drywall, such as bumps, ridges, or uneven patches. It can also sand drywall mud, joint compound, or spackle, allowing for a smoother and more even finish. Additionally, an orbital sander is relatively easy to control and maneuver, making it suitable for both beginners and experienced DIYers.
However, there are some considerations to keep in mind when using an orbital sander on drywall. The main drawback is the potential for creating dust and mess. Drywall sanding produces a significant amount of fine dust particles that can quickly spread throughout the room. To mitigate this, it’s crucial to take proper precautions such as wearing a dust mask, using a shop vacuum or dust extraction system, and sealing off the work area with plastic sheets. Another important point to note is that an orbital sander can be aggressive on drywall surfaces, especially if a coarse grit sandpaper is used. Careful sanding and a gentle touch are essential to avoid damaging the drywall.
Techniques and Tips for Using an Orbital Sander on Drywall
Now that we’ve established that an orbital sander can be used on drywall, let’s explore some techniques and tips to ensure a successful sanding experience. Firstly, it’s advisable to start with a lower grit sandpaper, such as 80 or 100, to remove any high spots or significant imperfections. As you progress, switch to a finer grit sandpaper, such as 120 or 150, to achieve a smoother finish.
Remember to move the orbital sander slowly and evenly across the drywall surface. Avoid applying excessive pressure, as this can cause gouging or uneven sanding. It’s recommended to use a gentle touch and let the sander do the work. To minimize dust generation, periodically clean or replace the sandpaper, as clogged sandpaper can lead to ineffective sanding and increased dust production.
Lastly, after sanding the drywall, it’s essential to clean the area thoroughly to remove any residual dust. Wipe down the walls with a damp cloth or sponge, ensuring that all dust particles are removed before proceeding with any painting or further finishing.
The Benefits of Using an Orbital Sander on Drywall
Using an orbital sander on drywall offers several benefits, making it a viable option for tackling home improvement projects. Here are some key advantages:
1. Efficient and smooth sanding: An orbital sander’s random orbital motion ensures a smooth and even sanding finish, effectively removing imperfections and creating a polished surface.
2. Versatility: While primarily designed for wood surfaces, an orbital sander can also be used on drywall, making it a versatile tool that can be applied to multiple materials.
3. Time-saving: An orbital sander allows for faster sanding compared to manual methods, enabling you to complete your project more efficiently.
4. Ease of use: With its ergonomic design and user-friendly features, an orbital sander is relatively easy to operate, making it suitable for both beginners and experienced DIYers.
5. Cost-effective: Investing in an orbital sander can save you money in the long run, as it allows you to handle sanding tasks yourself without the need to hire professionals.
Tips for Using an Orbital Sander on Drywall
To make the most out of using an orbital sander on drywall, here are some useful tips to keep in mind:
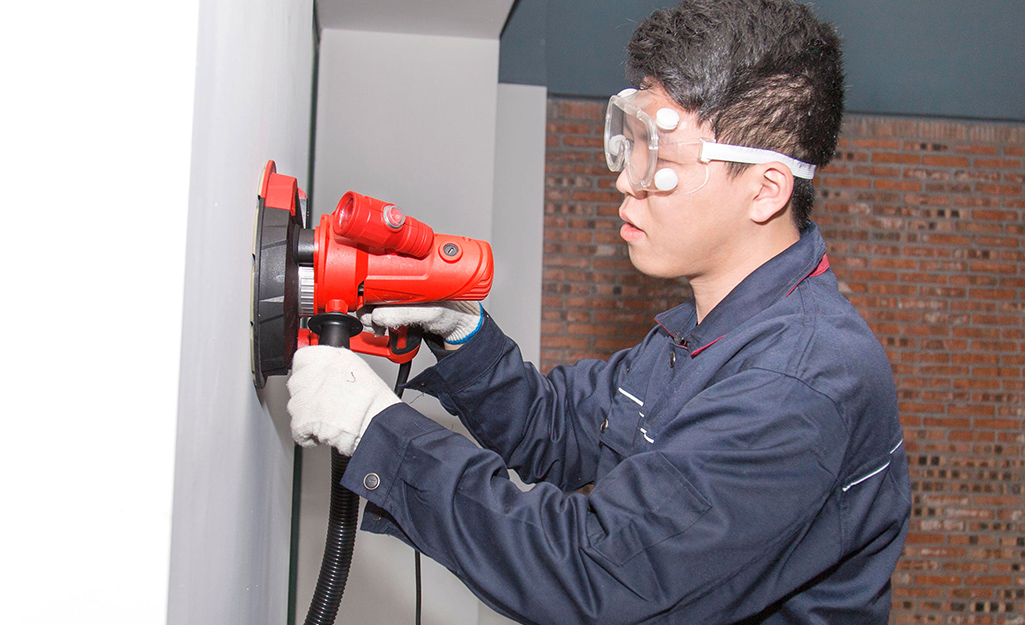
1. Safety first: Always wear protective gear such as safety glasses and a dust mask to shield yourself from airborne particles generated during sanding.
2. Preparing the work area: Before starting, ensure that the work area is well-ventilated, and cover nearby furniture or objects to protect them from dust accumulation.
3. Test on a hidden area: If you’re unsure how your orbital sander will behave on a particular area of drywall, test it on a small, inconspicuous spot first to avoid any potential damage.
4. Use the right sandpaper grit: Start with a coarser grit sandpaper to tackle any significant imperfections, then gradually switch to finer grits for a smoother finish.
5. Clean as you go: Regularly clean the sandpaper or replace it when it becomes clogged to maintain optimal sanding performance and reduce dust production.
6. Proper disposal of dust: Collect the dust generated during sanding in a dust bag or disposable bag attached to your orbital sander. Dispose of it properly according to local regulations.
With these tips in mind, you can confidently use an orbital sander on drywall and achieve professional-looking results in your home improvement projects. Happy sanding!
In conclusion, an orbital sander can indeed be used on drywall. It offers an efficient and effective way to smooth out imperfections and achieve a polished finish. However, it’s important to approach the task with caution and take necessary safety measures to minimize dust generation and potential damage to the drywall itself. By following the recommended techniques and tips, you can confidently use an orbital sander on drywall and achieve professional-quality results in your home improvement endeavors.
Key Takeaways: Can You Use an Orbital Sander on Drywall?
– Yes, an orbital sander can be used on drywall to smoothen and prepare it for painting or wallpapering.
– Make sure to use a fine-grit sandpaper (120-220) and sand lightly to avoid damaging the drywall surface.
– Be cautious when sanding near electrical outlets or switches to avoid any potential hazards.
– Dust created while sanding drywall can be harmful, so wear a mask and protective eyewear.
– After sanding, wipe off the dust with a damp cloth and ensure the surface is clean before proceeding with the next step.
Frequently Asked Questions
Welcome to our Frequently Asked Questions section where we provide answers to commonly asked questions about using an orbital sander on drywall. Whether you’re a DIY enthusiast or a professional, this guide will help you understand the do’s and don’ts of using an orbital sander on your drywall.
1. How do I prepare my drywall before using an orbital sander?
Before using an orbital sander on your drywall, it’s important to prepare the surface properly. Start by removing any loose paint or debris using a scraper or sandpaper. Next, fill in any cracks or holes with a high-quality spackling compound and let it dry completely. Once dry, lightly sand the patched areas with a sanding sponge to create a smooth surface. Finally, wipe down the entire wall with a damp cloth to remove any dust or residue.
By following these preparation steps, you’ll ensure that your drywall is in the best condition for sanding, allowing the orbital sander to work efficiently and effectively.
2. Can I use an orbital sander with any grit sandpaper on drywall?
No, it is not recommended to use just any grit sandpaper with an orbital sander on drywall. For drywall surfaces, it’s best to use fine-grit sandpaper with a grit size between 120 and 220. Using a coarser grit can be too aggressive and may cause damage to the drywall, resulting in uneven surfaces or even holes. Fine-grit sandpaper helps to smooth out imperfections and create a seamless finish.
Additionally, it’s important to regularly check the sandpaper for wear and tear. If the sandpaper becomes clogged or worn, replace it to maintain optimal performance. Following these guidelines will allow you to achieve the desired results without compromising the integrity of your drywall.
3. Should I use an orbital sander on new drywall?
Yes, an orbital sander can be used on new drywall to achieve a smooth and polished finish. However, it’s essential to take certain precautions. Before sanding new drywall, make sure it has been properly primed and painted. This will protect the drywall and allow for easier sanding.
When sanding new drywall, start with a lighter grit sandpaper, such as 120 or 150. This will help smooth out any minor imperfections without removing too much material. Gradually increase the grit size as needed to achieve the desired finish. Remember to always sand in a circular or back-and-forth motion, moving the sander evenly across the entire surface to avoid creating uneven spots.
4. Can an orbital sander be used to remove texture from drywall?
While an orbital sander can be used to remove texture from drywall, it may not always be the most efficient method. Removing texture from drywall can be a time-consuming task, especially if the texture is thick or heavily applied. In such cases, it may be more effective to use other methods, such as scraping or sanding with a specialized texture removal tool.
If you choose to use an orbital sander, be prepared for a longer sanding process and monitor the condition of the sandpaper closely. The textured surface can clog the sandpaper quicker, requiring more frequent changes. Additionally, be cautious not to apply excessive pressure, as this could damage the drywall. Consider starting with a small inconspicuous area to determine the effectiveness and feasibility of using an orbital sander for texture removal.
5. What safety precautions should I take when using an orbital sander on drywall?
When using an orbital sander on drywall, it’s important to prioritize safety. Start by wearing appropriate protective gear, including safety glasses and a dust mask, to shield your eyes and lungs from dust particles. Ensure that the work area is well-ventilated to prevent the accumulation of dust.
Always keep the sander moving to avoid creating deep grooves or uneven spots on the drywall. Apply a light touch and allow the sander to do the work. Remember to unplug the sander when not in use and during sandpaper changes. If using a cordless sander, remove the battery after each use. Following these safety precautions will help you have a safe and successful sanding experience.
Summary
So, can you use an orbital sander on drywall? The answer is yes, but with caution. While it can be used to smooth out rough surfaces and prepare for painting, it’s important to be gentle to avoid damaging the delicate drywall. Always start with a lower grit sandpaper and gradually work your way up to a higher grit for a smoother finish. Remember to use light pressure and keep the sander moving to avoid creating grooves or gouges in the drywall.
It’s also worth noting that an orbital sander may not be the best tool for every drywall job. For smaller repairs and touch-ups, sanding by hand may be more precise. And when it comes to removing texture or major imperfections, it’s always a good idea to consult a professional or consider other methods, like using a drywall sander or hiring a contractor. With the right approach and a little practice, an orbital sander can be a helpful tool in your drywall finishing process.