Have you ever wondered how high you should set the blades on your planer? Well, wonder no more! In this article, we’ll dive into the nitty-gritty of planer blade height, giving you all the information you need to achieve perfect results. Whether you’re a seasoned woodworker or just starting out, understanding the optimal blade height is crucial for smooth and precise planing.
When it comes to planer blades, finding the right height is like finding the sweet spot on a guitar string. Too low, and you risk rough finishes and tear-outs. Too high, and you’ll put unnecessary strain on your planer’s motor while compromising the quality of your work. So, what’s the magic number? Tune in as we unravel the mystery and guide you through the process of setting your planer blades just right.
Properly setting the height of your planer blades can make all the difference in creating professional-looking projects. Whether your planer is electric or manually operated, understanding the ins and outs of blade height will help you achieve the best results possible. So grab your tool belt and get ready to embark on a journey to planer blade perfection. Let’s dive right in!
Setting the planer blade height is crucial for achieving smooth and precise cuts. Here’s a step-by-step guide to help you get it right:
- Start by disconnecting the power and securing the planer.
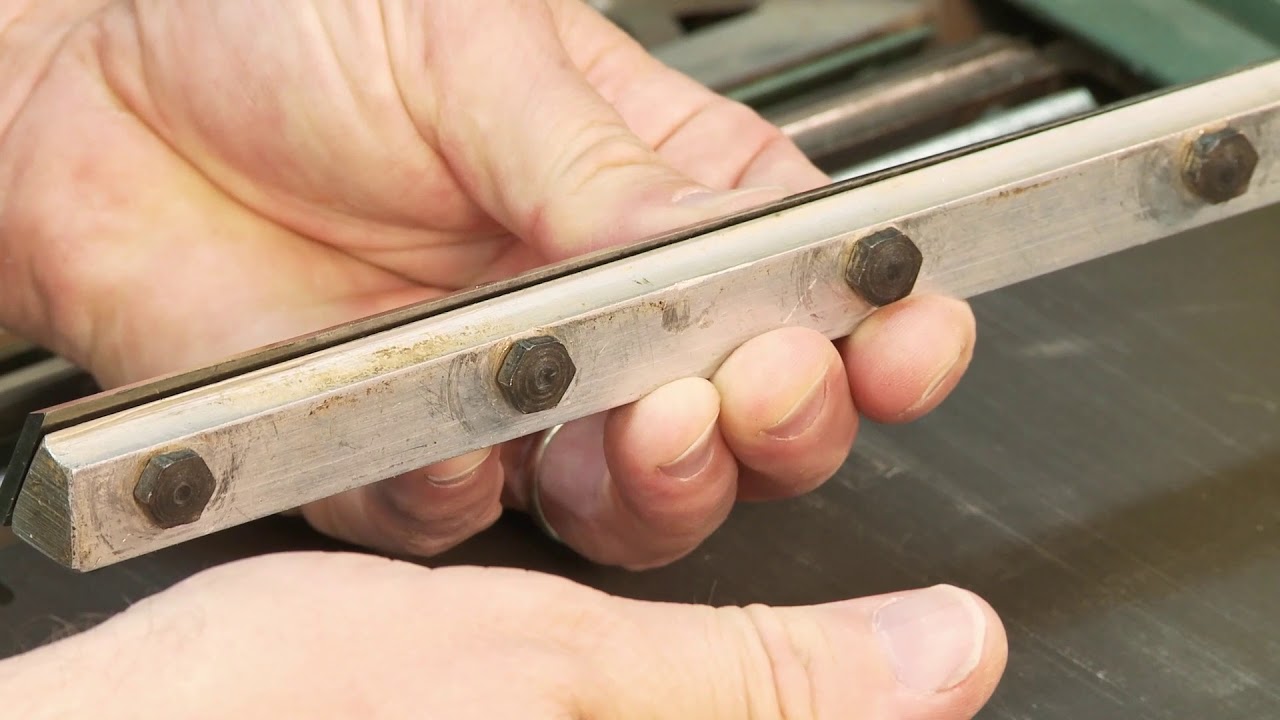
- Use a depth gauge to measure the current blade height.
- Rotate the blades so they are parallel to the planer bed.
- Adjust the blade height by turning the adjustment screws.
- Recheck the blade height and make any necessary adjustments.
Remember, proper blade height ensures excellent results and helps extend the life of your planer blades!

How High Should Planer Blades Be Set? A Comprehensive Guide
Welcome to our comprehensive guide on how high planer blades should be set. If you’re a woodworking enthusiast or a professional carpenter, you know how crucial it is to get the blade height just right for a smooth and accurate cutting experience. In this article, we’ll take a deep dive into the factors that determine blade height, the benefits of proper blade setting, and some handy tips to help you achieve the perfect cut every time.
The Importance of Blade Height in Planers
Before we delve into the ideal blade height, let’s first understand why it is so important in planers. The blade height determines the depth of the cut, and getting it right can make a world of difference in the outcome of your woodworking project. If the blades are set too low, they won’t remove enough material, resulting in an uneven surface. Conversely, if the blades are set too high, they can cause tear-out and damage the wood. Achieving the optimal blade height ensures smooth, clean cuts and minimizes the need for further sanding or finishing.
The Factors that Determine Blade Height
The ideal blade height for your planer depends on several factors that you need to consider before making any adjustments. Here are the main factors that determine the proper blade height:
- Wood Species: Different wood species have different densities and characteristics. Hardwoods like oak or maple require a slightly higher blade height compared to softwoods like pine or cedar, which are more forgiving.
- Material Thickness: Thicker boards generally require a higher blade setting to ensure an adequate depth of cut. For thinner materials, a lower blade height is sufficient.
- Desired Surface Finish: If you’re going for a smooth, flawless finish, setting the blades slightly lower can help achieve that. However, if you’re aiming for a rougher, textured surface, a higher blade height may be desirable.
- Blade Sharpness: Dull blades tend to tear and cause rough cuts, even if the blade height is accurately set. Make sure your blades are sharp to ensure the best results.
- Feed Rate: The speed at which you feed the material through the planer can affect the blade height. Faster feed rates may require higher blade settings to maintain consistent cutting depth.
By considering these factors, you can determine the optimal blade height that suits your specific woodworking needs and achieve the desired results.
Benefits of Proper Blade Setting
Properly setting the blades in your planer offers several benefits that ultimately enhance your woodworking experience. Here are some key benefits:
- Smooth and Accurate Cuts: When the blades are set at the right height, you’ll achieve clean, tear-free cuts, resulting in a seamless finish.
- Improved Efficiency: With the blades set correctly, you can remove the desired amount of material in one pass, reducing the need for multiple passes and saving time.
- Reduced Sanding and Finishing: A planer with properly set blades can minimize the need for excessive sanding or finishing, saving you time and effort.
- Extended Blade Life: Setting the blades at the correct height prevents premature wear and tear, ensuring the longevity of your planer blades.
- Enhanced Safety: Accurately set blades reduce the likelihood of kickbacks and other accidents, keeping you safe in the workshop.
Now that you understand the importance and benefits of proper blade height, let’s move on to some essential tips to help you achieve the perfect setting.
Tips for Setting Planer Blades at the Ideal Height
Setting planer blades may seem like a daunting task, but with the right approach and some handy tips, you can master it in no time. Here are some tips to help you achieve the ideal blade height:
1. Consult the Planer’s Manual
If you’re new to using a planer or have recently acquired a new model, it’s essential to consult the manufacturer’s manual. The manual typically provides specific instructions on how to set the blades at the appropriate height for optimal performance.
2. Use a Blade Height Gauge
A blade height gauge is a handy tool that allows you to measure the exact height of your planer blades. It ensures accuracy and consistency in your blade setting, resulting in better cuts. Make sure to choose a gauge that is compatible with your planer model.
3. Start with a Test Piece
Before working on your actual project, it’s a good idea to start with a test piece of wood. Make multiple passes with varying blade heights and examine the results to identify the blade height that produces the desired outcome. This allows you to make adjustments without compromising your project.
4. Take Small Increments
When adjusting the blade height, always make small, incremental changes. This allows you to fine-tune the height and avoid making drastic adjustments that could lead to mistakes or damage the wood.
5. Check for Evenness
Once you’ve set the blade height, run a few boards through the planer and inspect the results. Look for even cuts across the entire width of the board. If you notice any discrepancies or unevenness, make minor adjustments to correct the blade height.
6. Maintain Sharp Blades
Blade sharpness is crucial for achieving clean cuts, regardless of the blade height. Regularly inspect your planer blades for dullness and sharpen or replace them as needed. Sharp blades ensure optimal performance and minimize the risk of tear-outs and rough cuts.
By following these tips, you’ll be able to set your planer blades at the ideal height and achieve professional-level results in your woodworking projects.
Common Mistakes to Avoid
While setting planer blades, it’s important to avoid certain common mistakes that can jeopardize your cutting accuracy and surface finish. Here are some mistakes to watch out for:
1. Setting the Blades Too High
Setting the blades too high can result in tear-outs, rough cuts, and even damage to the wood. Avoid this mistake by double-checking the height using a blade height gauge and making small, incremental adjustments.
2. Setting the Blades Too Low
On the other hand, setting the blades too low will not remove enough material, leaving you with an uneven surface. Always ensure that the blades are at an appropriate height to achieve the desired depth of cut.
3. Neglecting Blade Sharpness
Even with the correct blade height, if your blades are dull, you’ll end up with unsatisfactory results. Regularly maintain and sharpen your blades to ensure optimal cutting performance.
Conclusion
Setting the height of planer blades correctly is crucial for achieving smooth, accurate cuts and ensuring the best results in your woodworking projects. Take the time to consider the factors that influence blade height, follow the tips provided, and avoid common mistakes. With practice, you’ll become proficient at setting your planer blades at the ideal height and enjoy an enhanced woodworking experience.
Key Takeaways: How High Should Planer Blades be Set?
- 1. Planer blades should be set just barely above the highest point of the wood being planed.
- 2. Setting the blades too high can result in tear-out and rough surfaces.
- 3. It’s important to make sure the blades are parallel to the planer bed for even cutting.
- 4. Taking light passes and adjusting as needed will help achieve the desired smoothness.
- 5. Safety should always be a top priority when working with planer blades to avoid accidents.
Frequently Asked Questions
Here are some commonly asked questions regarding the optimal height for setting planer blades:
1. What factors should I consider when setting the height of planer blades?
When setting the height of your planer blades, there are a few factors to consider. First, you need to think about the type of wood you’ll be planing. Different woods have different densities and hardness, which can affect the ideal blade height. Additionally, the depth of cut you desire and the finish you want to achieve will also impact the blade height. Finally, it’s important to take into account the condition of the blades and the planer itself, as well as any specific manufacturer recommendations.
By considering these factors and adjusting the blade height accordingly, you can achieve the best results for your planing project.
2. How can I determine the appropriate height for my planer blades?
One way to determine the appropriate height for your planer blades is through trial and error. Begin by setting the blades at a medium height and planing a small section of wood. Evaluate the results and make adjustments as needed to achieve the desired outcome. Gradually increase or decrease the blade height until you find the optimal setting for the specific wood and finish you want.
Another helpful technique is to consult the manual or guidelines provided by the planer manufacturer. These resources often offer recommendations on blade height based on the model and intended use. Following these guidelines can provide a good starting point for finding the right blade height.
3. What happens if planer blades are set too high?
If planer blades are set too high, several potential issues may arise. One problem is tear-out, which is when the wood fibers are lifted or torn during the planing process, leaving a rough finish. This is especially common in figured or highly grained wood. Another issue is an excessive amount of material being removed, which can lead to an uneven or inconsistent surface. It can also cause the wood to become too thin, compromising its structural integrity.
Setting blades too high can also put unnecessary strain on the planer motor and increase the risk of kickback or other accidents. It’s important to find the right balance and set the blades at an appropriate height to achieve optimal results without causing damage.
4. What are the consequences of setting planer blades too low?
If planer blades are set too low, you may encounter some challenges and undesirable outcomes. One common issue is reduced cutting efficiency, as the blades may not be able to effectively remove the desired amount of material. This can result in a slower planing process or the need for multiple passes over the wood to achieve the desired outcome.
Additionally, blades set too low can lead to excessive friction and heat buildup, potentially damaging the blades and the wood being planed. This friction can also cause the planer motor to work harder than necessary, leading to premature wear and reduced performance. It’s important to ensure the blades are set at an appropriate height to avoid these consequences.
5. Can I use a specific measurement to determine the ideal height for planer blades?
While there is no specific measurement that universally guarantees the ideal height for planer blades, there are some general guidelines that can help. One commonly used rule of thumb is to set the blades just below the surface of the wood, allowing for a small amount of material to be removed with each pass. This generally results in a smoother finish while minimizing the risk of tear-out.
However, it’s important to note that the optimal blade height can vary depending on the specific wood, the desired finish, and other factors mentioned earlier. Experimentation and adjustments based on the specific project are often necessary to find the perfect blade height for a particular planing job.

Summary
So, here’s what you need to know about setting the height of planer blades:
First, make sure the blades are set just above the surface of the wood. This will give you a smooth cut and prevent any tear-out.
Second, check the owner’s manual for your specific planer model. The manufacturer’s instructions will give you the most accurate guidance.
Lastly, always remember to adjust the blades when they start to dull. Sharp blades ensure better performance and reduce the risk of accidents. Keep these tips in mind, and happy planing!